
Blog
What is flooring compatibility: a homeowner’s guide

May
TL;DR:
- Mixing flooring types requires careful attention to installation compatibility, especially moisture levels and movement allowances. Proper testing, matching adhesives, and selecting durable trims—preferably solid brass—are essential for long-lasting results. Planning transitions before installation and avoiding shortcuts can prevent costly failures and ensure a professional finish.
When you decide to mix flooring types across your home, what is flooring compatibility suddenly becomes one of the most important questions you can ask. The industry term for this concept is installation compatibility, and it covers everything from how your subfloor’s moisture level affects adhesive performance, to whether your transition trims will allow your floating floor to expand without buckling. Get it wrong, and you are looking at lifted planks, failed adhesive bonds, and tripping hazards within months. Get it right, and your renovation lasts for decades.
Table of Contents
- Key takeaways
- What is flooring compatibility and why it matters
- Moisture, adhesives, and your subfloor
- Transition trims and flooring movement
- Planning a mixed flooring installation
- Common compatibility mistakes to avoid
- My honest take on getting compatibility right
- Premium trims for lasting flooring transitions
- Common questions
Key takeaways
| Point | Details |
|---|---|
| Moisture drives compatibility | Internal subfloor moisture, not surface dryness, determines which flooring and adhesives can be safely installed. |
| Use the most demanding floor as your baseline | In mixed installations, let the most moisture-sensitive flooring type set the standard for your whole project. |
| Transitions must allow movement | Floating floors need transition hardware that leaves planks free to expand, or edge failure will follow. |
| Cheap trims cause long-term damage | Plastic, rubber, and aluminium trims warp, dent, and split. Solid brass trims hold their finish and form for years. |
| Plan before you purchase | Check manufacturer requirements for every flooring product before buying adhesives, underlays, or transition trims. |
What is flooring compatibility and why it matters
Flooring compatibility, at its most practical level, is the degree to which a flooring material, its adhesive, its underlay, and the subfloor beneath it can coexist without causing failure. It also extends upward to the point where two different floor types meet, making transition trim selection a genuine compatibility decision rather than a purely cosmetic one.
Most homeowners think about flooring compatibility only in aesthetic terms. Can laminate sit next to wood-effect vinyl without looking odd? That question matters, but it is secondary. The real questions are structural. Will your concrete subfloor’s moisture content destroy the adhesive bond you are relying on? Will your floating laminate have enough room to expand at the doorway where it meets ceramic tile? These are the questions a solid flooring compatibility guide addresses from the outset.

The consequences of ignoring installation compatibility are rarely dramatic on day one. They show up six months later as bubbling vinyl, lifting laminate edges, or a trim strip that has started to pull away from the floor. By that point, the remediation cost often exceeds the original installation.
Moisture, adhesives, and your subfloor
The single biggest threat to flooring material compatibility is moisture trapped in or moving through your subfloor. This is where many DIY installations fail, because a floor that looks and feels dry can still carry enough internal moisture to destroy an adhesive bond over time.
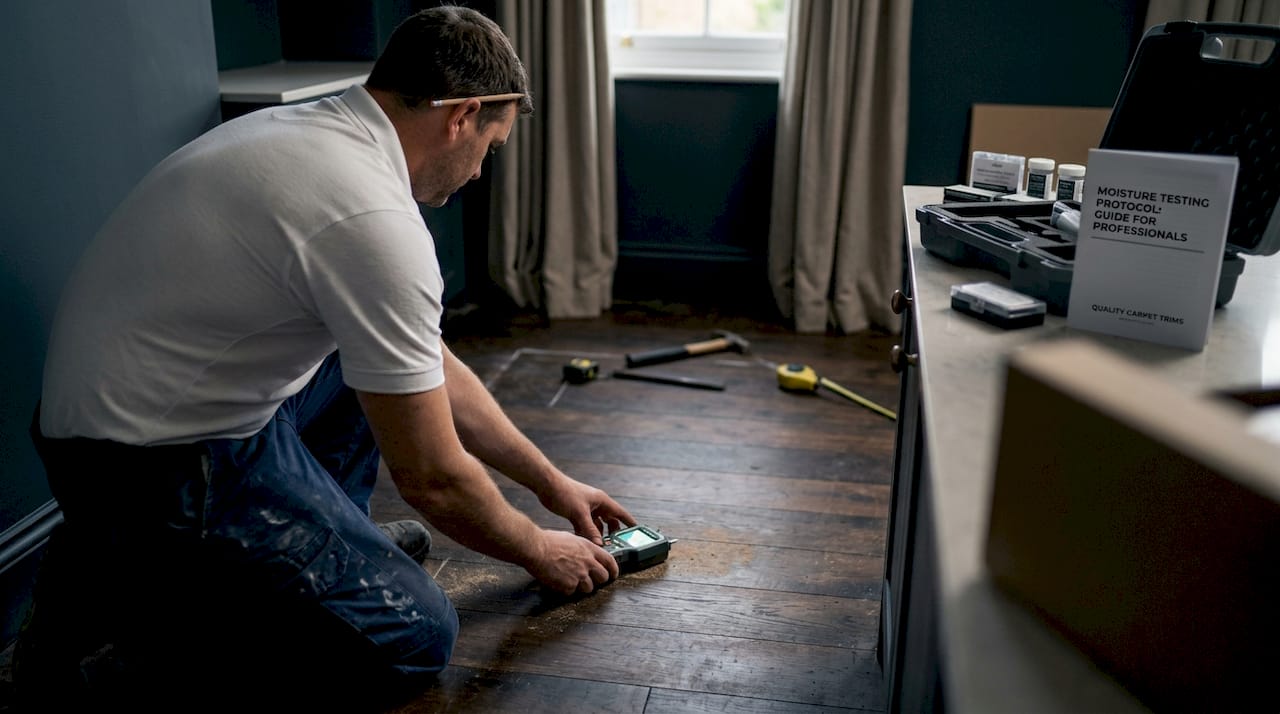
The two industry-standard tests used to measure this are ASTM F2170 and ASTM F1869. The F2170 method involves drilling holes and placing humidity sensors at approximately 40% of the slab’s depth. F2170 measures internal RH for long-term prediction rather than surface conditions, which is why surface dryness alone is a genuinely unreliable indicator of whether a floor is ready for installation.
Different flooring types tolerate different moisture thresholds. Here is a practical overview:
| Flooring type | Moisture sensitivity | Key consideration |
|---|---|---|
| Solid hardwood | Very high | Requires subfloor RH well below 75% and acclimatisation |
| Engineered wood | High | Slightly more tolerant but still needs moisture mitigation |
| Glue-down LVT/LVP | Moderate to high | Adhesive moisture sensitivity requires RH testing and possible moisture barriers |
| Ceramic/porcelain tile | Lower | Grout and adhesive still affected by excessive moisture |
| Carpet | Low to moderate | Underlays can trap moisture, promoting mould in wet areas |
Adhesive compatibility is closely tied to these moisture levels. A pressure-sensitive adhesive designed for dry conditions will fail under elevated RH, while a moisture-tolerant epoxy adhesive may be overkill and cost-prohibitive for a bedroom installation. No single generic barrier fits all scenarios because failure modes differ across flooring systems.
Pro Tip: Always read the moisture requirements in your flooring manufacturer’s technical data sheet before purchasing an adhesive or barrier system. If the data sheet specifies ASTM F2170 testing, do not substitute a cheaper surface test and assume the result is comparable.
The subfloor type matters too. Timber subfloors behave differently from concrete. Suspended timber floors allow air movement beneath, which can actually assist moisture dissipation, whereas concrete slabs can hold moisture for months after a wet trade, such as plastering or screeding, has been completed.
Transition trims and flooring movement
Once you understand material compatibility at the subfloor level, the next challenge is the junction between two different floor types. This is where transition strips come in, and choosing the wrong one is a surprisingly common and costly mistake.
Transition hardware is critical not just cosmetically but for structural floor performance. A transition strip does several jobs simultaneously: it covers the expansion gap between two floors, manages any height difference between the two surfaces, protects exposed floor edges from chipping or fraying, and reduces the risk of tripping.
The four principal types of transition strip used in residential projects are:
- T-moulding: Used where two floors of equal or near-equal height meet, such as laminate to laminate or laminate to hardwood. The T-shape slots into the gap and rests on both surfaces without fixing to either floor.
- Reducer strip: Used where one floor is higher than the other. The tapered profile creates a gentle slope between surfaces. ADA guidelines recommend a gradient no steeper than 1:2 for accessibility.
- Threshold strip: Typically used in doorways, bridging two different floor types across a door frame. Often slightly raised to create a clear visual and physical boundary.
- End cap (or carpet bar): Used where a hard floor meets carpet, or where a floor terminates at a wall or step edge. The cap holds the edge of the hard floor and the carpet gripper below it.
The critical compatibility point here is installation method. Floating floors need transition hardware that accommodates expansion gaps to avoid stress and buckling. If you hard-fix a transition strip directly through a floating floor plank into the subfloor, you are essentially pinning that plank in place. As the floor expands with temperature and humidity changes, it cannot move. The result is either buckling in the field or seam failure at the edge. The strip should be anchored to the subfloor only, leaving the planks free to slide beneath the overlap.
Pro Tip: When shopping for transition strips for a floating installation, check that the product description specifies “fixed to subfloor only” or “independent of floor movement.” If the fitting method is unclear, ask before you buy.
For glue-down and nail-down installations, the movement requirement is less critical because those floors are already fixed. However, you still need a strip profile that matches the height difference accurately. Fitting a flat T-moulding where you actually need a reducer creates a trip hazard and puts mechanical stress on the edge of the higher floor every time someone walks across it.
On materials: plastic, aluminium, and rubber trims are frequently sold as budget options, but they warp under temperature variation, dent under foot traffic, and eventually split at the edges. Solid brass trims, powder-coated to your chosen finish, hold their form for the life of the floor. The professional transition methods that contractors use consistently favour brass for exactly this reason.
Planning a mixed flooring installation
With the principles above in mind, here is a practical sequence for planning a mixed flooring project with compatibility at its core:
-
List every flooring type in the project. Write down each material, its installation method (floating, glue-down, nail-down), and pull the manufacturer’s technical data sheet for each one. Note the required subfloor RH, adhesive specifications, and expansion gap requirements.
-
Identify the most demanding floor. Mixed flooring projects should use the most moisture-sensitive flooring type to drive moisture and adhesive selection across the whole installation. If you have solid hardwood in the living room and LVT in the kitchen, your subfloor moisture standard applies to the hardwood, even under the LVT area.
-
Test your subfloor moisture properly. Use ASTM F2170 on concrete slabs. Do not rely on a damp-proof membrane you cannot verify, and do not assume a recently laid screed is dry just because it looks dry. Screeds can hold elevated moisture for weeks.
-
Select compatible adhesives and barriers. Once you know your subfloor RH reading, match your adhesive and moisture barrier to every product in the installation. If manufacturers specify different systems, choose one that satisfies all requirements or consult a flooring specialist.
-
Map every transition point. Walk the project and note every doorway and junction where flooring types change. Record the height of each floor as installed (including underlay where applicable) to determine whether you need a T-moulding, reducer, or threshold at each point. Use the floor level transition guide to match profiles to height differences accurately.
-
Order trims before installation day. Trims should be on site before the floors go in, not ordered as an afterthought. The expansion gap width you leave at doorways needs to correspond to the overlap coverage of the trim you have selected.
-
Follow manufacturer fitting instructions to the letter. This applies to both the flooring and the trim. Warranty claims are frequently rejected because trims were fitted incorrectly, such as being screwed through floating planks rather than into the subfloor alone.
Common compatibility mistakes to avoid
Even well-planned projects go wrong when small compatibility details are overlooked. The following errors account for the majority of avoidable flooring failures:
- Relying on surface dryness as a moisture test. Concrete appears dry but internal moisture causes failure long after installation. Always test at depth.
- Using a one-size-fits-all moisture barrier. The barrier must match the specific flooring and adhesive system. A barrier validated for LVT may not be appropriate under engineered wood.
- Hard-fixing transitions to floating floors. Transition strips fixed to the subfloor must leave floating planks free to move. Pinning them causes buckling within one heating season.
- Ignoring height differences. Fitting a flat strip where a reducer is needed creates a daily mechanical stress point and a trip hazard. The correct profile must match the actual height differential.
- Choosing inferior trim materials. Rubber, plastic, and aluminium trims degrade under normal use. They bend, split, and discolour, leaving exposed floor edges vulnerable to chipping and moisture ingress. Solid brass trims do not behave this way.
- Skipping expansion gaps. Every floating floor needs an unobstructed perimeter gap. Transition strips must cover that gap without restricting it.
My honest take on getting compatibility right
What I have found, time and again, is that homeowners underestimate the moisture question and overestimate the difficulty of getting transitions right.
On moisture: the number of installations I have seen fail not because of bad flooring or poor technique, but simply because nobody bothered to test the concrete. The floor looked fine for a year, then an unusually warm summer caused the slab to emit, the adhesive softened, and the vinyl blistered. A forty-minute ASTM F2170 test would have caught it. I genuinely believe it is the single highest-value step in any hard floor installation on concrete.
On transitions: people treat them as an afterthought, something to sort out once the floor is down. That is backwards. The transition strip determines the expansion gap you need to leave during installation. If you do not know which profile you are using before you lay the first plank, you cannot set the correct gap at the doorway.
And on trim quality: I have seen cheap plastic and aluminium trims look acceptable on day one and look terrible within a year. They buckle in warm rooms, they dent when someone catches them with a vacuum cleaner, and they split under the edge pressure of a threshold that is slightly too tight. Solid brass trims with a quality powder coat simply do not do any of those things. The upfront cost difference is modest relative to the floor itself. For a project you want to last ten or fifteen years, it is not a difficult decision.
— Matt
Premium trims for lasting flooring transitions

When you have spent the time and money getting your flooring compatibility right, the trim you choose at every junction deserves the same level of thought. At Qualitycarpettrims, every door bar, threshold, and carpet to hard floor trim is made from solid brass and hand-finished in one of ten luxury powder-coat colours. They will not warp in a warm hallway, dent under a front door, or split at a tight threshold. Aluminium, plastic, and rubber trims simply cannot match that durability.
Whether you need a T-moulding for adjoining laminate floors, a reducer where LVT meets tile, or a matwell trim for a tiled entrance, Qualitycarpettrims has the profile. Free samples, fast UK delivery, and expert advice are available on site to help you choose the right finish and fitting method for your project.
Common questions
What does flooring compatibility mean for a DIY project?
Flooring compatibility refers to how well a flooring material, its adhesive, and its subfloor conditions work together without causing failure. For DIY projects, it also covers choosing the correct transition strip at every point where two different floor types meet.
How do I test if my subfloor is compatible with my chosen floor?
Use ASTM F2170 in-situ relative humidity testing for concrete subfloors. Surface testing alone is unreliable because internal moisture can be significantly higher than what appears on the surface.
Can different flooring types be mixed in an open-plan space?
Yes, different flooring types can be mixed, but each floor’s moisture and adhesive requirements must be identified first. The most moisture-sensitive floor in the project should set the standard for the whole subfloor preparation.
What type of transition strip should I use between laminate and tile?
Use a reducer strip where the laminate sits higher than the tile, or a T-moulding where the heights are equal. The strip must be anchored to the subfloor only, not to the floating laminate planks, to allow independent movement.
Why do cheap trims fail at flooring junctions?
Plastic, rubber, and aluminium trims are susceptible to warping under temperature change, denting under foot traffic, and splitting under edge pressure. Solid brass trims hold their shape and finish throughout the life of the floor.
Recommended
- Defining flooring compatibility: the UK DIY and contractor guide
- Explaining hardfloor transitions: a homeowner’s guide
- What is a flooring transition: guide for UK homeowners 2026
- Home flooring thresholds: your guide to seamless finishes