
Blog
Step by step flooring trim installation guide

May
TL;DR:
- Getting flooring trim installed correctly requires precise measurement at floor level and proper dry fitting to ensure tight joints. Nailing only into walls or baseboards, avoiding the floor to allow for expansion, is essential for a durable, professional finish. Using quality trims and meticulous finishing—filling, sanding, and caulking—creates a sleek, long-lasting result that appears flawless.
Getting flooring trim installation wrong is frustratingly easy. Gaps at corners, trims pulling away from the wall, paint bleeding onto your new floor — these are the results of skipping steps or relying on guesswork. A proper step by step flooring trim installation fixes all of that before it starts. This guide walks you through everything: preparing your space, cutting with precision, fastening correctly, and finishing to a standard that looks like professional work. Whether you’re laying new carpet trims, laminate thresholds, or luxury door bars, the same principles apply throughout.
Table of Contents
- Key takeaways
- Step by step flooring trim installation: preparation
- Cutting and fitting flooring trims
- Fastening flooring trim correctly
- Finishing touches for a professional result
- Common mistakes and how to avoid them
- My honest take on DIY trim installation
- Why your trim choice matters as much as your technique
- FAQ
Key takeaways
| Point | Details |
|---|---|
| Measure at floor level | Wall runs measured at floor level give accurate trim lengths and identify corner types correctly. |
| Always dry fit first | Cutting trim slightly longer and dry fitting before nailing prevents costly misalignment and wasted material. |
| Nail into walls, not floors | Fastening into baseboards or wall framing protects your flooring from buckling as it expands and contracts. |
| Cope inside corners | Coping yields tighter joints than mitering on imperfect walls, a hallmark of genuinely professional trim work. |
| Finish with caulk and filler | Filling nail holes and caulking the top joint transforms a functional installation into a flawless one. |
Step by step flooring trim installation: preparation
Good preparation separates a trim installation that lasts a decade from one that starts failing within a year. Before you touch a saw or a nail gun, you need the right tools and a clear picture of what each wall requires.
Tools and materials you will need
- Tape measure and pencil
- Miter saw (or hand saw with mitre box)
- Coping saw for inside corners
- Brad nailer (pneumatic or cordless) and appropriate brad nails
- Stud finder
- Paintable latex caulk and caulk gun
- Wood filler or spackle
- 220-grit sandpaper
- Primer and paint or stain
- Safety glasses and ear protection
Once your tools are assembled, the next move is measuring. Measure each wall at floor level rather than at skirting height, because walls bow and shift slightly, and the floor line is your actual reference point. As you measure, note whether each corner is an inside corner (where two walls meet inward), an outside corner (where walls project outward), or a butt joint where a trim run terminates at a door frame or obstruction.
Before measuring is complete, run your stud finder along each wall and mark stud positions lightly in pencil. Pre-marking stud locations before you start nailing is one of the most overlooked preparation steps, yet it directly determines whether your trims stay fixed for years or begin loosening at joints.
Pro Tip: Remove old trim carefully with a pry bar and a scrap of wood as a fulcrum. This protects your wall surface and keeps the plaster intact, saving you considerable repair work before you even begin.
Cutting and fitting flooring trims
Cutting is where most DIY installations go wrong. The good news is that there are only four cut types you need to know, and once you understand when to use each one, the whole process becomes logical.
Here is a comparison of each cut type and its correct application:
| Cut type | When to use it | Key tip |
|---|---|---|
| Straight cut | Butt joints at door frames or walls | Square the saw to 0 degrees |
| Miter cut | Outside corners | Cut two pieces at 45 degrees opposing |
| Cope cut | Inside corners | One piece runs full length, second is coped |
| Scarf joint | Long walls requiring two lengths | Overlap at 45 degrees over a stud |
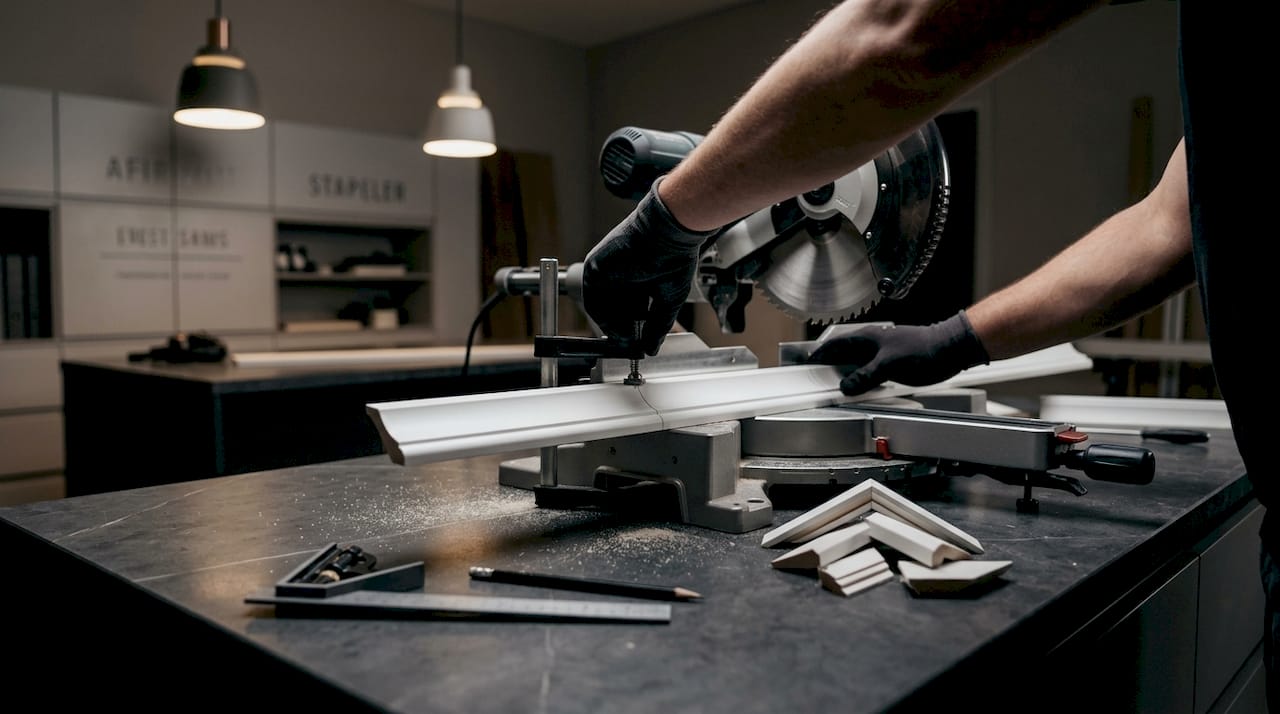
Coping inside corners produces a tighter, longer-lasting joint than mitering, particularly on older walls that are rarely perfectly square. To cope a corner, run the first trim piece the full length of the wall and butt it hard against the adjacent wall. Then cut the second piece with a 45-degree miter to reveal the profile, and use a coping saw to follow the profile line exactly, undercutting slightly so the front face fits flush.
Follow this sequence for every cut:
- Measure the wall run at floor level and note the corner types at each end.
- Set your miter saw to the correct angle for the cut type required.
- Cut trim pieces about 1/16 inch longer than your measurement to allow for fine adjustment.
- Dry fit the piece in position without nailing. Check for gaps at corners and joints.
- If the fit is tight and correct, mark the back of the piece and set it aside ready for fastening.
- For scarf joints on long walls, position the join over a marked stud so both ends can be nailed securely.
- Check each dry-fitted corner from standing height and crouching height. Gaps that are invisible at floor level become obvious once the room is finished.
Pro Tip: For outside corners on walls that are not a perfect 90 degrees, try adjusting your miter to 44 or 46 degrees rather than the standard 45. A small change makes a significant difference to how tightly the faces meet.
Fastening flooring trim correctly
Once every piece is dry fitted and marked, fastening is straightforward as long as you respect one non-negotiable rule: nail only into walls or baseboards, never into the floor itself. Flooring expands and contracts with humidity and temperature changes throughout the year. Pin a trim into the floor layer and you are restricting that movement, which causes the floor to buckle or pulls the trim away from the wall.
Nail types and spacing
- Use 16-gauge or 18-gauge brad nails between 38mm and 50mm in length for most trim profiles
- Space nails every 12 to 16 inches along straight runs
- Nail closer together (every 6 to 8 inches) within 50mm of corners and joints to prevent lifting
- At scarf joints, nail both overlapping pieces into the stud below
A pneumatic brad nailer makes this process clean and fast. If you are hand nailing, pre-drill pilot holes to avoid splitting the trim face. Angle the nail very slightly upward toward the wall framing rather than driving it perpendicular to the trim face. This pulls the trim tight against the wall without the nail head breaking through the surface.
For quarter-round or similar cover trims, nail horizontally into the baseboard above rather than downward into the floor. This single habit is the difference between a trim that stays put for fifteen years and one that starts separating within months.
Pro Tip: If you are working with solid brass trims, pilot holes are not just a precaution. They protect the finish and give you precise control over nail placement, especially at corners where the material is under the most stress.
Finishing touches for a professional result
The last 10% of any trim installation is where the real transformation happens. You can have perfect cuts and solid fastening, but without good finishing work, the result still looks DIY.
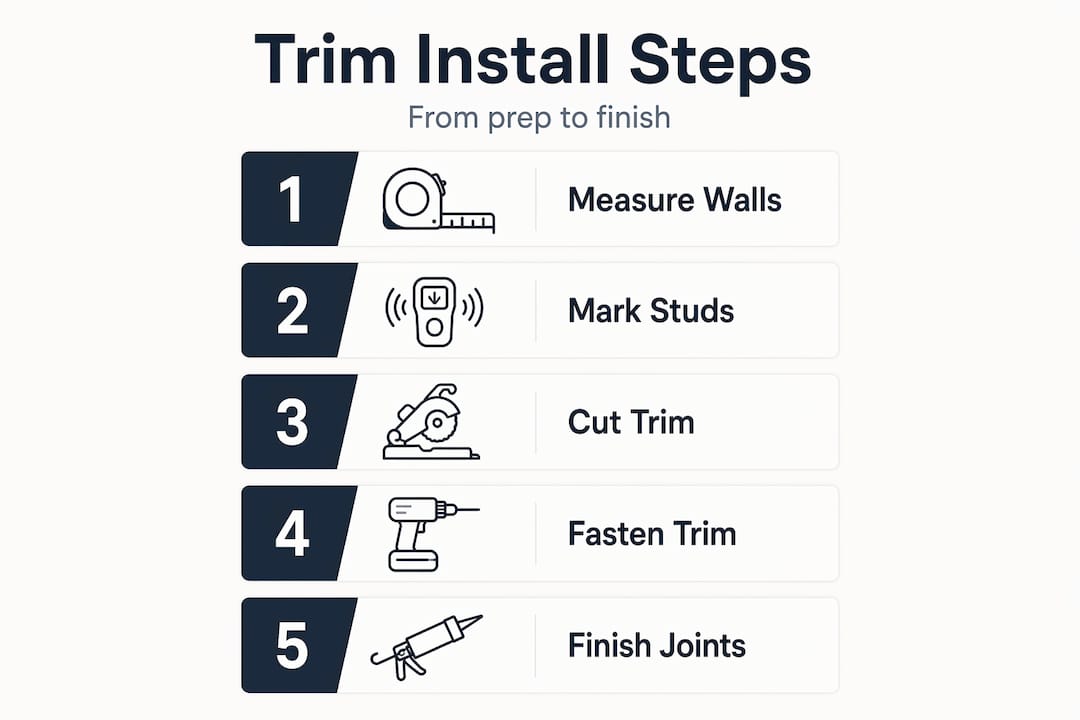
Follow this sequence:
- Countersink nail heads. Use a nail set to push each brad nail head just below the surface of the trim. Do not go too deep. A small depression about 1mm below the surface is all you need.
- Fill nail holes. Apply wood filler or spackle to each nail hole with a putty knife. Overfill slightly, as filler shrinks as it dries.
- Sand smooth. Once filler is fully dry, sand with 220-grit paper using light circular strokes. Wipe the dust clean with a slightly damp cloth.
- Caulk the top joint. Run a thin, even bead of paintable latex caulk along the joint where the top of the trim meets the wall. Smooth with a damp finger. This conceals any slight gap and gives the trim a built-in look.
- Do not caulk the bottom edge. Leave the floor-level edge free. The trim needs the smallest amount of movement as the floor expands seasonally. Caulking the bottom traps that movement and causes cracking.
- Prime and paint. Apply a coat of primer first, allow it to dry fully, then apply your chosen paint in thin coats. Use a small angled brush and painter’s tape along the floor edge for a clean line.
Setting nail heads below the surface and caulking top joints is what distinguishes genuinely finished work from a basic installation. A typical room project runs across two days. Cutting, fitting, and nailing on day one, then filling, sanding, and painting on day two once everything is secure and dry.
Common mistakes and how to avoid them
Even careful DIYers make predictable mistakes. Knowing what they are before you start saves time and material. If you want a deeper look at fixing trim problems after installation, that resource is worth reading alongside this guide.
- Measuring at skirting height instead of floor level. Walls are rarely perfectly vertical. Measuring at floor level gives you the actual run length you need.
- Skipping the dry fit. Nailing a piece in without dry fitting first is the fastest route to gaps at corners that you cannot undo without pulling the trim.
- Nailing into flooring. This causes buckling and joint separation, particularly with laminate and engineered wood floors that have significant seasonal movement.
- Caulking the bottom edge. Sealing the floor-level gap traps floor movement and causes the caulk to crack and lift within one heating season.
- Using inferior trims that split or dent. Wooden trims crack along the grain over time. Plastic trims dent and discolour. Aluminium trims buckle under foot traffic and never hold a finish well. These products look cheap because they are cheap, and no amount of careful installation makes them last.
Precise measuring and correct nailing contribute more to avoiding gaps and long-term warping than any other part of the installation process. Get those two things right and finishing becomes straightforward.
My honest take on DIY trim installation
I have watched a lot of homeowners rush the measuring stage and pay for it in the cutting and fitting stages. What I have learned is that measuring accurately at floor level is not a minor step. It is the foundation of everything else. When I started doing this properly, I stopped redoing cuts.
The dry fit habit took me longer to adopt, and I still see experienced people skip it. Every time I have been tempted to skip it, the result has been a gap at a corner I could not fix without pulling the piece and cutting again. Five minutes of dry fitting saves forty minutes of remedial work.
My strongest piece of advice for coping inside corners: do not rush the coping saw. Go slowly, follow the profile line, and undercut by a degree or two. A slightly undercut cope fits perfectly. An overcut one gaps visibly. Practise on a short offcut before doing the real piece.
The finishing steps are where patience pays off most visibly. The combination of countersunk nails, filled holes, and a clean caulk line along the top joint is genuinely what separates professional-looking results from ones that always look like a weekend project. It is not difficult work. It just requires care and the right sequence.
— Matt
Why your trim choice matters as much as your technique

All the careful installation technique in the world cannot compensate for a trim that fails on its own. Wooden trims split and swell with moisture. Plastic trims scratch, yellow, and never hold a finish convincingly. Aluminium trims dent underfoot and corrode over time. At Qualitycarpettrims, every trim is solid brass, hand finished in one of ten luxury powder-coated colours that will not fade, chip, or deform under normal use.
These are trims built to complement professional installation, not undermine it. Whether you are finishing a doorway, a floor-to-floor transition, or a matwell edge, the right profile makes a genuine difference to how the finished room looks and how long it lasts. Explore the full range of luxury flooring trims and order directly online, with fast UK delivery. If you want guidance on selecting the right profile for your project, the flooring trim types guide is a practical starting point.
FAQ
How do I measure correctly for flooring trim?
Measure each wall run at floor level rather than at mid-wall height, noting the type of corner at each end. Wall measurements at floor level account for walls that bow or lean slightly, giving you accurate trim lengths.
Should I cope or miter inside corners?
Coping inside corners produces tighter, longer-lasting joints because it accounts for walls that are not perfectly square. Coping inside corners is the professional standard, particularly in older properties.
Can I nail flooring trim into the floor?
No. Nailing trim into flooring restricts the floor’s natural movement and causes buckling or trim separation over time. Always nail into the wall, baseboard, or wall framing.
How far apart should trim nails be spaced?
Space nails every 12 to 16 inches along straight runs, and closer together near corners and joints. Nailing every 6 to 8 inches near joints keeps the trim from lifting at its most vulnerable points.
Do I need to caulk the bottom edge of the trim?
No. Leave the bottom edge free to allow for floor movement. Only caulk the top joint where the trim meets the wall, using paintable latex caulk for a clean, finished appearance.
Recommended
- How to solve flooring trim problems like a pro
- Installing Flooring Edge Trims for Seamless Floor Transitions
- Master professional flooring trim methods: 40% fewer fails
- 7 Essential Steps in a Commercial Flooring Trim Guide