
Blog
What is edge finishing? A homeowner’s guide

May
TL;DR:
- Proper edge finishing is essential for protecting flooring edges from moisture, damage, and safety hazards. It involves using high-quality trims like solid brass to ensure durability, safety, and a polished appearance. Careful measurement, correct tools, and proper installation techniques guarantee long-lasting and professional results.
Most homeowners assume edge finishing is purely decorative. It is not. What is edge finishing, really? It is the process of protecting, sealing, and neatening the exposed edges of your flooring so they do not fray, lift, crack, or absorb moisture over time. Get it right and your floors look sharp, feel safe underfoot, and last years longer. Get it wrong and you will be dealing with lifting carpet, swollen boards, and trip hazards within months. This guide covers the types, tools, methods, and real benefits of edge finishing so you can tackle your next flooring project with confidence.
Table of Contents
- Key takeaways
- What is edge finishing and why does it matter?
- Types of edge finishing for home flooring
- Edge finishing tools for DIY projects
- How to apply edge finishing: a step-by-step process
- Benefits of edge finishing for your home
- My honest take on edge finishing mistakes
- Get the right trims from Qualitycarpettrims
- FAQ
Key takeaways
| Point | Details |
|---|---|
| Edge finishing is functional, not just cosmetic | Proper edge finishing protects flooring from moisture, fraying, and physical damage at vulnerable exposed edges. |
| Material quality matters enormously | Solid brass and powder-coated trims outlast cheaper materials that split, bend, or dent under normal use. |
| Preparation determines the result | Accurate measuring and substrate sealing before fitting trims prevents the most common DIY edge finishing failures. |
| Choose the trim profile to match the situation | Door threshold bars, matwell trims, and angle trims each serve specific transitions and carry different load requirements. |
| Professional results are achievable at home | With the right tools and a methodical approach, DIY homeowners can achieve a clean, lasting edge finish on any flooring type. |
What is edge finishing and why does it matter?
Edge finishing in flooring refers to any technique or product used to treat, protect, and neaten the exposed perimeter of a floor covering. Think of the point where your carpet meets a doorway, where laminate ends at a step, or where hard flooring abuts a tiled threshold. Without proper finishing at those junctions, those edges are the most vulnerable part of your entire floor.
The role of edge finishing is threefold: safety, protection, and appearance. On the safety side, raw or poorly finished edges create trip hazards, particularly at doorways and floor level changes. On the protection side, sealing vulnerable edge areas like the underside of flooring at toe kicks or doorway thresholds is one of the most overlooked steps in any flooring installation. Moisture finds its way in through these gaps and causes swelling, warping, and delamination over time.
The materials used at these edges matter just as much as the technique. Here is what to consider when thinking about edge finishing for your home:
- Solid brass trims are heavy, rigid, and hold their profile under foot traffic without bending or denting. They are the benchmark for durability in residential and commercial flooring.
- Powder-coated finishes on solid brass trims resist chipping, scratching, and moisture far better than any painted or plastic-coated alternative.
- Cheaper trim materials such as plastic, rubber, or hollow aluminium extrusions will split, crack, or bow under repeated foot traffic. They also look cheap, which undermines everything else you have done in a room.
- Profile choice affects how well the trim sits against the flooring surface and how it handles the height difference between two floors.
The quality of your edge finishing tells you, and anyone who visits your home, a great deal about the care taken in the rest of the installation. Just as edge finishing quality signals craftsmanship in high-end leather goods, the neatness of your flooring edges signals whether a job was done properly or cut short.
Types of edge finishing for home flooring
Understanding the different types of edge finishing available helps you choose the right solution for each specific situation. Not every edge calls for the same approach, and getting this wrong is one of the most common DIY flooring mistakes.
| Trim type | Best used for | Key feature |
|---|---|---|
| Door threshold bar | Doorway transitions between two floor types | Covers height differences, protects both edges |
| Matwell trim | Recessed or surface-mounted entrance matting | Holds matting securely and protects perimeter |
| Angle trim | Exposed step edges and carpet ends | Stops carpet lifting and protects stair noses |
| Carpet edge trim | Open carpet ends away from walls | Secures raw carpet edges neatly |
Solid brass door threshold bars are among the most practical trims available for UK homes. They sit across the junction between two flooring types, covering the raw edge of each floor covering while managing any height difference. Available in ten luxury powder-coated finishes from Qualitycarpettrims, they suit everything from contemporary greys to classic brass tones, meaning you match your trim to your interior rather than compromising.
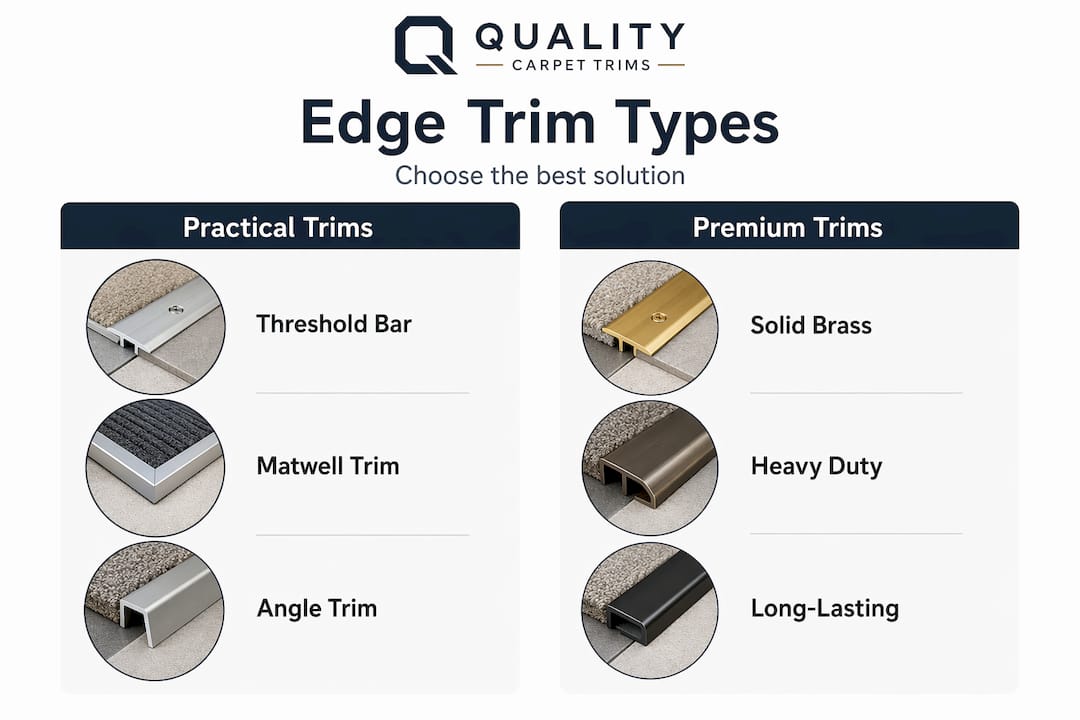
Matwell trims deserve special mention. They are specifically designed to hold entrance matting in place within a recessed or surface-mounted frame. The trim secures the perimeter, prevents the mat from creeping, and gives the area a sharp, defined look. Without it, entrance mats shift constantly and their edges begin to fray or curl.
Pro Tip: When choosing a finish for your trim, hold a sample against your door furniture and skirting boards. Trims that coordinate with existing metalwork in a room look intentional rather than incidental.
The difference between a quality solid brass trim and a cheaper alternative becomes obvious within the first year of use. Plastic trims crack at the screw points. Hollow trims dent when a chair leg or heavy object rolls over them. Solid brass holds its shape, its finish, and its fixing, regardless of how much traffic passes over it.
Edge finishing tools for DIY projects
The good news for DIY enthusiasts is that fitting quality brass and powder-coated trims does not require specialist equipment. What it does require is a careful approach and the right basic tools used in the right order.
- Steel tape measure and pencil. Measure the full length of the transition twice before cutting anything. Mark the trim on the underside to avoid scratching the finished face.
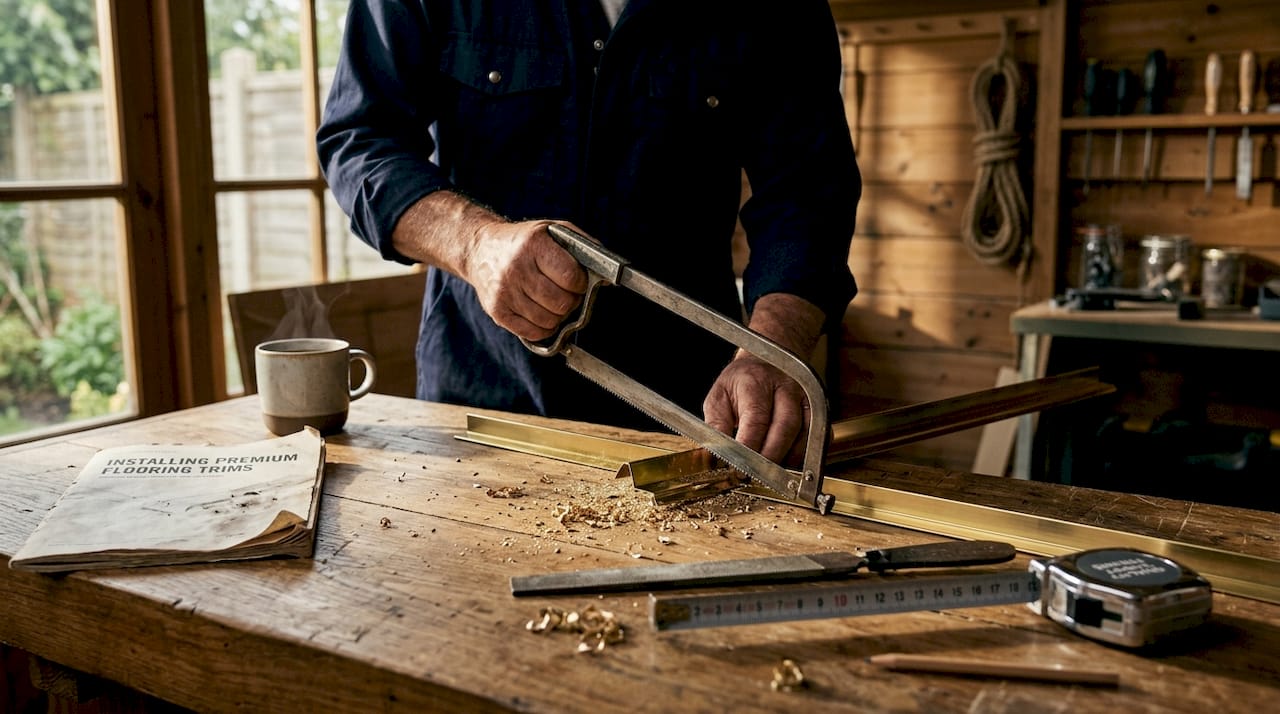
- Junior hacksaw or fine-tooth mitre saw. Solid brass trims cut cleanly with either. A fine-tooth blade prevents burring on the cut face. Keep the blade perpendicular to avoid an angled cut that leaves a gap at the wall.
- File or fine abrasive paper. Use this on the cut end of the trim to remove any rough projections. Sharp burrs at edges are a genuine safety hazard and will catch on socks, underlays, and cleaning equipment.
- Power drill and appropriate bit. For screw-fixed trims, pre-drill pilot holes through the trim and into the subfloor. This prevents the brass from distorting as the screw drives home.
- Countersink bit. Use this so screw heads sit flush with the trim surface rather than proud of it. Proud screws snag on everything.
- Rubber mallet. For trims that grip via a gripper channel or press-fit bar, a rubber mallet seats the trim without damaging the finish.
Pro Tip: For a truly professional cut on a solid brass trim, make a rough pass first leaving a millimetre of excess material, then make a clean final pass to the line. Two-pass cutting eliminates breakout at the cut face, which is particularly visible on polished or satin finishes.
A word on using the wrong tools: a standard wood saw leaves a ragged, torn edge on brass. A grinder works but produces too much heat and can discolour a powder-coated finish. Stick to a fine hacksaw or a mitre saw with a metal-cutting blade and you will get a clean, square end every time.
How to apply edge finishing: a step-by-step process
The edge finishing process for a typical flooring transition follows a logical sequence. Rushing any stage creates problems that are difficult to fix once the floor covering is laid.
- Prepare the subfloor. Remove any old adhesive, level dips greater than 3mm, and check that the subfloor is dry. True waterproofing requires sealing the substrate itself, not relying on a bead of caulk to do the job. Prime any MDF or particle board sub-bases with a barrier coat before fitting flooring.
- Measure the transition gap. Measure the width of the doorway or exposed edge at both ends. Thresholds in older UK homes often vary by several millimetres across their width. Cut to the shorter measurement if there is a discrepancy and fill any gap at the wall end with a colour-matched sealant.
- Select the correct trim profile. Match the trim height to the combined thickness of your flooring and underlay. A trim that sits too high creates its own trip hazard.
- Cut the trim to length. Use the two-pass method described above. Deburr the cut end thoroughly.
- Dry-fit the trim. Place it in position without fixing to check the fit. Look for gaps, rocking, or misalignment with the floor surface on either side.
- Fix the trim. Screw-fix trims are the most secure for solid brass. For click-fit or gripper bar systems, press firmly and evenly across the full length using a rubber mallet.
- Final check. Run your hand along the trim to feel for any proud screw heads or raised edges. A good flooring edge finish should feel completely smooth underfoot and be invisible in use.
Benefits of edge finishing for your home
Done properly, edge finishing delivers benefits that go well beyond aesthetics. Here is what you actually gain:
- Reduced trip hazards. Loose, lifting, or unfinished flooring edges are responsible for a significant number of home falls. A properly fitted trim holds everything flat and secure.
- Moisture protection. Unsealed edges absorb moisture and swell, particularly in kitchens, bathrooms, and hallways where humidity fluctuates. Brass trims create a physical barrier at these points.
- Extended flooring lifespan. Edges that are held securely do not fray, lift, or crack. The flooring stays intact for longer, reducing replacement costs.
- Improved appearance. A quality trim in a complementary finish pulls the room together. Exposed or messy edges undermine even the most expensive floor covering.
- Added property value. Neat, well-finished interiors signal quality to buyers and valuers. Small details like trim selection communicate whether a home has been maintained properly.
“The edges of a floor are the first thing a trained eye notices. Get them right and everything else looks intentional.”
My honest take on edge finishing mistakes
I have seen far too many otherwise excellent flooring installations let down by the last two per cent of the job. In my experience, the single biggest mistake DIYers make is treating the trim as an afterthought. They spend carefully on the floor covering itself, then buy the cheapest trim they can find because it “just sits in the doorway.”
That decision costs them within twelve to eighteen months. The cheap trim bends. The finish chips off. The floor covering begins to lift at the edge because the trim no longer holds it securely. And then the whole doorway area needs to be redone.
What I have learned from watching this pattern repeat is that the trim is not secondary to the floor. It is the structural endpoint of the installation. A solid brass trim in a quality powder-coated finish does not just look better on day one. It performs the same job on year ten as it did on day one, without bending, splitting, or discolouring.
I have also seen homeowners rely on caulk to “finish” an edge rather than fitting a proper trim. Caulk is cosmetic only. It fills a gap visually but does nothing to hold the flooring edge in place or protect the substrate from moisture. That is a purely cosmetic patch, not a finish.
My advice is straightforward. Invest in the trim with the same care you invested in the floor. Choose solid brass. Choose a finish that coordinates with your hardware. And fit it properly with the right tools. You will not regret it.
— Matt
Get the right trims from Qualitycarpettrims
If you are ready to finish your flooring properly, Qualitycarpettrims supplies solid brass door bars and edge trims hand-finished in ten luxury powder-coated colours. Every trim is made in the UK, built from solid brass that will not split, bend, or dent, and finished to a standard that genuinely complements a well-decorated home.

Whether you need a matwell trim for your entrance hall, a door threshold bar for a laminate-to-carpet transition, or a carpet edge trim for an exposed run of carpet, you will find the right profile and finish in the range. Free samples are available so you can check the colour against your flooring before committing. Not sure which profile fits your situation? The trim selection guide walks you through it clearly.
FAQ
What does edge finishing mean in flooring?
Edge finishing in flooring means treating and protecting the exposed edges of floor coverings using trims, threshold bars, or sealing methods to prevent fraying, moisture ingress, and trip hazards.
What are the main types of edge finishing trims?
The main types include door threshold bars, matwell trims, angle trims for stair edges, and carpet edge trims. Each serves a specific transition type and floor covering combination.
What tools do I need for edge finishing at home?
For most DIY edge finishing projects you need a tape measure, fine-tooth hacksaw, file, power drill with countersink bit, and a rubber mallet for press-fit trims.
Why do cheap trims fail at flooring edges?
Plastic, rubber, and hollow trims crack, bend, and chip under normal foot traffic. Solid brass trims hold their shape and finish indefinitely, making them the only sensible long-term choice for flooring edges.
How does edge finishing protect against moisture damage?
A properly fitted solid brass trim creates a physical barrier at vulnerable flooring edges, preventing water from working its way under the floor covering and into the substrate where it causes swelling and warping.
Recommended
- How to finish floor edges like a professional
- Flooring Edge Trims: The Key to a Seamless Finish
- Complete guide to hardfloor edge strips: seamless floors
- Why use edge trims? Enhance safety and style in flooring