
Blog
Floor trim fitting guide for a professional finish

May
TL;DR:
- Most floor trim projects fail initially by skipping steps, leading to gaps, uneven edges, and joints that open over time. Proper measurement, coping inside corners, securing to studs, and using solid brass trims ensure professional-looking and durable results. Careful planning, precise cuts, and correct finishing techniques are essential for a lasting, high-quality installation.
Most floor trim projects go wrong before a single piece of trim is cut. Gaps at corners, uneven edges along the skirting, and joints that open up six months later are almost always the result of skipping steps at the start. This floor trim fitting guide covers every stage properly: the tools you need, how to measure without wasting material, the difference between coping and mitring, how to fasten and finish cleanly, and what to do when walls refuse to cooperate. Follow this, and the result will look like a professional did it.
Table of Contents
- Key takeaways
- Your floor trim fitting guide: tools and preparation
- Cutting and fitting: step by step
- Securing and finishing the trim
- Troubleshooting common problems
- My honest take on floor trim fitting
- Finish the job with the right trims
- FAQ
Key takeaways
| Point | Details |
|---|---|
| Measure with a waste allowance | Add 10 to 15% extra material to your total perimeter measurement to account for angled cuts and errors. |
| Cope inside corners, don’t mitre | Coped joints last longer on imperfect walls and won’t open up as the building moves. |
| Nail into studs at correct spacing | Baseboards every 16 inches keep trims secure and prevent movement over time. |
| Choose solid brass over cheaper materials | Solid brass trims won’t split, bend, or dent the way wooden, plastic, or aluminium versions do. |
| Finish in the right order | Fill, caulk, sand, then paint. Doing this out of sequence ruins an otherwise good job. |
Your floor trim fitting guide: tools and preparation
Getting this stage right saves a great deal of frustration later. The tools you choose and the time you spend planning directly affect the quality of the finished result.
What you’ll need
Here is a practical list of tools for DIY floor trim installation:
- Miter saw (also called a chop saw): for accurate angled cuts on straight runs and outside corners
- Coping saw: for coping inside corners, where a miter saw alone won’t give a tight fit
- Nail gun or hammer: a nail gun is faster and more consistent; a hammer works perfectly well with care
- Measuring tape and pencil: for marking lengths before cutting
- Spirit level: to check trim alignment along the wall
- Stud finder: to locate wall studs for secure fixing
- Safety glasses and hearing protection: non-negotiable when cutting with power tools
For materials, solid brass trims are the only sensible choice if you want the job to hold up. Wooden trims swell, split, and warp when humidity changes. Plastic and aluminium trims bend and dent far too easily. Solid brass holds its shape and its finish through years of use.
Measuring the room
Measure the full perimeter of the room, adding up each wall length individually. Then add 10 to 15% to that total for waste from angled cuts and any errors. In rooms with multiple alcoves or bay windows, increase that allowance to 20%. It is far cheaper to have offcuts left over than to realise you are short when you are mid-installation.
Pro Tip: Mark each wall measurement directly on a rough sketch of the room. This makes it much easier to plan where your joints will land and whether any pieces need to wrap around door casings or fireplace surrounds.
Before you buy anything, identify the flooring trim types that suit your floor. The profile you choose needs to complement both the flooring and the door casings. A trim that looks right in isolation can look entirely wrong once it sits next to an existing architrave.
| Room type | Recommended waste allowance | Notes |
|---|---|---|
| Simple rectangular room | 10% | Minimal angled cuts needed |
| Room with alcoves | 15% | Extra joints and returns required |
| Complex or bay-windowed room | 20% | Multiple angles increase off-cut rate |
Cutting and fitting: step by step
This is where most DIY installations succeed or fail. Slow, deliberate work here pays off every single time.
- Remove the old trim carefully. Score along the top edge with a utility knife first to break the paint seal, then lever the trim away from the wall gradually. Rushing this stage damages the plaster.
- Prep the surfaces. Fill any holes in the wall, sand any high spots on the floor edge, and make sure the surface is clean and dry before you start fixing anything.
- Cut and fit straight runs first. Measure each wall, mark the trim, and cut cleanly with your miter saw at 90 degrees. Fit the longest, simplest pieces before you tackle corners.
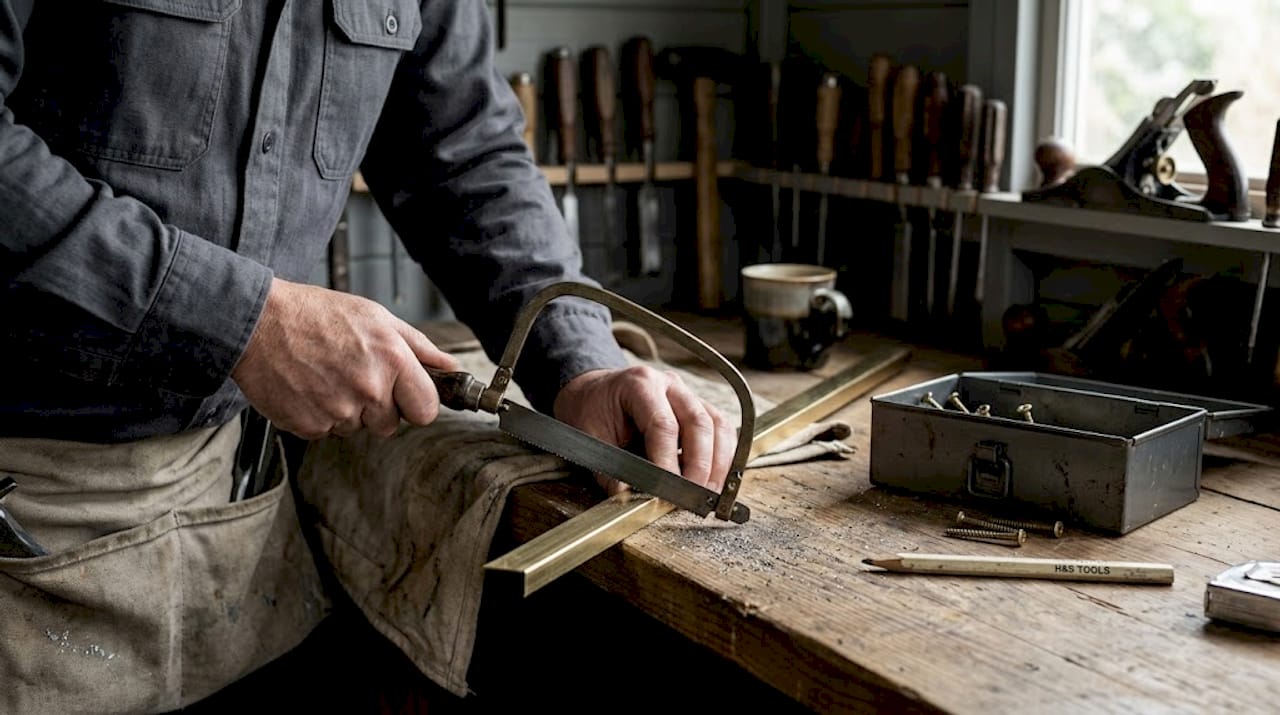
- Inside corners: cope, don’t mitre. A coped joint fits tighter on walls that aren’t perfectly square, which describes the majority of British homes. Cut the first piece square to the corner. On the second piece, make a 45-degree mitre cut to reveal the profile, then use a coping saw to follow that profile line. The piece then fits over the face of the first. Cut the profile back about 1/8 inch to allow for paint clearance and a tight fit.
- Outside corners: mitre both pieces. Both pieces need a 45-degree cut in opposing directions. Dry-fit first. If the corner isn’t a true 90 degrees, adjust each cut by half the difference.
- Long runs: use scarf joints. When a wall is longer than your trim pieces, join with opposing 45-degree cuts rather than butt joints. This overlapping scarf joint creates a stronger, nearly invisible seam. Position it over a stud.
- Fit around door casings. You have two options: scribe the trim to meet the casing profile, or make a plinth block and butt both pieces to it. The plinth block approach looks cleaner and is easier for most DIYers.
Pro Tip: Practice coping on scrap pieces before committing to your actual trim. The technique feels awkward at first, but after three or four practice cuts it becomes straightforward. Rushing this step is the most common reason inside corners look poor.
The difference between a coped and a mitred inside corner matters enormously over time. Mitred inside corners open as the building settles and wood in walls moves seasonally. A coped joint holds because one piece overlaps the other regardless of minor movement.
Securing and finishing the trim
Fitting is only half of it. How you fasten and finish the trim determines whether the result looks amateur or genuinely professional.
Nailing correctly
- Nail into wall studs wherever possible. Use a stud finder and mark stud positions lightly in pencil on the wall before you start.
- Nail baseboards every 16 inches along the length, and smaller trims such as quarter round every 10 to 16 inches.
- Use 8d finish nails at a slight downward angle into the wall. Countersink each nail head just below the surface so it can be filled cleanly.
- On solid brass trims, use appropriately sized screws or pins as specified by the manufacturer. Brass holds fastenings superbly without the risk of the material cracking under pressure.
If your walls have significant undulation, use a flexible adhesive behind the trim on the affected section before nailing. This fills the gap and stops the trim from flexing or springing away from the wall over time.
Filling and caulking
Once all the trim is fixed, fill every nail hole with an appropriate filler. Let it cure fully, then sand flush. Run a bead of paintable caulk along the top seam where the trim meets the wall, and along any joint lines. Smooth with a damp finger.
Quarter round moulding is the right solution for covering expansion gaps between the trim base and the floor surface. Nail it into the baseboard, never into the floor, so the floor can still expand and contract freely.
Pro Tip: Don’t rush to paint. Wait for the caulk and filler to cure completely, then sand lightly with fine-grit paper. Paint over fully cured filler and you’ll get a smooth, professional finish. Paint too soon and you’ll see every lump and shrink line.
When maintaining your flooring during renovation, protecting the floor surface during painting is equally worthwhile. A strip of low-tack masking tape along the floor edge takes seconds to apply and saves a great deal of cleaning up.
Troubleshooting common problems
Even with good preparation, things don’t always go to plan. Here is how to deal with the issues that come up most often.
“Forcing trim tight against uneven walls often leads to cracks and gaps. Controlled gaps and scribing prevent this far more effectively than trying to force the material into submission.”
- Wavy or uneven walls. Don’t force the trim flat. Instead, scribe the back of the trim to follow the wall’s contour, removing material where the wall protrudes. A small intentional gap at a high spot, filled with caulk later, is far better than a stressed trim that cracks.
- Corners that won’t close. If a coped joint won’t sit flat, the profile cut is not following the contour accurately enough. Recut slowly, removing tiny amounts at a time rather than making one large adjustment.
- Nails splitting the trim. This happens when nailing too close to the end of a piece. Stay at least 25mm from any cut end, and pre-drill if the trim is narrower than 40mm.
- Gaps opening after a few weeks. This is almost always a joint problem. Rushing corner cuts creates joints that look fine initially but open as the structure settles. Re-cope the joint properly rather than filling it repeatedly with caulk.
- Poor nail placement showing through paint. If nails land at awkward angles or too close to the trim face, the filled hole shows as a bump. Fill proud, sand flat, and prime before painting for the cleanest result.
Being able to solve flooring trim problems before they become visible from across the room is the real mark of a careful installer. Most issues have straightforward fixes if you catch them before the paint goes on.
My honest take on floor trim fitting
I’ve fitted a lot of trim over the years, and the single most reliable observation I can share is this: the people who get beautiful results are not the ones with the most expensive tools. They are the ones who slow down at the corners.
Coping inside corners is the technique I’d push every DIY homeowner to learn. Most guides mention it briefly and then move on. I’d argue it deserves the most practice time of anything in this guide. A well-coped inside corner looks crisp for years. A mitred one starts to show a gap within months in most homes, because British houses move. They flex with temperature and humidity throughout the year, and mitred corners simply can’t accommodate that.
The other thing I’ve learnt is that solid brass trims are not a luxury. They are the sensible choice. I’ve seen wooden trims swell after a single wet winter. I’ve watched plastic trims crack when someone caught them with a vacuum cleaner. Solid brass holds its shape, holds its finish, and holds its fastenings. When you’re spending time doing this properly, it makes no sense to fit a material that will let you down.
Finally, the measure-twice advice isn’t a cliché. The specific habit that separates clean installs from frustrating ones is marking the cut direction on each piece before you walk to the saw. It takes five seconds and eliminates a category of mistake entirely.
— Matt
Finish the job with the right trims

The technique in this guide is only as good as the materials you use alongside it. At Qualitycarpettrims, every trim is made from solid brass and hand-finished in ten luxury finishes to complement any interior. They won’t split, bend, or dent like cheaper alternatives, and they’re made right here in the UK to a standard that shows in the final result. Whether you’re fitting matwell trims, carpet-to-carpet transitions, or threshold bars between different floor surfaces, Qualitycarpettrims has the right profile for the job. Browse the full range online, order with confidence, and finish your floor the way it deserves.
FAQ
How do I avoid gaps in inside corners?
Cope rather than mitre inside corners. A coped joint overlaps and holds tight even as walls move slightly over time, whereas a mitred joint tends to open within months.
How much extra trim should I buy?
Add 10 to 15% to your total perimeter measurement as a waste allowance, increasing to 20% for rooms with alcoves, bay windows, or complex shapes.
Should I nail into the floor or the wall?
Always nail into the wall, hitting studs wherever possible. Quarter round moulding should be nailed into the baseboard, not the floor, so the floor can expand and contract freely.
Why does my trim keep cracking after a few months?
Cracking usually means the trim was forced against an uneven wall under tension. Use scribing or a flexible adhesive to accommodate the wall’s shape rather than forcing the trim flat.
What is the best material for floor trims?
Solid brass is the most durable option. It resists splitting, bending, and denting in a way that wooden, plastic, and aluminium trims simply cannot match over the long term.
Recommended
- How to finish floor edges like a professional
- Installing Flooring Edge Trims for Seamless Floor Transitions
- Floor trim types explained for UK homes: A full guide
- Master professional flooring trim methods: 40% fewer fails