
Blog
Understanding flooring profiles: a UK homeowner’s guide

Jun
TL;DR:
- Flooring profiles are essential finishing strips that cover expansion gaps, protect exposed edges, and ensure smooth transitions, preventing buckling and trip hazards. Choosing high-quality solid brass profiles and correctly measuring height differences are crucial for long-lasting, professional results. Proper installation and consistent finishes across the floor enhance durability, safety, and visual coherence.
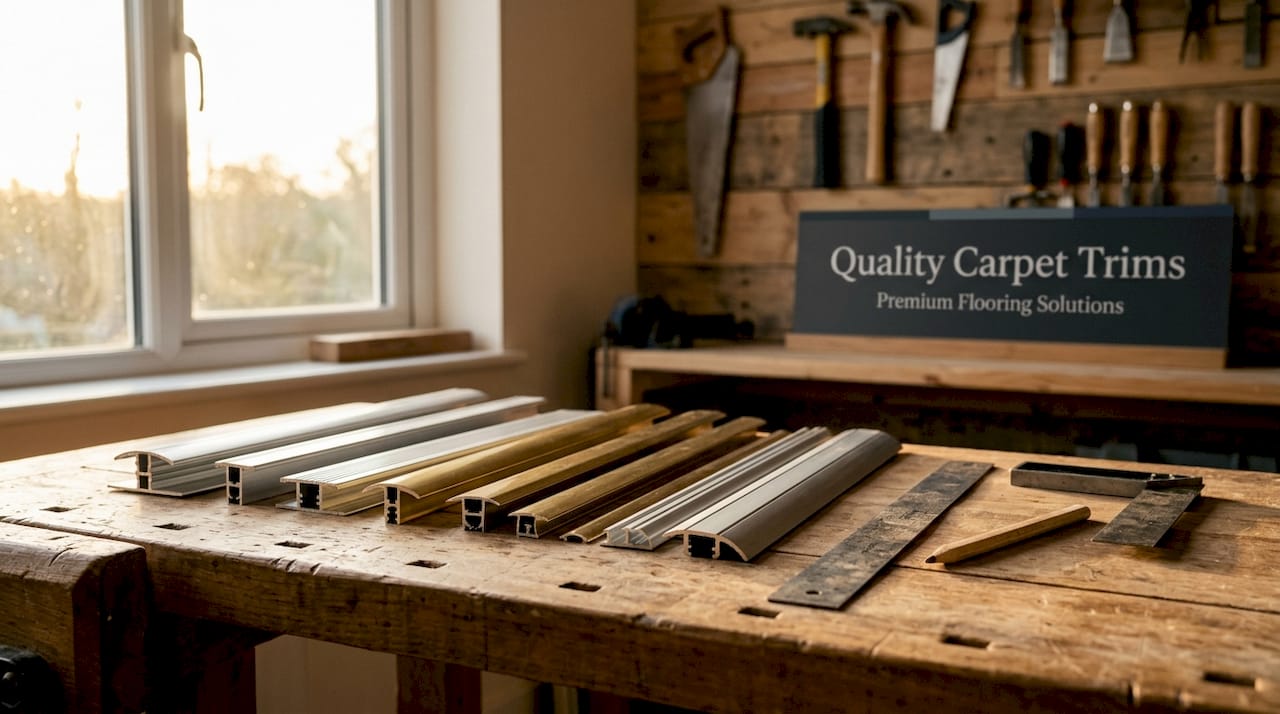
Flooring profiles are finishing strips that cover expansion gaps, protect exposed edges, and create smooth transitions between different floor surfaces. Known in the trade as transition trims or threshold strips, they are a structural part of any floor installation, not an afterthought. The right profile prevents buckling, reduces trip hazards, and keeps your floors looking sharp for years. The wrong one, or a cheap one made from plastic or aluminium that bends and splits under foot traffic, will cost you far more in repairs than you saved at the till. Understanding flooring profiles properly is the difference between a floor that lasts a decade and one that starts lifting within a year.
What are flooring profiles and why do they matter?
Flooring profiles are finishing strips designed to cover perimeter gaps, protect exposed edges, and connect two different floor surfaces at a junction. Every floating floor needs room to expand and contract with changes in temperature and humidity. Profiles sit over those gaps without restricting movement, which is precisely why material quality matters so much.
Transition profiles affect slip resistance, accessibility, and long-term floor performance. This means selecting a profile is a design and engineering decision, not simply a cosmetic one. A poorly chosen strip can create a trip hazard, restrict floor movement, and cause edge lifting within months.
Cheap trims made from plastic, rubber, or aluminium are the most common source of these problems. They dent under furniture legs, split along their length, and lose their finish within a year or two. Solid brass profiles, powder coated in one of ten luxury finishes, resist all of that. They hold their shape, hold their colour, and hold their fixing without fail.
What are the main types of flooring profiles and their uses?
Understanding the different types of flooring profiles helps you match the right strip to the right situation. Each type solves a specific problem at a floor junction.
-
T-moulding sits between two floors of equal height, typically in a doorway where the same flooring continues from one room to the next. The T-shape bridges the expansion gap, with the central spine anchored to the subfloor and the cap floating above both floor surfaces. T-mouldings have top caps roughly 38mm to 57mm wide, giving enough coverage for standard expansion gaps.
-
Reducer strips slope down from a higher floor to a lower one. They are the correct choice where laminate or engineered wood meets a thinner vinyl or ceramic tile. The bevelled profile creates a gradual step rather than an abrupt edge.
-
Threshold strips are used at doorways and at exposed edges where flooring meets an external door, a step, or a tiled hearth. They tend to be wider and more substantial than reducers, providing a clean termination point for the floor.
-
Scotia beading is a concave quarter-round strip fitted at the base of a skirting board to cover the perimeter expansion gap. It sits against the wall and the floor surface without being fixed to the floor itself.
-
Quadrant beading performs the same function as scotia but with a convex profile. It is more visible and suits certain traditional interior styles.
-
Flat edge trims finish the exposed edge of a floor at a step, bay window, or raised platform where the flooring simply ends without meeting another surface.
Each of these profiles accommodates floor expansion and movement, reducing the risk of edge lifting, squeaking, and buckling. Solid brass versions of all these types hold their shape under daily use in a way that cheaper materials simply cannot match.
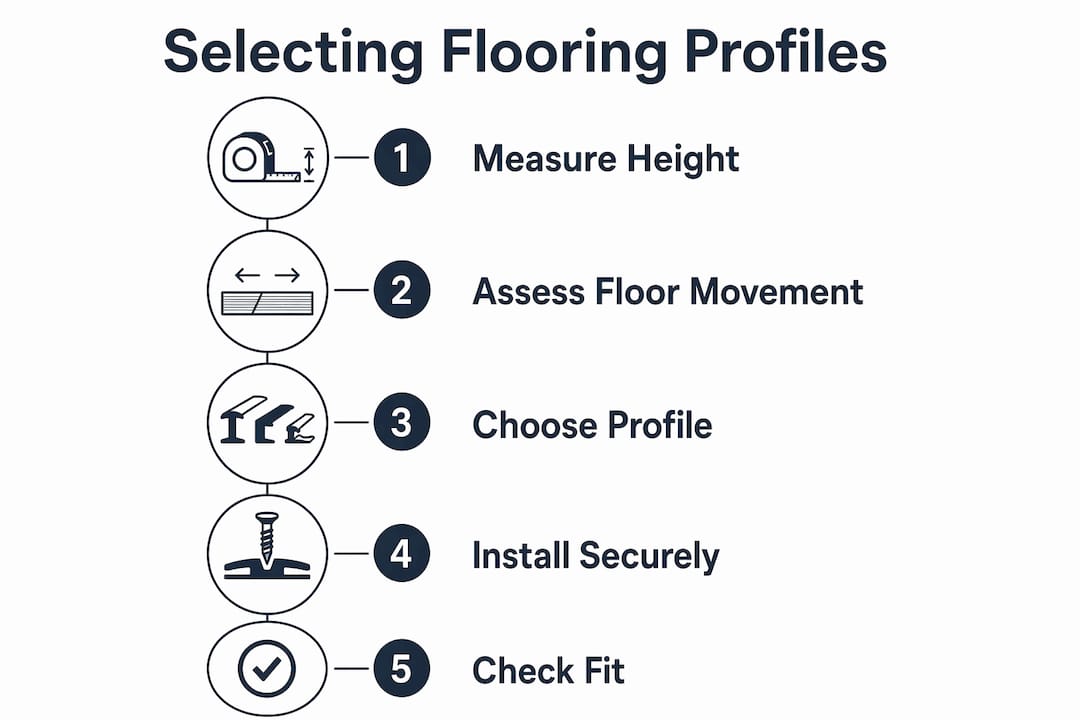
How to select the right flooring profile for your floor
Selecting the correct profile starts with one measurement: the height difference between the two floor surfaces you are connecting. Get this wrong and the profile will either rock, create a trip hazard, or fail to cover the gap properly.
Follow these steps before you buy anything:
-
Measure the height difference at multiple points. Use a straightedge or spirit level across the junction. Floors are rarely perfectly flat, so take readings at three or four points along the transition line.
-
Apply the correct threshold for your measurement. Height-differential thresholds guide profile selection as follows: a difference of 6mm or less calls for a flat seam strip or flush reducer; a difference between 6mm and 13mm requires a bevelled reducer with a maximum slope of 1:2; a difference greater than 13mm requires a ramped threshold assembly.
-
Account for floor movement. Floating floors expand and contract seasonally. Measure the required expansion gap specified by your flooring manufacturer, typically between 8mm and 12mm for laminate, and confirm the profile you choose covers that gap without being fixed to the floor surface itself.
-
Check the subfloor material. Some profiles use a screw-fixed track, others use adhesive. Concrete subfloors need a different fixing method than timber joists.
-
Consider foot traffic and use. A doorway between a kitchen and a hallway takes far more punishment than a transition in a bedroom. Choose a profile rated for the traffic level, and choose solid brass if you want it to still look good in ten years.
Pro Tip: Measure the height difference at a minimum of three separate points along the transition line. A single measurement at the centre can miss a bow or dip in the subfloor that causes the fitted profile to rock and wear unevenly.
ADA-compliant transition rules specify that vertical changes of 6mm or less need no bevel, changes between 6mm and 13mm must be bevelled at a maximum slope of 1:2, and changes above 13mm must be ramped. These standards originate in the United States but reflect sound engineering logic that applies equally to UK residential installations, particularly where elderly or mobility-impaired residents are present.
T-moulding vs reducer vs threshold: which profile do you need?
| Profile type | Best use | Height difference | Key installation note |
|---|---|---|---|
| T-moulding | Equal-height floors in doorways | None | Spine fixed to subfloor only; cap floats |
| Reducer strip | Higher floor meeting lower floor | 6mm to 13mm | Bevelled slope; track fixed to subfloor |
| Threshold strip | Doorways, exposed edges, external doors | Variable | Wider profile; may use adhesive or screw track |
| Scotia or quadrant beading | Perimeter gaps at skirting boards | N/A | Fixed to skirting, not to floor |
| Flat edge trim | Exposed floor edges at steps or platforms | N/A | Fixed to subfloor or riser |
T-moulding is the most commonly misused profile. Many DIYers reach for it at every junction regardless of height difference, which creates a rocking strip and an uneven surface underfoot. It is only correct where both floors sit at the same finished height.
Reducers are the right answer for the majority of mixed-floor transitions in UK homes, particularly where laminate or engineered wood meets ceramic tile or vinyl. The bevelled slope distributes foot traffic load gradually rather than concentrating it at a sharp edge.
Threshold strips at external doorways deserve particular attention. They take the most punishment of any profile in the home, exposed to foot traffic, moisture, and temperature swings. Solid brass powder-coated thresholds from Qualitycarpettrims resist all of that. Plastic and aluminium versions corrode, discolour, and deform within a few years in the same conditions.
Matching profile systems simplifies installation and improves visual consistency across a room or floor plan. Choosing the same finish across your T-mouldings, reducers, and beading creates a coherent look that reads as intentional rather than assembled from leftover parts.
Practical installation tips and common mistakes to avoid
Good installation starts before you open the packaging. These are the steps and pitfalls that separate a professional finish from one that fails within a year.
-
Prepare the subfloor first. Any high spots or debris under the transition zone will cause the profile to rock. Sand or grind down any raised areas and vacuum thoroughly before fitting the track.
-
Leave the expansion gap intact. Never fasten floating floor panels directly to trim. The track or base of the profile fixes to the subfloor. The floor surface must be free to move beneath the cap.
-
Choose the correct fixing method. Screw-fixed tracks suit most situations. Adhesive-only fixing is appropriate for profiles over underfloor heating where drilling into the screed is not practical. Snap-in systems work well for T-mouldings over timber subfloors.
-
Cut profiles cleanly. Use a fine-tooth mitre saw or a junior hacksaw with a metal-cutting blade. Solid brass cuts cleanly and holds a precise edge. Score the cut line first with a marking knife to prevent the finish from chipping.
-
Check alignment before fixing permanently. Lay the profile in position and check it with a straightedge at both ends and the centre. A profile that rocks at the centre will wear through its fixing within months.
-
Avoid creating trip hazards. Measuring finished heights at multiple points prevents the profile from sitting proud of one floor surface. Any lip above 6mm at a transition is a trip hazard, particularly on a staircase or in a high-traffic hallway.
Pro Tip: Run a straightedge across the transition zone before and after fitting the track. If the track rocks at any point, pack it with a thin shim before fixing. A level track is the foundation of a profile that stays tight and flat for years.
Correct profile selection prevents buckling and poor fit by accounting for moisture, expansion, and thickness differences before a single screw goes in. Measure twice, fix once.
How to maintain your flooring profiles for lasting results
A well-fitted solid brass profile needs very little maintenance, but a small amount of regular attention keeps it performing and looking its best.
-
Clean brass profiles with a damp cloth and mild detergent. Avoid abrasive cleaners or steel wool, which scratch the powder-coated finish. A soft cloth removes scuff marks and foot traffic residue without damaging the surface.
-
Inspect fixings every twelve months. Seasonal floor movement can gradually loosen the screws or clips holding a track in place. A loose profile rocks, wears unevenly, and eventually lifts. Tighten any loose screws before they become a problem.
-
Replace worn clips or snap-in components promptly. Clips are inexpensive and easy to swap. A broken clip left in place transfers load to the cap and causes it to flex and crack over time.
-
Match finishes when replacing profiles. If you are upgrading old trims or replacing a damaged section, match the finish across the whole room. Qualitycarpettrims offers ten powder-coated finishes specifically so you can achieve a consistent look throughout your home.
-
Upgrade old plastic or cheap trims when refurbishing. If you are relaying a floor and the existing profiles are plastic, aluminium, or rubber, replace them. They will not outlast the new floor, and they will look out of place against a quality finish.
Key takeaways
Choosing the correct flooring profile based on measured height difference, floor movement, and material quality is the single most important factor in achieving a floor transition that lasts.
| Point | Details |
|---|---|
| Profile type follows height difference | Use a flush reducer at 6mm or less, a bevelled reducer at 6mm to 13mm, and a ramped threshold above 13mm. |
| Never fix floating floors to trims | Fix the track to the subfloor only; the floor must move freely beneath the profile cap. |
| Measure at multiple points | A single measurement misses bows and dips that cause rocking and premature wear. |
| Material quality determines longevity | Solid brass profiles resist denting, splitting, and corrosion where plastic and aluminium fail within years. |
| Match finishes across the room | Consistent profile finishes throughout a floor plan create a coherent, professional result. |
Why I always tell DIYers to spend more on the trim
I have seen hundreds of floor installations where the homeowner spent good money on quality laminate or engineered wood and then finished it with the cheapest trim they could find. Within two years, the plastic has yellowed, the aluminium has bent where a chair leg caught it, and the whole floor looks tired despite the boards themselves being in perfect condition. The trim is the last thing you see and the first thing that fails.
The other mistake I see constantly is fixing the profile directly to the floating floor rather than to the subfloor. The floor tries to expand, the trim holds it back, and within one heating season you have buckling at the edges. Expansion gap coverage requires flexibility, not rigid fillers or trims screwed into the boards themselves.
My honest advice is this: treat the profile as part of the floor, not a finishing touch. Measure the height difference properly, choose the correct profile type for that measurement, and buy solid brass. You will not replace it. You will not regret it. The right flooring trim choice made once is worth ten cheap ones replaced repeatedly.
— Matt
Explore Qualitycarpettrims’ solid brass flooring profiles
If you are ready to fit profiles that will genuinely last, Qualitycarpettrims supplies solid brass flooring trims hand-finished in ten luxury powder-coated finishes. Every profile is British-made, resistant to bending, splitting, and denting, and designed to work with the full range of residential floor types including laminate, vinyl, carpet, and hard flooring.

The range covers T-mouldings, reducers, thresholds, and beading, so you can match profiles across an entire floor plan in a single order. Browse the premium matwell trims for a starting point, or explore the full flooring trim types guide to match the right profile to your specific floor junction. Free samples are available so you can check the finish against your floor before committing.
FAQ
What are flooring profiles used for?
Flooring profiles are finishing strips that cover expansion gaps, protect exposed floor edges, and create smooth transitions between two different floor surfaces. They are fitted at doorways, room perimeters, and anywhere two floor types meet.
How do I choose the right flooring profile?
Measure the height difference between the two floor surfaces at multiple points. Use a flush reducer for differences of 6mm or less, a bevelled reducer for 6mm to 13mm, and a ramped threshold for anything greater than 13mm.
Can I fix a flooring profile directly to a floating floor?
No. The track or base of the profile must be fixed to the subfloor only. Fixing directly to a floating floor restricts its natural expansion and contraction, which causes buckling and edge lifting.
What is the difference between T-moulding and a reducer strip?
T-moulding connects two floors of equal height and bridges the expansion gap between them. A reducer strip slopes down from a higher floor surface to a lower one and is the correct choice where two floors sit at different finished heights.
Why choose solid brass profiles over other materials?
Solid brass profiles resist denting, bending, and splitting under daily foot traffic and furniture load. Plastic, rubber, and aluminium trims deform and discolour within a few years, particularly at external doorways where temperature and moisture fluctuations are greatest.
Recommended
- What is a flooring transition: guide for UK homeowners 2026
- Floor trim types explained for UK homes: A full guide
- Flooring trim terminology explained for UK finishes 2026
- Defining flooring compatibility: the UK DIY and contractor guide