
Blog
Choosing trims for renovations: the complete guide

Jun
TL;DR:
- Choosing the right trims enhances interior cohesion, durability, and safety, especially with high-quality materials like solid brass.
- Selecting profiles that match a home’s architectural style and planning trims as a system ensure a polished, timeless look.
- Proper planning, sampling, and matching finishes across fixtures produce professional results that withstand long-term use.
Choosing trims for renovations is the process of selecting profiles and finishes that combine durability, functional flooring transitions, and design cohesion to define the finished quality of your interior. The right trim does far more than cover a gap. It frames every doorway, anchors every floor, and signals whether a renovation was finished with care or cut short. Solid brass and powder-coated trims are the benchmark for longevity, resisting the splitting, bending, and denting that plague cheaper alternatives. This guide covers trim types, material selection, style matching, and installation planning so you can make confident decisions from the outset.
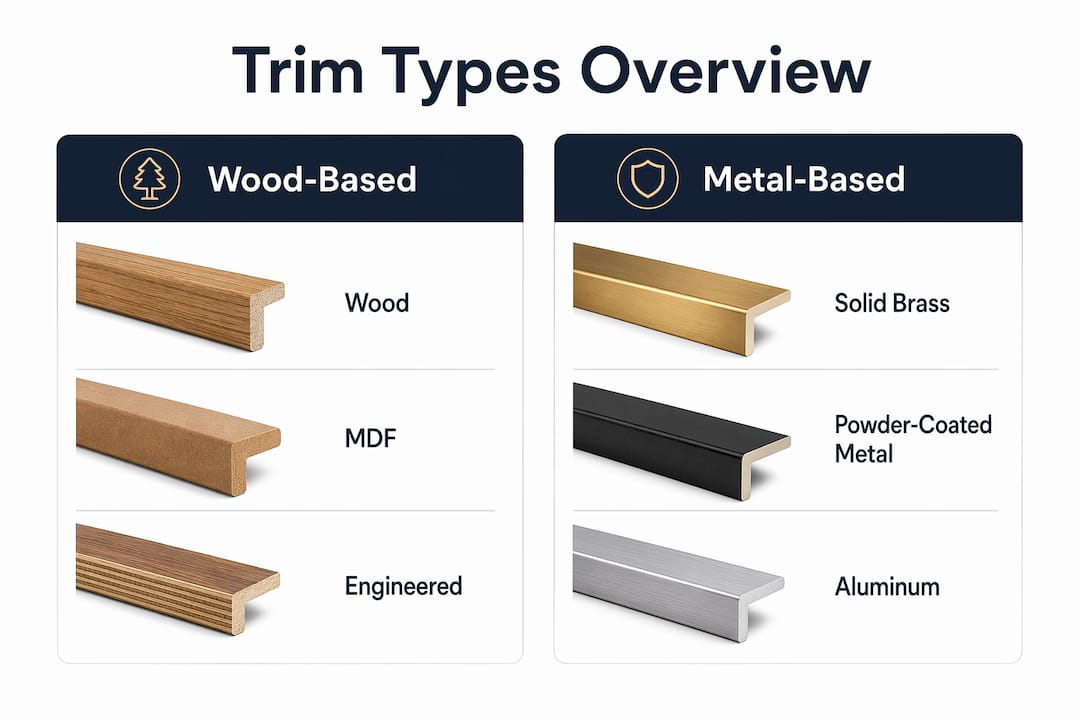
What are the main types of trims used in renovations?
Trims fall into two broad categories: architectural trims that define walls and openings, and flooring trims that manage transitions between surfaces. Both categories are functional and decorative, but confusing one for the other leads to poor results.
Architectural trims shape the visual structure of a room:
- Baseboards run along the base of walls to cover the joint between wall and floor. Taller baseboards and dimensional casing create a more custom look, whereas undersized profiles leave rooms feeling flat and unfinished.
- Crown moulding sits at the ceiling-wall junction and adds a formal, layered finish. It is one of the most impactful architectural trims in terms of perceived room quality.
- Door and window casings frame openings and tie the trim scheme together. They are the most visible trim in any room and set the tone for the entire profile language.
Flooring trims handle the practical challenge of connecting different floor surfaces:
- Threshold strips and door bars cover the transition between two floor types, such as carpet meeting hardwood or laminate meeting tile. They protect exposed flooring edges and prevent trip hazards.
- Edge trims finish the perimeter of a flooring installation where it meets a wall or step, giving a clean, professional edge.
- Quarter-round and shoe moulding seal the gap between flooring and baseboards. This is not merely decorative. Quarter-round serves a functional role by compensating for uneven floors and preventing gaps that can cause damage or safety issues over time.
Understanding which trim type belongs where is the foundation of any well-planned renovation. Skipping a flooring trim to save cost is a false economy. The gap it leaves will collect dirt, lift edges, and create a visible reminder that the job was not completed properly.
How to select trim materials and finishes for longevity
Material choice is where most renovation trim decisions go wrong. Homeowners often default to whatever is cheapest or most available, without considering how that material will perform over five or ten years.
Why material quality determines long-term value
Wood and MDF are common in painted architectural trims. MDF suits painted trim due to its smooth surface and low cost, but it is not moisture-resistant and degrades in bathrooms, kitchens, or any area with humidity. Solid wood performs better in heavy-use areas but costs roughly twice as much to install. Neither material is appropriate for flooring transition trims, where foot traffic, cleaning products, and moisture exposure are constant.
For flooring trims specifically, solid brass and powder-coated metal is the correct choice. Brass does not split under pressure, does not bend when furniture is dragged across it, and does not dent from dropped objects. Powder coating adds a protective layer that resists scratches and holds colour without fading. The trims supplied by Qualitycarpettrims are hand-finished in 10 luxury finishes, which means you are not choosing between functional and attractive. You get both.
| Material | Durability | Moisture resistance | Finish options |
|---|---|---|---|
| Solid brass (powder-coated) | Excellent. Will not split, bend, or dent | High. Suitable for all areas including wet rooms | 10 luxury finishes including brushed, satin, and antique effects |
| Wood | Moderate. Prone to warping and splitting | Low. Degrades in humid environments | Limited to paint or stain |
| MDF | Low. Dents and swells with moisture | Very low. Not suitable for wet areas | Paint only |
| Plastic/PVC | Poor. Brittle over time, discolours with UV exposure | Moderate | Very limited. Yellows with age |
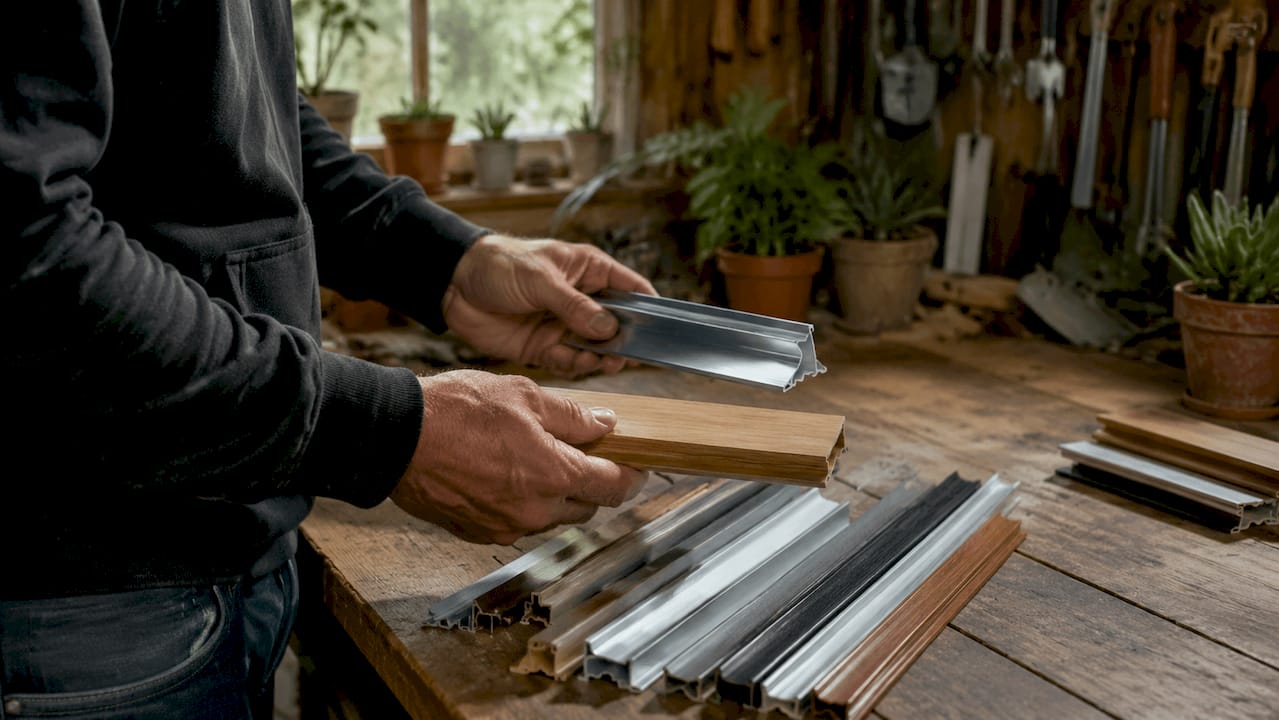
Pro Tip: Always request a physical sample before committing to a finish. Photographs do not convey how a profile catches light or sits against your flooring. A sample held in the actual room will tell you more in thirty seconds than any product image.
Finish selection also affects design cohesion. A brushed brass finish on your door bars should correspond with your door handles, light fittings, and tap finishes. This is not a minor detail. Mismatched metal tones are one of the most common reasons a renovation looks uncoordinated despite good individual choices.
Which trim styles work best with different interior design themes?
The most common mistake in renovation trim selection is choosing profiles based on what looks appealing in isolation rather than what suits the architecture of the home. Selecting trims based on trends rather than the existing architectural vocabulary leads to a piecemeal aesthetic that no amount of paint or furniture can fix.
The principle that guides every good trim decision is this: trims should support the architectural character of the building, not compete with it. Here is how that translates across the most common UK home types:
- Victorian and Edwardian terraces suit detailed, layered profiles with ogee or ovolo shapes. Taller baseboards with a stepped profile, ornate door casings, and decorative corner blocks are all historically appropriate. A flat, minimal trim in a Victorian hallway looks like a mistake rather than a design choice.
- 1930s semi-detached homes work well with moderate-detail profiles. Simple chamfered or rounded baseboards and plain door casings suit the period without over-decorating.
- Modern new-builds and open-plan spaces call for clean, flat profiles with minimal shadow lines. Slim baseboards and square-edge casings reinforce the architectural language without adding visual noise.
- Transitional interiors that blend traditional and contemporary elements benefit from well-proportioned trims with moderate detail. These sit comfortably in either direction and age well regardless of how the rest of the interior evolves.
The rule on timelessness is straightforward. Balanced, moderate-detail profiles remain stylish because they complement rather than dominate. Heavily ornate trims in a plain room, or razor-thin trims in a period property, both date quickly because they fight the space rather than finishing it.
Consistency across connected rooms is equally important. A hallway, living room, and dining room that share the same sightlines must use the same trim profile language. Switching profiles between rooms without a clear architectural reason creates a fragmented interior that feels unresolved. For UK home decor guidance on aligning trim choices with British architectural styles, it is worth reviewing how period features influence the right profile selection.
What are practical tips for planning and installing trims?
Planning trims as a coordinated system rather than a series of individual purchases is the single most effective way to achieve a professional result. Most homeowners who are disappointed with their renovation trim work made decisions room by room, without considering how each choice would read against the next.
Follow this sequence when planning your trim package:
- Audit your architecture first. Walk through the property and identify the dominant architectural style. Note ceiling heights, door heights, and the scale of existing features. These proportions determine the correct trim scale before you look at a single product.
- Establish a design hierarchy. Primary living areas such as hallways, living rooms, and kitchens warrant more detailed profiles. Secondary spaces like utility rooms and storage areas use simpler versions of the same profile family. This creates flow without uniformity.
- Select flooring trims before you lay the floor. The transition profile between your carpet and laminate, or your tile and hardwood, must be specified before installation begins. Retrofitting a trim to an already-laid floor is harder, and the result is rarely as clean.
- Order physical samples. Trim profiles catch light in ways that photographs cannot replicate. Hold samples against your actual flooring and wall colours in the room’s natural light before ordering.
- Measure generously and order with surplus. Cutting waste is unavoidable, and running short mid-project means delays and potential profile mismatches if a batch differs slightly.
Pro Tip: For flooring transition trims in doorways, measure the door width and add 10mm on each side to account for fitting tolerance. A trim that finishes flush with the door frame on both sides looks deliberate. One that stops short looks like an afterthought.
Complex architectural trims such as crown moulding with mitred returns benefit from professional installation. The cost of crown moulding installation runs to £8 to £10 per linear foot for labour alone, which reflects the skill required for accurate mitring and scribing. Flooring trims and door bars, by contrast, are well within DIY capability when the correct profile and fixing method are chosen. Qualitycarpettrims provides fitting guidance with every product to support exactly this kind of confident DIY installation.
Key takeaways
Choosing the right trim material, profile, and finish from the start determines whether a renovation looks finished or merely functional.
| Point | Details |
|---|---|
| Material determines longevity | Solid brass and powder-coated trims outlast wood, MDF, and plastic in every real-world condition. |
| Profile must suit the architecture | Match trim scale and detail to your home’s period and ceiling height, not to current trends. |
| Plan trims as a system | Establish a design hierarchy across primary and secondary spaces before purchasing anything. |
| Physical samples are non-negotiable | How a trim catches light in your room cannot be judged from a product photograph. |
| Flooring trims are functional, not optional | Transition strips and edge trims prevent safety hazards and protect flooring edges from long-term damage. |
Why I always tell renovators to start with the trims, not the paint
Most people treat trims as the last decision in a renovation. They choose flooring, paint, furniture, and then look for something to cover the gaps. That approach is backwards, and it shows in the result.
The trims define the proportions of every surface in the room. Get the baseboard scale wrong and the walls look too short. Choose the wrong door bar finish and every metal element in the room suddenly looks mismatched. I have seen beautifully specified kitchens undermined by a plastic threshold strip that flexed every time someone walked across it. The trim was the last thing chosen and the first thing noticed.
The other mistake I see repeatedly is chasing finish trends. Brushed gold was everywhere a few years ago, and now some of those interiors look dated because the homeowner chose the finish for its moment rather than its fit. The answer is not to avoid bold finishes. It is to choose a finish that relates to the other fixed elements in the room, the door furniture, the light fittings, the tap ware. When those elements share a finish language, the trim disappears into the room as it should, and the space feels resolved.
Premium brass trims with a quality powder-coat finish are the only flooring trims I would recommend without reservation. They do not flex, they do not discolour, and they do not need replacing after three years of normal use. The upfront cost is higher than a plastic or aluminium strip, but the comparison is false economy. You replace cheap trims. You do not replace quality ones.
— Matt
Complete your renovation with trims that last

The finishing details of a renovation deserve the same quality as the flooring and fixtures they connect. Qualitycarpettrims supplies solid brass, hand-finished flooring trims in 10 luxury finishes, from brushed satin to antique bronze, designed to complement every interior style and withstand decades of daily use. Whether you need a matwell flooring trim for an entrance hall, a door bar for a carpet-to-laminate transition, or specialist carpet-to-carpet trims for adjoining rooms, every product is British-made and built to a standard that cheaper alternatives simply cannot match. Order free samples, get expert fitting advice, and finish your renovation the right way.
FAQ
What is the best trim material for flooring transitions?
Solid brass with a powder-coat finish is the most durable option for flooring transitions. It resists splitting, bending, and denting under foot traffic, outperforming wood, plastic, and aluminium alternatives in long-term performance.
How do I choose a trim style that won’t date?
Choose profiles with balanced proportions and moderate detail that match your home’s existing architectural style. Timeless trim profiles complement the building rather than following a trend, which means they remain appropriate regardless of how interior fashions shift.
Should all trims in a home match exactly?
Not exactly, but they must share the same design vocabulary. Use more detailed profiles in primary living spaces and simpler versions of the same profile family in secondary areas. This layered trim hierarchy creates cohesion without monotony.
Can I install flooring trims myself?
Most flooring transition trims and door bars are suitable for DIY installation when the correct profile and fixing method are used. Complex architectural trims such as crown moulding with mitred corners are better left to a professional joiner.
How do I match trim finishes across a room?
Select a trim finish that corresponds with the other fixed metal elements in the space, including door handles, light fittings, and tap ware. Reviewing finish matching guidance before ordering helps avoid the most common coordination mistakes.
Recommended
- Why trims matter: choosing the right finish for your renovation
- The role of trims in home decor: a guide for UK homes
- Why trims enhance decor: a homeowner’s guide
- The role of trims in bathroom fitting explained