
Blog
The role of trims in bathroom fitting explained

May
TL;DR:
- Trims in bathrooms serve a vital protective and sealing function, preventing water damage and improving surface transitions. High-quality materials like powder-coated brass ensure longevity in humid environments, while proper installation and maintenance are crucial for durability. Thoughtful design and matching finishes enhance both safety and aesthetic coherence in bathroom spaces.
Trims are the finishing detail most people overlook until something goes wrong. A poorly chosen trim cracks within months, lets moisture seep behind tiles, or simply looks out of place against an otherwise polished bathroom. Understanding the role of trims in bathroom fitting goes well beyond aesthetics. The right trim protects edges, manages water, and determines how long your finish actually lasts. This guide covers materials, bathroom trim styles, installation techniques, and what separates a trim that holds up for decades from one that lets you down in year two.
Table of Contents
- Key takeaways
- The role of trims in bathroom fitting
- Choosing the right trim material and style
- Installing trims correctly and keeping them maintained
- Design considerations for trims in bathrooms
- My experience: why the trim is never just a trim
- Premium trims for a professional bathroom finish
- FAQ
Key takeaways
| Point | Details |
|---|---|
| Trims protect edges and surfaces | Without proper trims, tile edges chip, gaps collect moisture, and surfaces degrade faster. |
| Material quality determines longevity | Solid brass with powder coating outlasts cheaper materials that warp, split, or corrode in wet environments. |
| Sealing is as critical as the trim itself | The weakest points are corners and bottom edges where moisture exposure is constant. |
| Trim proportions affect room balance | Placing trims in the lower third of a wall creates a more harmonious, integrated look. |
| Installation errors reduce lifespan | Forcing trims against uneven surfaces causes tension, cracking, and eventual moisture ingress. |
The role of trims in bathroom fitting
Most people think of trims as decorative strips you add at the end. They are not. The functional role of trims in bathroom fitting is to protect, seal, and transition. Without them, you expose raw tile edges to knocks and chips, leave gaps where water can travel behind surfaces, and produce a finish that looks unfinished regardless of how good the tiles themselves are.
Trims act as water barriers, create clean transitions between surfaces, and protect edges in wet rooms where moisture is a constant presence. Here is what trims actually do in a bathroom:
- Edge protection: Raw tile edges are brittle and vulnerable to chipping from towels, doors, and everyday contact.
- Moisture management: Trims cover the gap between surfaces where water would otherwise track behind walls or under floors.
- Visual transition: They bridge two different surfaces, such as tile meeting a painted wall, without leaving a raw or messy joint.
- Structural support: Correctly fitted trims hold the edge of a tile bed in place and reduce movement over time.
One point worth clarifying: there is a technical difference between trim kits for shower hardware (handles, heads, valves) and edge profile trims. Many DIY homeowners confuse the two and buy the wrong product entirely. Edge trims are what you need for tile and surface transitions. Shower trim kits are a plumbing product. Getting this wrong is a very common and very avoidable mistake.
Pro Tip: If you notice tiles near your shower screen or bath edge starting to lift or darken at the joint, that is usually a sign that your existing trim has failed to seal moisture out. Replace it before the damage spreads to the substrate.
Choosing the right trim material and style
This is where the importance of bathroom trims becomes most obvious. The bathroom is the most demanding environment in any home. High humidity, temperature swings, cleaning chemicals, and constant water exposure create conditions that destroy poor quality materials fast.
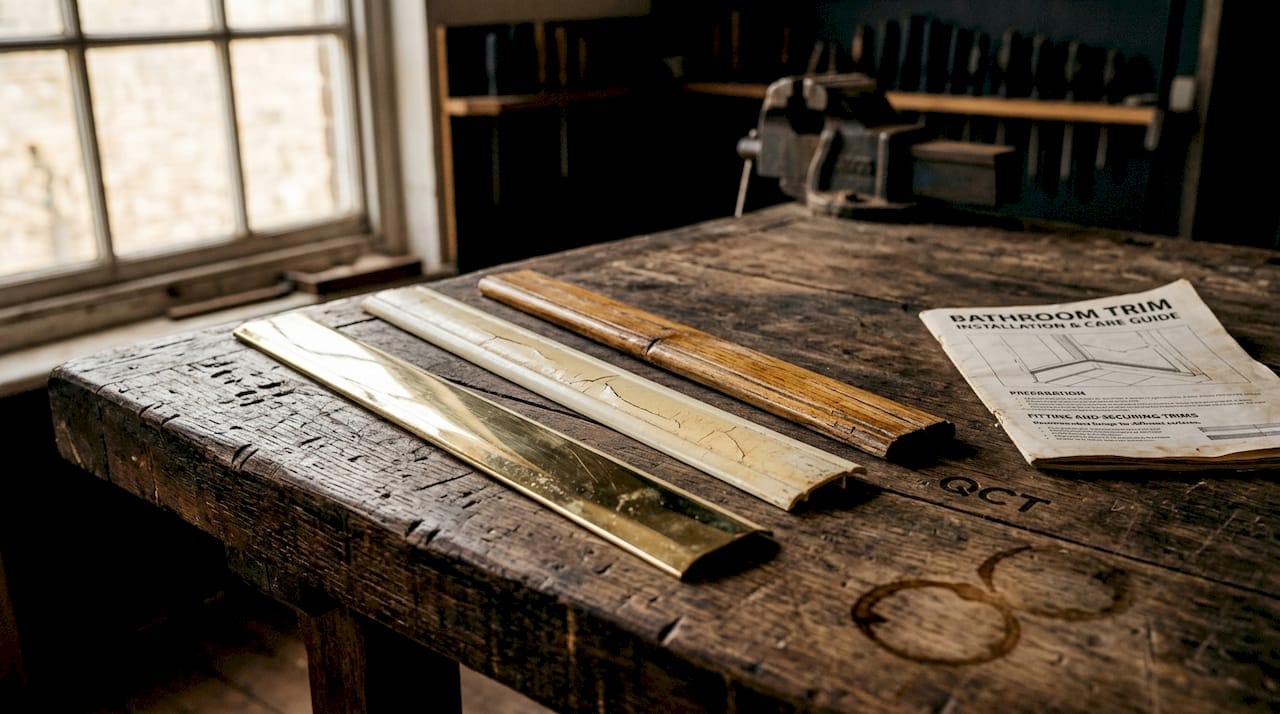
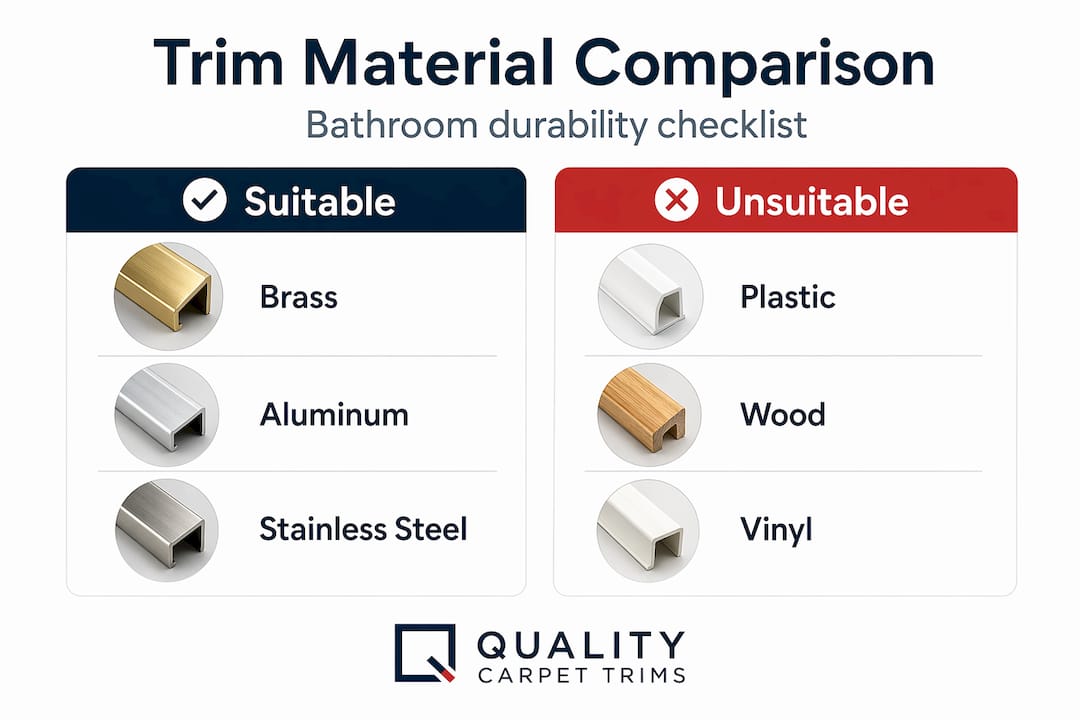
Wooden trims absorb moisture and split. Plastic trims go brittle, yellow, and eventually crack. These are not suitable choices for a wet room, and no amount of paint or sealing will make them perform reliably long term. Solid brass trims with powder coating do not suffer from these problems. They will not split, bend, or dent, and the powder coat finish holds up to both moisture and regular cleaning without peeling or fading.
Here is a comparison of how trim materials perform in a bathroom environment:
| Material | Moisture resistance | Durability | Finish stability |
|---|---|---|---|
| Solid brass (powder coated) | Excellent | Very high | Does not peel or corrode |
| Wood | Poor | Low | Cracks and splits with humidity |
| Plastic | Poor | Low | Yellows and becomes brittle |
| Rubber | Poor | Low | Perishes and stains over time |
When it comes to bathroom trim styles, the profile shape matters just as much as the material. Simple flat profiles are preferred in bathrooms because intricate mouldings with deep grooves trap moisture and soap residue. They become difficult to clean and eventually harbour mildew regardless of how often you wipe them down. A low-profile trim with a smooth, powder-coated surface is far easier to maintain and looks cleaner over time.
The choice of finish also has a practical dimension. Qualitycarpettrims offers ten different hand-finished options in solid brass, which means you can match your trim to your taps, shower hardware, or door furniture with precision. A finish that coordinates with the rest of your fittings makes the trim feel intentional rather than like an afterthought.
Pro Tip: When choosing a finish for your bathroom trims, pick the same tone as your most prominent fixture. If your towel rails are brushed brass, match that. Mixing warm and cool metallic tones is the most common design error in bathroom finishing.
Installing trims correctly and keeping them maintained
The best trim in the world will fail if it is installed badly. Trim longevity depends significantly on environmental control and professional sealing rather than on the material alone. Here is a step-by-step approach to getting installation right:
- Prepare the surface. Clean and dry all edges before fitting. Any moisture, dust, or grease will compromise the adhesive bond and your sealant.
- Dry fit first. Hold the trim in place without adhesive and check the fit. Forcing a trim against an uneven surface creates tension that will eventually crack the trim or the sealant joint.
- Apply adhesive correctly. Use a bathroom-grade adhesive appropriate for your substrate. Follow the manufacturer’s guidance on open time.
- Press and hold. Apply steady, even pressure along the full length of the trim. Use masking tape to hold it in position while the adhesive cures.
- Seal all joints. This step is the one most people rush. The weakest points are corners, bottom edges, and seams where moisture exposure is constant. Use a sanitary silicone sealant and tool the bead carefully.
- Allow full cure time. Do not expose the trim to water until the adhesive and sealant have fully cured. Check the product data sheets for exact times.
For ongoing maintenance, you only need to do a few things consistently:
- Wipe down trims weekly with a non-abrasive cloth and a mild cleaner. Avoid anything with bleach on powder-coated surfaces.
- Inspect silicone seals every six months. Any cracking, shrinking, or discolouration is a sign the seal needs refreshing.
- Check for loose sections by pressing gently along the trim length. A hollow sound or movement means the bond has failed and needs attention.
- Ventilate your bathroom properly after every shower or bath. Humidity cycles cause surfaces to move, stressing even well-fitted trims over time.
For step-by-step guidance, the flooring edge trim installation guide from Qualitycarpettrims covers the core techniques in practical detail.
Design considerations for trims in bathrooms
Getting the functional aspects right is non-negotiable. But the benefits of bathroom fittings also extend to the visual, and trim design choices have a bigger effect on how a bathroom feels than most people expect.
A useful framework for scale is the rule of thirds for trim placement. Placing trim in the lower third of a wall creates visual balance and makes the room feel grounded. Trim that sits too high on the wall can make a small bathroom feel compressed. Getting the proportions right costs nothing extra. It just requires deliberate planning before you start fitting.
There are a few further points worth considering when making design decisions:
- Minimalist versus decorative profiles: In smaller bathrooms, a slim, low-profile trim keeps the visual clean. Larger bathrooms with bolder tile formats can carry a more substantial trim profile without it looking heavy.
- Colour and finish coordination: Your trim finish should relate to your hardware. A polished chrome shower head paired with a brass trim looks disjointed. Cohesion across finishes is what separates a considered design from a random one.
- No-trim designs: A trim-free tile finish creates a modern, seamless look and works well with artisan tiles. It is a legitimate design choice, but it requires highly precise installation and carries real edge damage risk in high-traffic areas. It is not a shortcut.
- Wet zones versus dry zones: In the immediate shower and bath areas, prioritise function over decoration. Further into the room, you have more freedom to choose a trim style that complements the overall design.
The design and safety benefits of well-chosen trims are well documented, and the principle applies in bathrooms as much as anywhere else in the home.
My experience: why the trim is never just a trim
I have seen hundreds of bathroom projects where the trim was treated as a last-minute decision. Someone spends weeks choosing tiles and a fortune on fixtures, then grabs whatever trim is cheapest at the point of completion. It almost always causes regret within two years.
What I have learned is this: the trim is doing more structural and protective work than it appears to be. It is the line between a sealed installation and one that is slowly letting water into your walls. In my experience, the projects that come back with problems are almost always the ones where a cheap plastic or wooden trim was used, not because the installer lacked skill, but because the material failed the installation.
The upfront cost difference between a cheap trim and a solid brass powder-coated trim from Qualitycarpettrims is genuinely small relative to the cost of the bathroom project. But the difference in performance over five or ten years is not small at all. I have seen brass trims that enhance safety and maintain their finish for well over a decade in wet conditions. I have never seen a plastic trim last that long in a bathroom.
The advice I give consistently is to treat the trim as part of the waterproofing system, not as decoration. Once you think about it that way, the decision to invest in quality becomes straightforward.
— Matt
Premium trims for a professional bathroom finish
When you are ready to choose a trim that will actually hold up in a bathroom environment, the material and finish need to be right from the start. Qualitycarpettrims supplies solid brass trims with ten hand-finished, powder-coated options designed for exactly this kind of demanding application. They will not split, dent, or corrode, and every finish is designed to coordinate with the fixtures and hardware you have already chosen.

Whether you are fitting a new bathroom yourself or specifying materials for a client, browse the full trim range to find the profile and finish that fits your project. For threshold and matwell applications, the matwell flooring trims section offers ten colour options with fast UK delivery. If you need guidance before ordering, the team at Qualitycarpettrims is available to advise on compatibility and fitting.
FAQ
What is the role of trims in bathroom fitting?
Trims protect exposed tile and surface edges, seal gaps against moisture ingress, and create clean visual transitions between different surfaces. Without them, edges chip, water tracks behind walls, and the overall finish looks incomplete.
Which trim materials last longest in a bathroom?
Solid brass trims with powder coating are the most durable option for bathrooms. Wood splits and swells with humidity, plastic becomes brittle and cracks, making both unsuitable for wet environments over the long term.
Do bathroom trims need sealing after installation?
Yes. Sealing is one of the most critical steps in installing bathroom trims. Corners, bottom edges, and seams are the most vulnerable points and should be finished with sanitary silicone sealant to prevent moisture penetration.
Can I fit bathroom trims without a trim-free tile design?
A no-trim tile finish is possible but requires precise installation and carries real risk of edge chipping in busy or wet zones. For most DIY projects and high-traffic areas, fitted trims are the more reliable and practical choice.
How do I choose the right bathroom trim style?
Match the trim profile to the room scale, keeping low-profile designs for smaller bathrooms and coordinating the finish with your existing hardware. Simple, flat profiles are easier to clean and maintain in wet areas than ornate or grooved designs.
Recommended
- The role of trims in home decor: a guide for UK homes
- Why trims matter: choosing the right finish for your renovation
- How trims transform decor for safer, stylish spaces
- Floor trim types explained for UK homes: A full guide