
Blog
The role of trims in waterproofing: a UK guide 2026

Jul
Trims are not finishing touches. They are the mechanical backbone of any waterproofing system, and getting them wrong is one of the most common reasons a roof or cladding installation fails within a few years. At every vulnerable edge, junction, and perimeter, trims secure the membrane, prevent wind uplift, and stop water finding its way into the building fabric. Without them, even a perfectly laid membrane is exposed to UV degradation, capillary ingress, and edge lift the moment the weather turns.
The role of trims in waterproofing covers four distinct jobs:
- Mechanical anchoring: Trims clamp the membrane perimeter to the substrate, resisting wind uplift during storms.
- Sealing: They close the junction between the membrane and structural elements, eliminating gaps where water can track in.
- Edge protection: They shield membrane edges from UV exposure, foot traffic, and physical wear.
- Water management: Drip profiles direct rainwater away from sensitive building components and into drainage.
Done properly, a well-specified trim system extends the working life of the waterproofing membrane and reduces the frequency of repairs.
What types of waterproofing trims are there, and what does each one do?
Different zones of a roof or cladding system face different threats, so trim types serve distinct zones from ridge to gutter. Understanding which profile goes where is the starting point for any reliable installation.
- Edge trims: Run along the roof perimeter to protect the membrane edge and provide a clean, mechanically fixed termination. Without edge trims, the membrane end is exposed to UV cracking and wind peel.
- Drip edge trims: Installed on the gutter-facing edge, these guide water cleanly off the roof surface and into the gutter, preventing it from tracking back under the membrane.
- Check kerb trims: Used on the remaining edges of a flat roof to prevent water run-off and push it back toward the drip edge, maintaining a controlled drainage path.
- Gutter trims: Facilitate clean water flow into drainage channels without allowing ingress behind the membrane at the eaves.
- Rake and verge trims: Protect the sloped edges of a gabled or pitched roof, sealing where the membrane or sheet meets the roofline and resisting wind uplift along the gable.
- Ridge trims: Cover the apex where two roof slopes meet, protecting the most exposed seam on the entire roof surface from wind-driven rain.
- Corner trims: Pre-formed profiles for internal and external corners, which are the highest-risk points for on-site cutting errors and subsequent leaks.
- Joiners and end caps: Factory-made accessories that connect trim lengths and close off open ends, removing the need for on-site mitring that frequently causes failures.
Each of these profiles is supported by matching accessories. The right combination creates a watertight perimeter without guesswork or improvised cuts on site.
Pro Tip: Always specify pre-formed corners and joiners rather than cutting mitres on site. Factory tolerances are far tighter than anything achievable with a hand saw on a roof, and pre-formed corners eliminate the leak risk that on-site cuts introduce.

How do trims seal and protect the most vulnerable points in a waterproofing system?
The edges of a waterproofing membrane are where failure almost always begins. The centre of a flat roof is relatively forgiving; the perimeter is not. Trims address this by doing several things simultaneously.
- Mechanical anchoring against wind uplift: Roof trims provide mechanical tension across the membrane edge, holding it flat against the substrate even during storms. This is not a secondary function; it is the primary structural role of a trim in any waterproofing system.
- Eliminating capillary gaps: Water does not need a visible gap to enter a building. Capillary action pulls moisture through surprisingly small spaces between a membrane edge and the substrate. A correctly profiled trim closes these gaps physically, breaking the capillary path before it starts.
- Profile matching to substrate: A trim that is close but not quite right leaves a capillary gap that draws water in during storms. Precise matching of trim height and width to the membrane thickness and substrate profile is a critical success factor, not an optional refinement.
- Protecting timber and sheathing: By covering exposed membrane edges, trims shield the timber fascia, decking, and sheathing beneath from direct moisture contact. Rot in these components is expensive to repair and often goes undetected until the damage is extensive.
- Sealants as support, not solution: Sealant at trim joints is a secondary measure. A joint that relies entirely on a bead of sealant with no proper trim profile behind it will not stay reliable long term. The trim does the structural work; the sealant fills any residual gap.
Pro Tip: Never over-fix trims by pinning both ends tight without allowance for thermal movement. Over-fixing causes buckling, pulled fixings, and new water ingress paths. Leave the clearances the manufacturer specifies and use the correct fixing pattern.
How do trims manage rainwater and drainage in a waterproofing system?
Water management is where trim design gets genuinely interesting. A drip edge trim is not just a tidy finish; it is a physics intervention. Water travelling across a flat or low-pitch roof surface has surface tension that causes it to cling and track back under the membrane edge rather than falling cleanly into the gutter. A correctly designed drip profile physically breaks this surface tension, forcing the water to drop away from the building.
- Drip edge trims create a physical break at the roof edge, guiding water into the gutter and preventing it from wicking back under the membrane or tracking down the fascia.
- Check kerb trims redirect water that would otherwise run off the wrong edge, pushing it back toward the drip edge and into the intended drainage path.
- Secondary drainage planes created by the trim layout give water an exit route even if the primary drainage is partially blocked, improving overall system resilience.
- Correct placement relative to slope and gutter is not negotiable. A drip trim positioned even slightly inside the gutter line can cause water to miss the gutter entirely and saturate the fascia below.
Failures at flashing and trim junctions are a primary cause of moisture-related building damage claims, and the majority of those failures trace back to incorrect trim placement or a missing drip profile rather than membrane failure itself.
Pro Tip: When installing on a low-pitch roof, check that the drip trim overhangs the gutter by at least the depth the manufacturer recommends. Too little overhang and water tracks back; too much and wind can deflect it sideways. The manufacturer’s detail drawing is the reference, not a rough estimate.
How do you choose the right trim for waterproofing applications in the UK?
Material quality is the single biggest variable in trim performance, and it is where the difference between a system that lasts and one that fails within a few years is decided. The UK climate is demanding: persistent rain, wind-driven moisture, UV exposure in summer, and freeze-thaw cycling in winter. Trims that cannot handle all of these simultaneously will degrade.
- Material durability: Cheap trims made from brittle or thin materials warp, dent, and degrade under UK climate stress. Premium solid metal trims resist thermal expansion, impact, and UV cracking in ways that inferior materials simply cannot match. Plastic trims crack in cold weather. Thin aluminium bends and corrodes at cut edges. Wooden trims rot. None of these are long-term solutions.
- Thermal expansion tolerance: Edge trims must permit movement as temperatures change. Rigid materials that cannot flex cause oil-canning and pulled fixings, both of which create new water ingress paths. Solid brass trims accommodate this movement without distorting.
- Profile matching: Trim height and width must match the membrane thickness and substrate profile precisely. A mismatch leaves gaps; gaps let water in. Check the membrane manufacturer’s specification before ordering.
- UK industry standards: Specify trims that meet the requirements of BS 6229 (flat roofs with continuously supported flexible waterproof coverings) and follow NHBC guidance where applicable. These standards exist because the consequences of getting it wrong are structural.
- Long-term cost: A premium trim costs more upfront. It costs far less than the repair bill for a failed waterproofing system, rotted decking, and water-damaged interiors. The maths is straightforward.
For trim selection in renovations, the same logic applies: match the material to the environment, not the budget.
Pro Tip: Get samples before committing to a full order. Fit a sample against your membrane and substrate to confirm the profile sits flush with no gap at the base. If you can slide a piece of card under the trim, the profile is wrong.
Why solid brass trims outperform cheaper alternatives: Qualitycarpettrims’ approach
The case for premium solid metal trims is not marketing. It is physics and track record. DIYers who select brittle or cheap materials find themselves back on the roof within a few years, dealing with warped profiles, lifted fixings, and water ingress that the original trim was supposed to prevent.
Qualitycarpettrims supplies solid brass trims that are hand-finished and powder coated in ten luxury finishes. Solid brass does not split, bend, or dent under impact or thermal stress. The powder coating adds a layer of UV and corrosion resistance that bare metal cannot provide, and it does so without the brittleness of plastic coatings that crack and peel in freeze-thaw conditions.
- Solid brass construction maintains structural integrity under the mechanical stresses of wind uplift and thermal movement that cheaper trims cannot handle.
- Hand finishing produces consistent profile tolerances, which matters for the capillary-gap problem: a trim that sits flush across its full length seals properly; one with manufacturing variation leaves gaps.
- Ten powder-coated finishes mean the trim performs functionally and looks correct against the building’s aesthetic, whether that is a residential flat roof or a commercial installation.
- Expert advice from Qualitycarpettrims supports both DIY installers and professional contractors in selecting the right profile for their specific membrane and substrate.
For professionals managing water risk in commercial buildings, the trim specification is part of the broader moisture management system, not an afterthought. Qualitycarpettrims’ range is built with that level of seriousness in mind.
Pro Tip: For interior wet environments such as bathrooms and utility rooms, the same principles apply. Solid brass trims resist the persistent moisture that degrades cheaper materials within months. The role of trims in bathroom fitting follows the same logic as external waterproofing: seal the edge, protect the substrate, manage the water.
Installation best practices and common challenges with trims in waterproofing
Getting the trim right on paper and getting it right on site are two different things. Most waterproofing failures at trim junctions trace back to a handful of installation errors that are entirely avoidable.
Sequence matters. Trims must be fitted in the correct order relative to the membrane. Fitting a drip trim after the membrane has been laid and bonded makes it almost impossible to achieve the correct overlap and seal. Plan the sequence before the membrane goes down.
Dry-fit before fixing. Align every trim length and corner piece before applying adhesive or driving fixings. Discovering a profile mismatch after the sealant has cured costs far more time than a dry run beforehand.
Thermal movement allowance. Long runs of metal trim expand and contract with temperature. Fixing both ends tight without the clearances the manufacturer specifies causes buckling and pulled fixings. This is one of the most common installation errors on flat roofs, and it creates exactly the water ingress path the trim was installed to prevent.
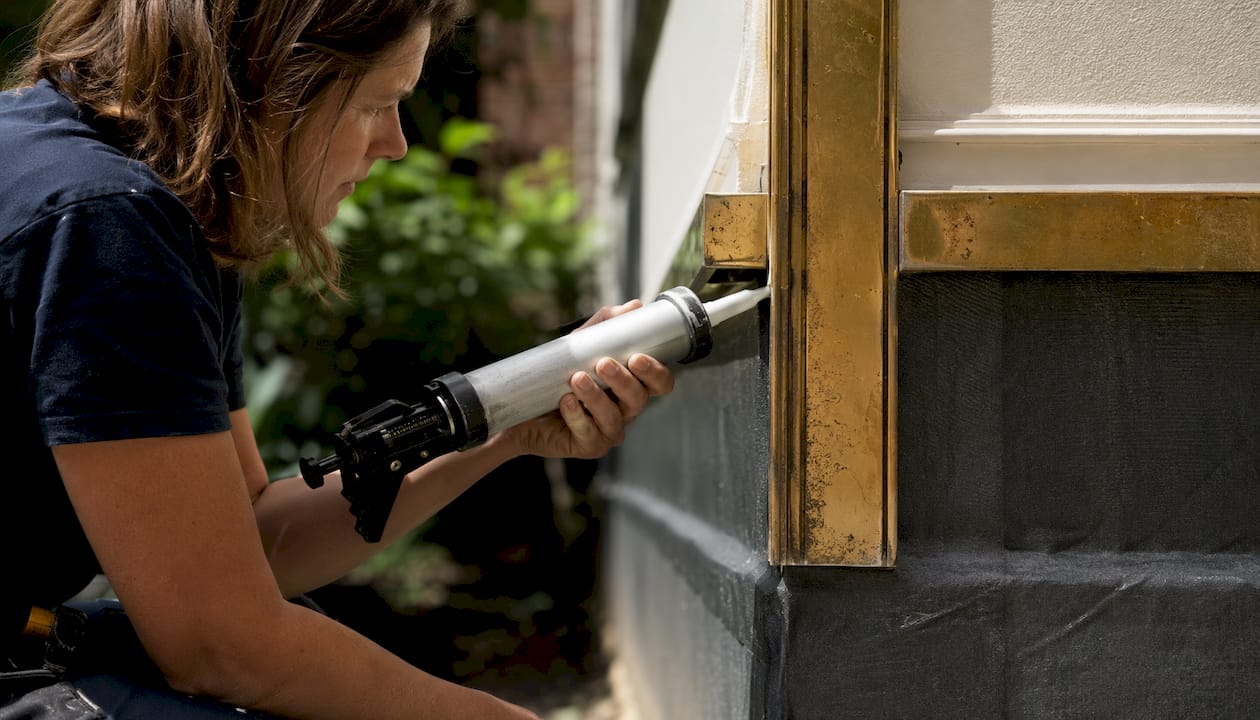
Sealant discipline. Use compatible, weather-resistant sealant at joints, but use it to support the trim, not replace it. A joint held together by sealant alone will fail. The trim profile does the structural work; the sealant fills the residual gap. Applying sealant in cold or damp conditions also reduces adhesion significantly, so check the manufacturer’s temperature range before proceeding.
Pre-formed accessories over on-site cuts. Relying on sealants alone is a temporary fix. Pre-formed corners, joiners, and end caps remove the risk of on-site mitring errors, which are a primary leak cause in waterproofing trim installations. If the system you are specifying does not include factory-made corners, find one that does.
For detailed guidance on professional installation methods that reduce failure rates, the principles are consistent whether you are working on a flat roof or an interior wet room.
Maintaining and inspecting trims to keep waterproofing effective long term
A trim that was correctly installed can still fail if it is not inspected and maintained. The good news is that trim maintenance is straightforward; the bad news is that most building owners skip it until there is a visible leak, by which point the damage is already done.
Inspect twice a year and after major storms. Check every trim length for lifting at the edges, cracking at joints, and any visible gap between the trim base and the substrate. Pay particular attention to corners and joiners, which are the highest-stress points in the system.
Look for these specific warning signs:
- Lifting or bowing along the trim length, which indicates either over-fixing without thermal clearance or substrate movement beneath.
- Discolouration or staining on the fascia or wall below a drip trim, which suggests water is tracking back rather than falling cleanly into the gutter.
- Sealant shrinkage or cracking at joints, which exposes the gap the sealant was closing.
- Rust streaking from metal fixings, which indicates the fixing has been compromised and may be allowing water ingress at the fixing point.
Keep gutters clear. A blocked gutter causes water to back up against the drip trim and fascia, accelerating deterioration of both. Gutter maintenance is trim maintenance.
Clean trim surfaces periodically. Biological growth, moss, and debris hold moisture against the trim surface and accelerate degradation, particularly at joints. A mild cleaning agent and a soft brush are sufficient; avoid abrasive tools that damage powder-coated finishes.
For UK industry standards on trim performance and inspection intervals, the guidance is consistent: regular inspection is cheaper than emergency repair, and a failing trim section that is caught early can be replaced without disturbing the membrane beneath it.
Why solid brass trims from Qualitycarpettrims are worth specifying

If you are specifying or installing trims for a waterproofing system in 2026, the material choice is not a detail to leave until last. Solid brass trims from Qualitycarpettrims are hand-finished, powder coated in ten luxury finishes, and built to resist the splitting, bending, and denting that cheaper materials cannot avoid. They work for both professional contractors and DIY installers, and the expert advice available from Qualitycarpettrims means you get the right profile for your specific application, not a generic recommendation. Browse the full range at the Qualitycarpettrims shop or explore the matwell trim range for edge protection options suited to high-traffic and wet environments.
Key takeaways
Trims are the mechanical and hydraulic components that make a waterproofing system work at its edges, and material quality determines whether they last or fail under UK conditions.
| Point | Details |
|---|---|
| Trims anchor membranes mechanically | They prevent wind uplift and water ingress at every perimeter edge, not just aesthetically finish the roof. |
| Profile matching is critical | A mismatched trim leaves capillary gaps that pull water into the building during storms. |
| Drip trims break surface tension | They physically redirect water into gutters, preventing it from tracking back under the membrane. |
| Solid brass outperforms cheaper materials | Unlike plastic, thin aluminium, or wood, solid brass resists splitting, denting, and thermal distortion under UK climate stress. |
| Inspect twice yearly and after storms | Catching lifting, joint cracking, or sealant shrinkage early prevents membrane damage and costly structural repairs. |
Recommended
- The role of trims in bathroom fitting explained
- The role of trims in home decor: a guide for UK homes
- Flooring trim terminology explained for UK finishes 2026
- Industry standards for flooring trims: a complete UK guide