
Blog
Residential trim use: a homeowner’s complete guide

Jun
TL;DR:
- Residential trim involves installing moulding at junctions of surfaces to hide gaps, protect edges, and enhance interior style. Proper selection of profiles and materials, such as solid brass, ensures durability and a polished appearance that elevates room design. Following the correct installation sequence and proportioning the trim to ceiling height creates a professional, cohesive look.
Residential trim use is defined as the installation of moulding and finishing profiles at the junctions where architectural surfaces meet, covering gaps, protecting edges, and adding visual structure to interior rooms. Known in the trade as trim moulding, these finishing elements appear at walls meeting floors, ceilings meeting walls, and around every door and window frame in your home. Trim is installed precisely where architectural elements meet or transition, making spaces feel complete rather than raw. Choosing the right material matters enormously. Solid brass and powder-coated trims outlast cheaper alternatives that split, bend, and dent within a few years.
What is residential trim use and why does it matter?
Residential trim use covers every finishing profile fitted where two surfaces meet inside your home. Trim and moulding form a protective transition layer that conceals imperfect seams while adding architectural depth and intentionality to interior spaces. Without trim, every room would show raw edges, uneven gaps, and unfinished junctions that no amount of paint can fix.
The functional case for trim is straightforward. It protects walls from furniture scuffs, shields flooring edges from damage, and covers the expansion gaps that all floor coverings need to breathe. The aesthetic case is equally strong. Well-chosen trim gives a room visual weight, proportion, and a sense of craftsmanship that buyers and guests notice immediately.
Door and window casings originated to cover gaps and protect plaster edges before their decorative role was ever considered. That history tells you something useful: trim always starts as a practical solution. The beauty comes second, but it matters just as much.
What are the main types of residential trim?
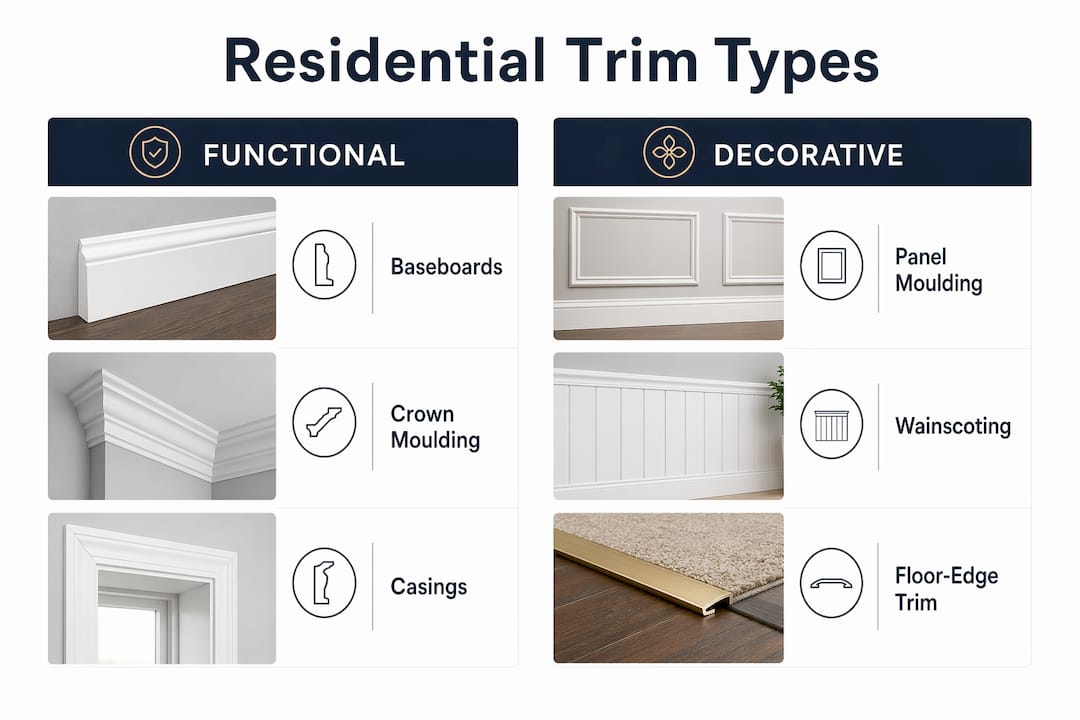
Common residential trim types include baseboards, crown moulding, door and window casing, wainscoting, and floor-edge trims such as shoe moulding and quarter-round. Each type has a specific location and a specific job.
| Trim Type | Location | Primary Function |
|---|---|---|
| Baseboard | Base of walls | Covers wall-to-floor gap, protects plaster |
| Crown moulding | Wall-to-ceiling junction | Adds architectural detail, covers ceiling gap |
| Door casing | Around door frames | Conceals gap between frame and drywall |
| Window casing | Around window frames | Finishes window reveal, covers plaster edge |
| Wainscoting | Lower wall panels | Adds depth, protects wall surface |
| Shoe/quarter-round | Floor-to-baseboard junction | Covers flooring expansion gap |
Baseboards are the most common starting point for any renovation. They run along the bottom of every wall and establish what designers call the “trim datum”, the base visual line from which all other trim elements scale upward. Get the baseboard right and the rest of the room follows naturally.
Crown moulding sits at the opposite end of the room, bridging the wall-to-ceiling junction. It adds height and formality to a space. Slim profiles suit rooms with lower ceilings; deeper, more ornate profiles work in rooms with generous ceiling heights of 2.7 metres or above.
- Baseboards: The foundation of any trim system, typically 70–150mm tall depending on ceiling height.
- Crown moulding: Adds formality and visual height; proportion to ceiling is critical.
- Door and window casings: Cover the gap between frame and drywall, providing both function and a polished finish.
- Shoe moulding: A practical solution for covering expansion gaps at the floor-to-baseboard junction without lifting the entire floor.
- Wainscoting: Adds panel depth to lower walls and protects high-traffic surfaces from marks and damage.
How does residential trim enhance function and aesthetics?
Trim does two jobs at once, and the best installations make both invisible. Trim helps keep floors in place, covers edges to prevent damage, and serves as a protective barrier for vulnerable surfaces. That is the functional layer. The aesthetic layer sits on top of it, adding visual rhythm and architectural character to otherwise plain rooms.
Think of trim as the frame around a painting. Remove the frame and the painting still exists, but it looks unfinished and smaller than it actually is. Add a well-proportioned frame and the whole composition gains authority. Trim works exactly the same way on walls, floors, and ceilings.
A coordinated trim system influences room perception significantly. Disproportionate trims can make rooms appear smaller or visually crowded. This is why matching your baseboard height to your casing width and your crown moulding depth to your ceiling height is not a stylistic preference. It is a structural design decision.
Pro Tip: Paint your trim in a contrasting colour to your walls for maximum architectural impact, or match it to the wall colour for a quieter, more contemporary feel. Both approaches work, but the choice sets the entire tone of the room.
The practical benefits of trim are easy to overlook until something goes wrong. Flooring without edge trims for safety and style creates trip hazards at transitions and allows carpet and hard floor edges to fray or lift over time. Trim prevents all of that.
What should homeowners consider when choosing and installing trim?
Choosing trim is not simply a matter of picking a profile you like. Proportion, material, and installation sequence all determine whether the finished result looks professional or amateurish.
Follow this sequence for a clean result:
- Set baseboards first. Professional installation begins with baseboards to anchor the room’s visual elevation. Everything else scales from this line.
- Size door casings to match. Casing width should relate to baseboard height. A common rule is casing at roughly two-thirds of baseboard height for visual balance.
- Add crown moulding last. Crown is sized to ceiling height and geometry. Rooms under 2.4 metres look best with slim, simple profiles.
- Use coped inside corners, not mitred ones. Coping inside corners yields tighter, cleaner joints than mitring, especially in crown moulding. Mitred corners open up as timber moves; coped joints stay tight.
- Check your reveals. A reveal is the small step back between casing and door frame. Consistent reveals of 6–8mm on all sides give a crisp, intentional look.
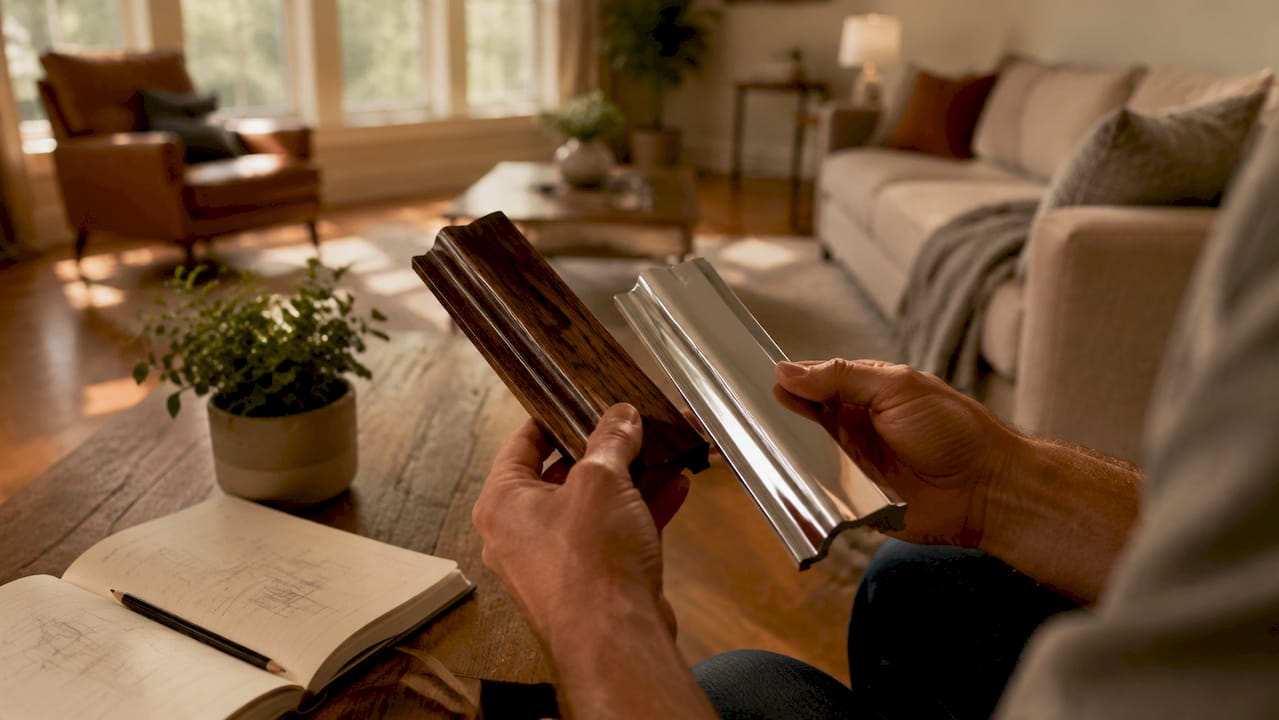
Material choice is where most DIYers make a costly mistake. Wooden trims split along the grain, warp with humidity changes, and require constant repainting. Plastic and rubber trims dent, discolour, and look cheap within a few years. Solid brass trims with powder-coated finishes hold their shape, resist denting, and maintain their finish for the long term. Qualitycarpettrims supplies solid brass door bars and threshold trims hand-finished in 10 luxury finishes, giving you the durability of metal with the visual quality of a premium interior finish.
Pro Tip: Before buying any trim, read the complete renovation guide to understand which profiles suit your specific flooring types and room proportions. Getting the profile wrong is an expensive mistake.
Paint and caulking cannot fix poorly planned or sized trim. Visible gaps and misaligned shadow lines persist regardless of how much filler you apply. Accurate layout and crisp geometry are the only solution.
What decorative trim options can personalise your interior?
Decorative trim options go well beyond the standard baseboard and casing set. For homeowners who want to add genuine architectural character to plain rooms, the following approaches deliver the most impact.
Panel moulding creates a grid of rectangular frames on walls, adding depth and a period feel without structural work. It works in hallways, dining rooms, and bedrooms. The frames can be painted to match the wall for a subtle effect, or picked out in a contrasting colour for a bolder statement.
Wainscoting styles range from simple flat panels to raised-and-fielded designs with multiple layers of moulding. Traditional wainscoting sits at roughly one-third of wall height. Contemporary versions often run higher, at 1.2 metres or above, for a more dramatic result.
Residential trim design ideas that consistently deliver impact include:
- Using a deeper crown moulding profile to add perceived ceiling height in period properties.
- Running continuous picture rail moulding around a room to create a horizontal datum that makes ceilings feel taller.
- Combining baseboard with a separate cap moulding on top for a more substantial, layered profile.
- Using flooring edge trims at every floor transition to create clean, intentional lines between different floor surfaces.
| Decorative Trim Style | Best Room Application | Visual Effect |
|---|---|---|
| Panel moulding | Hallways, dining rooms | Period depth and formality |
| Picture rail | Living rooms, bedrooms | Increased perceived ceiling height |
| Layered baseboard | Any room | Substantial, high-end wall base |
| Wainscoting | Kitchens, bathrooms, hallways | Surface protection plus architectural interest |
The finish you choose on your trim matters as much as the profile. Solid brass trims from Qualitycarpettrims are available in 10 hand-finished colours, from warm antique brass to contemporary brushed finishes, meaning your floor transitions can complement your door furniture, light fittings, and hardware throughout the house.
Key takeaways
Residential trim use is the single most cost-effective way to add architectural quality, surface protection, and visual finish to any interior renovation project.
| Point | Details |
|---|---|
| Trim covers functional gaps | Install at every wall-to-floor, wall-to-ceiling, and door or window junction to hide raw edges. |
| Proportion drives the result | Match baseboard height, casing width, and crown depth to ceiling height for a balanced room. |
| Material quality is non-negotiable | Solid brass and powder-coated trims outlast wooden and plastic alternatives that split, dent, and warp. |
| Installation sequence matters | Set baseboards first, then size casings, then add crown moulding for clean, coordinated joints. |
| Decorative trim transforms plain rooms | Panel moulding, wainscoting, and layered profiles add architectural character without structural work. |
Why i think most homeowners underestimate trim
Most people treat trim as an afterthought. They spend months choosing flooring, paint colours, and furniture, then grab whatever profile is on the shelf at the last minute. That is the single most common reason renovations look almost right but never quite professional.
The truth is that trim is the detail that trained eyes notice first. Walk into any well-designed room and you will see consistent reveals on every door casing, baseboards that relate proportionally to the ceiling height, and floor transitions that sit flush and clean. None of that happens by accident.
What I have found, working with homeowners on renovation projects, is that the material choice is where the biggest gains are available. Wooden trims look fine on day one. By year three, they have swollen, cracked along the grain, and need repainting. Plastic trims are worse. They dent from a single knock and the finish chips at every corner. Solid brass trims simply do not do any of that. They hold their shape, hold their finish, and look as good in ten years as they do on installation day.
The other misconception I encounter regularly is that decorative trim is only for period properties. That is wrong. A contemporary flat with plain white walls and a simple 70mm square-edge baseboard in a brushed brass finish looks just as considered and intentional as any Victorian cornice. The profile changes; the principle does not. Trim is the frame. Every room needs one.
— Matt
Upgrade your renovation with solid brass trims
If this article has convinced you that trim deserves more attention than it typically gets, the next step is choosing the right product for your specific project.

Qualitycarpettrims supplies solid brass door bars and threshold trims hand-finished in 10 luxury colours, from classic polished brass to contemporary matt black. These trims will not split, bend, or dent. Every bar is made in the UK and finished by hand to a standard that cheaper alternatives simply cannot match. Whether you need a door threshold bar for a carpet-to-hard-floor transition or a matwell flooring trim for an entrance area, Qualitycarpettrims has the profile and finish to complete your renovation properly.
FAQ
What is residential trim use in simple terms?
Residential trim use is the installation of moulding and finishing profiles at the junctions where walls meet floors, ceilings, doors, and windows. It covers gaps, protects surfaces, and adds architectural detail to interior rooms.
What is the difference between trim and moulding?
Trim is the general term for all finishing profiles used in interior construction, while moulding refers specifically to profiles with a shaped or decorative cross-section. All moulding is trim, but not all trim is moulding.
Which residential trim type should i install first?
Start with baseboards to establish the room’s visual base line, then fit door and window casings, and add crown moulding last. This sequence produces the cleanest joints and most balanced proportions.
Why choose solid brass trim over wooden or plastic options?
Solid brass trims with powder-coated finishes resist splitting, bending, and denting that affect wooden and plastic alternatives. They hold their finish for years without repainting or replacement, making them the more cost-effective choice long term.
How do i choose the right trim size for my room?
Match trim scale to ceiling height. Rooms with ceilings below 2.4 metres suit slim, simple profiles. Higher ceilings carry deeper, more detailed profiles without looking crowded. A floor trim installation guide can help you work out the correct proportions for your specific space.
Recommended
- Choosing trims for renovations: the complete guide
- The role of trims in home decor: a guide for UK homes
- Why trims enhance decor: a homeowner’s guide
- Why trims matter: choosing the right finish for your renovation