
Blog
Master professional flooring trim methods: 40% fewer fails

Mar
Flooring projects often fail at the finishing line when trims are poorly installed or mismatched to the application. Gaps appear, edges lift, and trip hazards emerge where transitions should provide seamless protection. This guide reveals expert methods for selecting, preparing, and installing flooring trims to professional standards across UK residential and commercial projects. You’ll learn how to handle height differences, choose appropriate materials for wet areas, and avoid the common mistakes that compromise both safety and aesthetics in finished floors.
Table of Contents
- Key takeaways
- Preparing for professional flooring trim installation
- Choosing and applying the right flooring trims for your project
- Common pitfalls and expert tips for long-lasting trim finishes
- Discover premium flooring trims and expert resources
- Frequently asked questions about flooring trim methods
Key Takeaways
| Point | Details |
|---|---|
| Thorough preparation | Successful trim installation begins long before you pick up tools, with thorough preparation including the right equipment and a clear project understanding. |
| Level subfloors first | Solid subfloor must be level and underlay compression accounted for to prevent trims sitting proud or creating lips. |
| Choose appropriate profiles | Selecting trim materials and profiles must match the application, with solid metal trims offering durability and hand finished surfaces resisting scratching. |
| Measure actual heights | Pro tip to measure actual floor heights after installation rather than relying on manufacturer specifications to ensure trims fit accurately. |
Preparing for professional flooring trim installation
Successful trim installation begins long before you pick up tools. Your preparation determines whether the finished result looks professional or reveals amateur shortcuts. Start by assembling the right equipment and understanding your specific project requirements.
Essential tools include a fine-toothed hacksaw for cutting metal profiles, a measuring tape accurate to 1mm, a sharp utility knife for trimming underlay, a spirit level for checking subfloor consistency, and appropriate fixings matched to your substrate type. You’ll also need a pencil for marking, masking tape to protect adjacent surfaces, and a rubber mallet for gentle persuasion without damaging finishes.
Material requirements vary by trim type and project scope. For threshold bars bridging doorways, you need the profile itself plus fixings and any necessary adhesive. Edge trims require matching screws or clips depending on the system. Reducer strips handling height transitions need longer fixings to penetrate both floor levels securely. Always order 10% extra length to account for cutting waste and potential measurement errors.
Subfloor condition directly impacts trim performance. Solid subfloor must be level, and underlay compression accounted for to prevent failures where trims sit proud or create lips. Check levelness across doorways and transition points using a straight edge. Any deviation beyond 3mm over a metre requires correction before proceeding. Expansion gaps around room perimeters need consistent sizing, typically 10mm for laminate and engineered wood, to prevent buckling that pushes trims out of position.
Understanding flooring trim terminology helps you select appropriate profiles. T-mouldings join floors at equal heights, creating a neat division between rooms or material types. Reducers manage height differences up to 12mm, ramping smoothly from the higher to lower surface. Threshold bars cover expansion gaps in doorways whilst providing a defined boundary between spaces. Stair nosings protect step edges and improve visibility. Scotia beading conceals perimeter gaps against skirting boards with a curved profile that accommodates irregular walls.
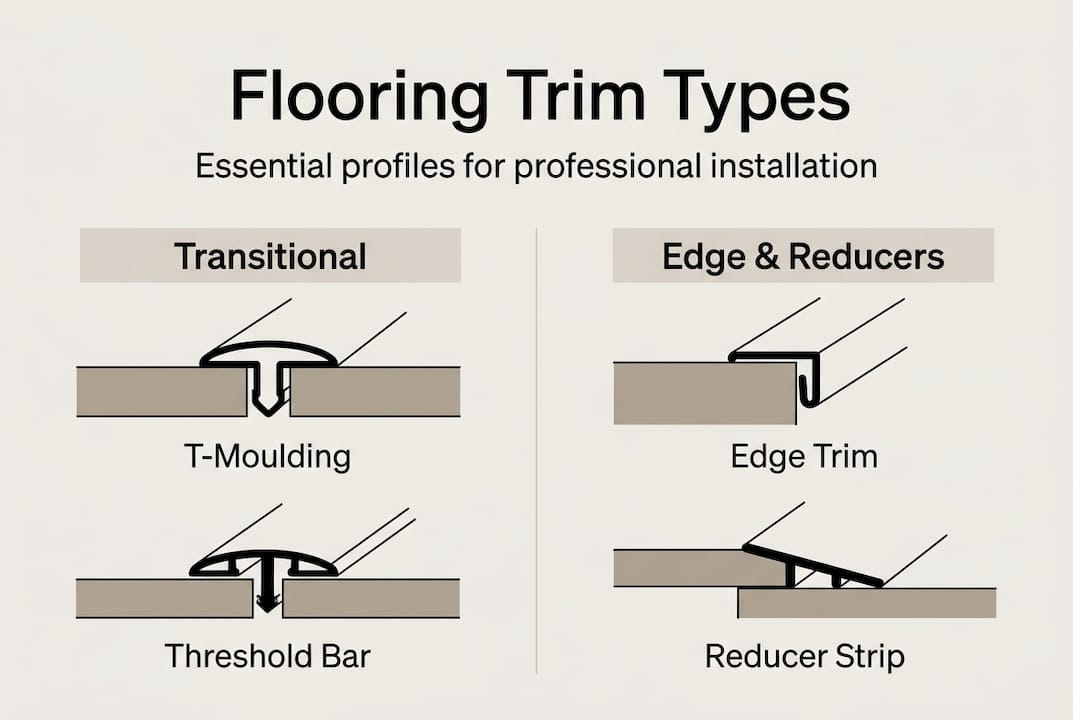
Pro Tip: Measure your actual floor heights after installation rather than relying on manufacturer specifications. Underlay compression and substrate variations often create differences that affect trim selection. A profile designed for 8mm might not suit your actual 10mm step.
Common trim dimensions follow industry standards but verify compatibility with your specific flooring. Standard threshold bars span 30mm to 50mm width, accommodating most doorway gaps. Reducer strips typically measure 40mm to 50mm across the transition zone. T-mouldings range from 30mm to 40mm width. Edge trims vary from 8mm to 20mm height depending on the floor thickness they’re designed to finish. Always check manufacturer specifications against your measured requirements before purchasing.
Choosing and applying the right flooring trims for your project
Selecting appropriate trim materials and profiles requires matching product characteristics to your specific application conditions. Solid metal trims offer exceptional durability and maintain their appearance under heavy foot traffic. The hand-finished surfaces resist scratching better than coated alternatives whilst providing the weight and rigidity needed for secure, long-lasting installations.
Height differences between adjacent floors determine which profile type you need. Flush transitions where floors meet at identical heights require T-mouldings that simply cover the expansion gap without ramping. Reducer strips handle up to 12mm height difference through a gradual slope that prevents tripping whilst protecting both floor edges. Larger steps exceeding 15mm typically need custom solutions or alternative approaches like step nosings rather than standard reducers.
Material selection impacts both performance and aesthetics. Solid brass trims provide maximum durability in commercial settings and high-traffic residential areas. The natural antimicrobial properties suit healthcare and food preparation environments. Finishes ranging from polished brass to antique bronze allow coordination with existing door furniture and fixtures. The substantial weight of metal profiles keeps them firmly in place without relying solely on fixings.
Environmental conditions influence material suitability. Wet areas like bathrooms and utility rooms benefit from trims with inherent moisture resistance. Solid metal profiles won’t delaminate or swell like inferior alternatives. The UK climate presents specific challenges with temperature fluctuations and humidity variations. Quality metal trims maintain dimensional stability and colour consistency through these conditions without fading or warping.
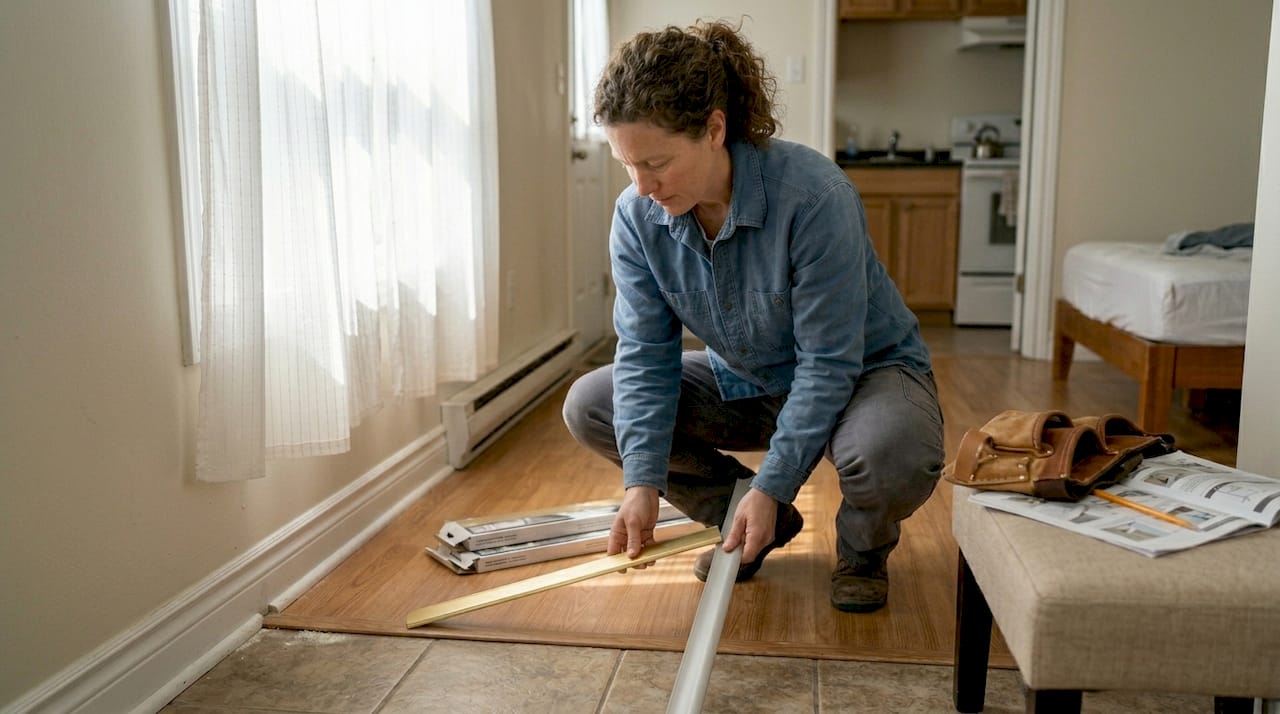
Installation processes vary by trim type but follow consistent principles:
- Measure the exact span required, accounting for any architrave or door stop positions that affect trim placement
- Cut the profile to length using a fine-toothed saw, supporting the trim firmly to prevent distortion
- Test fit the trim in position before fixing, checking it sits flush without rocking or gaps
- Mark fixing positions through pre-drilled holes or according to manufacturer spacing recommendations
- Drill pilot holes in the subfloor using a bit diameter slightly smaller than your screw gauge
- Apply any recommended adhesive to the trim base if specified for your installation type
- Position the trim carefully and insert fixings, tightening gradually to avoid distorting the profile
- Check the trim remains level and properly seated as you secure each fixing point
Threshold bar installation requires particular attention to door clearance. The trim must sit low enough that doors swing freely without catching, yet high enough to cover floor edges completely. This often means routing a shallow recess in wooden door frames or using slimmer profiles in tight clearance situations. Always test door operation before final fixing to avoid having to remove and reinstall.
Transition strips for uneven floors need flexible installation approaches. Where subfloor irregularities prevent perfect trim seating, use appropriate packers or additional adhesive to fill voids. Never force trims flat by over-tightening fixings as this creates stress points that lead to cracking. Address the underlying levelness issue instead.
Edge trim installation follows the flooring edge trims installation guide principles of working systematically along the edge. Start at one end and work towards the other, ensuring each fixing section aligns properly before moving forward. Overlapping sections need precise cutting to create invisible joins.
Pro Tip: Install trims after flooring has acclimatised and settled for 48 hours. This prevents gaps opening up as materials adjust to room conditions. Floating floors particularly need this settlement period before trim fixing locks their position.
| Trim type | Installation time | Durability rating | Best applications | Height capacity |
|---|---|---|---|---|
| T-moulding | 15-20 mins | Excellent | Same height transitions, room dividers | 0mm (flush) |
| Reducer strip | 20-25 mins | Very good | Height differences, carpet to hard floor | Up to 12mm |
| Threshold bar | 10-15 mins | Excellent | Doorways, external thresholds | 0-8mm |
| Stair nosing | 25-30 mins per step | Excellent | Step edges, landing transitions | 15-25mm |
| Edge trim | 30-40 mins per room | Good | Perimeter finishing, expansion gaps | 8-20mm |
Common pitfalls and expert tips for long-lasting trim finishes
Installation errors account for most trim failures, yet remain easily avoidable with proper technique. The most critical mistake involves fixing through floating floors, which prevents the natural expansion and contraction these systems require. Always fix trims to the subfloor only, leaving the floating floor free to move beneath the profile. This means drilling through any overlap carefully to avoid catching the floating floor edge.
Moisture-related failures plague trims in wet areas when inappropriate materials are specified. Whilst some installers use inferior alternatives, solid metal trims eliminate delamination and swelling issues entirely. The inherent moisture resistance of quality brass or other metal profiles means they perform reliably in bathrooms, kitchens, and utility rooms without special treatment or maintenance.
Colour stability matters particularly in UK installations where natural light exposure varies seasonally. Inferior coated trims fade noticeably within months, creating mismatched appearances that cheapen the overall finish. Hand-finished metal trims maintain their appearance indefinitely, with any patina development adding character rather than looking worn.
Improper installs cause 40% of transitions failures; brass trims reduce trip hazards by 30% through their secure edge protection and substantial profile that resists lifting. The weight of quality metal trims contributes to this safety benefit by keeping profiles firmly seated even under heavy traffic.
Acoustic considerations often get overlooked during trim selection. Sound transmission between rooms can increase where trims bridge gaps without acoustic backing. Solid profiles naturally provide better sound blocking than hollow alternatives. Where noise control matters, consider adding acoustic sealant beneath trims during installation to maintain the sound barrier your flooring provides.
Expansion gap sizing directly affects trim performance. Too narrow and the floor has nowhere to expand, pushing against trims and causing buckling. Too wide and trims may not cover the gap adequately, revealing unsightly edges. Standard 10mm gaps suit most laminate and engineered installations, but verify your specific product requirements. Underfloor heating installations often need larger gaps to accommodate greater thermal expansion.
Fixing selection impacts both immediate installation success and long-term durability. Match screw length to your floor construction, ensuring adequate penetration into solid subfloor without breaking through underneath. Screw gauge should suit the trim’s pre-drilled holes without forcing or wallowing. For concrete subfloors, use appropriate plugs rated for the expected load. Adhesive-only installations rarely provide sufficient hold for trims experiencing regular foot traffic.
“The difference between professional and amateur trim installation shows most clearly at threshold bars. Proper measurement, cutting, and fixing creates an almost invisible transition that simply works. Rushed installation with incorrect profiles creates a prominent, often unsafe, feature that draws attention for all the wrong reasons.”
Trim maintenance requirements vary by material but quality metal profiles need minimal attention. Regular sweeping or vacuuming prevents grit accumulation that could scratch finishes over time. Damp mopping with pH-neutral cleaners maintains appearance without damaging metal surfaces. Avoid abrasive cleaners or scouring pads that remove hand-finished patinas.
Pro Tip: Keep spare trim sections from your installation for future repairs. Exact finish matches become difficult years later as manufacturing batches vary. A 200mm offcut stored safely provides perfect material for patching damage or extending installations during renovations.
Choosing the right flooring trim involves balancing aesthetic preferences with functional requirements. The trim should complement your flooring and décor whilst providing the specific performance characteristics your application demands. Don’t compromise on quality to save minimal costs as trim replacement proves far more expensive than specifying correctly initially.
Discover premium flooring trims and expert resources
Achieving professional flooring finishes requires access to quality products designed for reliable performance. Quality Carpet Trims specialises in solid metal door bars and threshold solutions hand-finished in ten beautiful finishes to coordinate with any interior scheme. Each profile is manufactured in the UK to exacting standards, ensuring dimensional accuracy and consistent quality.

The comprehensive range includes solutions for every transition challenge, from flush T-mouldings to substantial reducers handling significant height differences. Matwell flooring trims provide specialist solutions for entrance areas where durability and appearance matter most. Detailed product specifications help you select profiles matching your exact requirements.
Expert guidance supports your project from specification through installation. The flooring trim types explained resource clarifies which profiles suit different applications, whilst flooring trim terminology explained ensures you understand industry language when discussing requirements with suppliers or contractors. Free samples allow you to assess finish quality and compatibility before committing to full orders.
Frequently asked questions about flooring trim methods
What are the main types of flooring trims and their uses?
T-mouldings join floors at equal heights, reducers manage height differences up to 12mm, threshold bars cover doorway gaps, stair nosings protect step edges, and edge trims finish perimeters against walls. Each profile serves specific transition requirements based on floor levels and material types.
How do I handle height differences between floors professionally?
Measure the actual height difference after flooring installation, then select reducer strips rated for that specific range. Install reducers with fixings into the subfloor only, ensuring the ramp sits securely without gaps. Differences exceeding 15mm typically require alternative solutions like step nosings rather than standard reducers.
Can I install flooring trims myself or should I hire a professional?
Competent DIY enthusiasts can install trims successfully with proper preparation, appropriate tools, and careful attention to manufacturer guidelines. Complex installations involving multiple trim types, difficult substrates, or commercial settings benefit from professional installation to ensure compliance and warranty protection.
What materials are best for trims in wet areas?
Solid metal trims provide superior moisture resistance without delamination or swelling issues. Brass profiles offer natural antimicrobial properties suitable for bathrooms and kitchens whilst maintaining appearance despite humidity exposure. Avoid inferior alternatives that deteriorate rapidly in wet conditions.
How do I avoid trip hazards with flooring trims?
Ensure trims sit flush with adjacent floor surfaces without proud edges or lips. Select appropriate reducer profiles for height transitions rather than forcing incompatible trims. Fix trims securely to prevent lifting, and verify all fixings are countersunk properly. Quality metal trims reduce trip hazards by 30% through their substantial, stable profiles.
Recommended
- Installing Flooring Edge Trims for Seamless Floor Transitions
- Flooring Edge Trims: The Key to a Seamless Finish
- Flooring Trim: Ensuring Seamless, Safe Transitions
- Matwell Flooring Trim – Premier Flooring Trims. 10 Colours Order Online Now
- Building Beginner Woodworking Projects: 60% Avoid Mistakes