
Blog
How to install threshold bars: a step-by-step guide

Jun
TL;DR:
- Proper installation of threshold bars depends on selecting the correct profile and securing fixings at proper intervals.
- Choosing the right material and maintaining expansion gaps ensure long-lasting, safe flooring transitions.
A threshold bar, also called a door bar or transition strip, is a floor trim that joins two different floor surfaces at a doorway, protecting exposed edges and allowing for natural floor movement. Knowing how to install threshold bars correctly makes the difference between a finish that lasts years and one that creaks, lifts, or catches the door within months. The standard door clearance in UK homes is 10 mm above the finished floor, and fixings should sit 50 mm from each end with intervals of 250–300 mm along the bar. Get those numbers right from the start, and the rest of the job follows logically.
What tools and materials do you need to install threshold bars?
Preparation is the part most DIY enthusiasts skip, and it is the part that causes the most problems. Gather everything before you start cutting.
Tools you will need:
- Tape measure and pencil
- Fine-toothed saw or mitre saw
- Drill with masonry bits and a countersink bit
- Rawl plugs and screws
- Contact adhesive (for flat, sealed surfaces)
- Hammer and tapping block
- Spirit level
- Metal file or deburring tool
- Safety goggles and dust mask
Materials to select carefully:
The trim itself matters more than most homeowners realise. Wooden trims split along the grain, plastic trims crack under foot traffic, and aluminium trims dent and scratch within months. Solid brass threshold bars with a powder-coated finish will not bend, split, or dent, and they hold their finish for the life of the floor.
Before you touch a drill, clean the floor edges thoroughly. Check that the floor surface near the doorway is stable and does not flex when you press on it. Reinforce any subfloor that moves underfoot, because a threshold fitted over a flexible edge will creak and eventually work loose. If the door lining sits tight to the floor, undercut it with a multi-tool so the bar slides neatly beneath it.
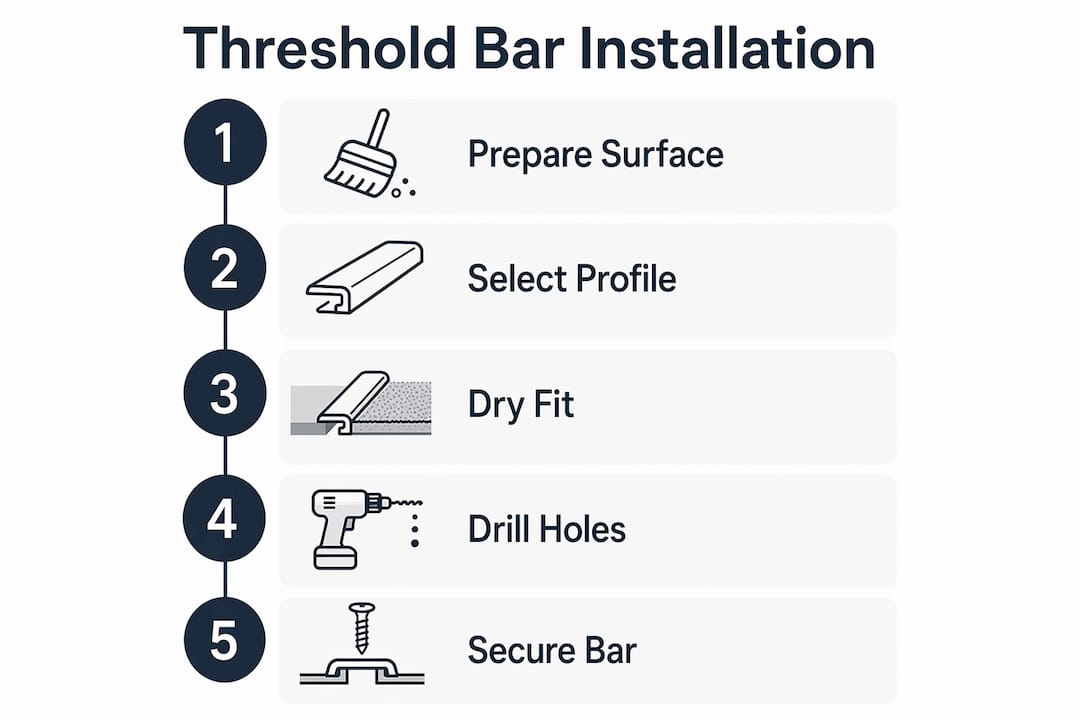
Pro Tip: Test-fit the bar dry before drilling anything. Lay it in position, close the door, and check clearance. Catching a problem at this stage costs nothing. Catching it after drilling costs time and a filled hole.
How do you choose the right threshold bar profile?
The profile you choose depends entirely on the height relationship between your two floors. Fitting the wrong profile is the single most common mistake in door threshold installation, and it creates trip hazards as well as floor damage.
| Floor situation | Correct profile | Height tolerance |
|---|---|---|
| Both floors at the same level | T-bar (double-sided) | Up to 2–3 mm difference |
| One floor higher than the other | Ramp-style reducer | Height differences up to 15–20 mm |
| Carpet meeting hard floor | Single-edge door bar | Varies by carpet pile height |
| Carpet meeting carpet | Flat cover strip | Minimal height difference |
A T-bar profile works where both floors sit at the same level, with a tolerance of 2–3 mm between surfaces. Beyond that tolerance, the bar rocks and creates an uneven edge. A ramp-style reducer handles height differences up to 15–20 mm and creates a gradual slope that is both safe to walk on and compliant with basic accessibility expectations.
Floating floors like laminate and LVT expand and contract with temperature and humidity changes. For these floors, maintain an expansion gap of 10–12 mm along the doorway beneath the threshold strip. Skipping this gap causes the floor to buckle, and it voids most manufacturers’ warranties. The threshold bar sits over this gap and conceals it without restricting movement.
Pro Tip: If you are fitting a threshold between a floating floor and a fixed floor like tile, always leave the expansion gap on the floating floor side only. The tile does not move, so there is no gap needed beneath that edge.
Door clearance also affects profile choice. UK door clearance is typically 10 mm above the finished floor. A profile that sits too high will catch the door on every swing. Measure the gap under your door before selecting any bar, and compare it against the profile’s finished height.
Step-by-step guide to installing threshold bars correctly
This is where the job either goes well or goes wrong. Follow each step in order.
-
Measure the doorway width accurately. Measure at the floor level, not at the frame. Doorways are rarely perfectly square, so measure at both ends of the opening and use the shorter measurement. Mark your cut line on the bar with a pencil.
-
Cut the bar to length. Use a fine-toothed saw or mitre saw. Measurement tolerances on cuts should be under 1 mm per end for a tight fit. After cutting, smooth the edges with a metal file to remove any sharp burrs. This step protects both the floor and anyone who brushes against the edge.
-
Position the bar correctly. The threshold should sit centred under the closed door leaf for clean aesthetics and effective draught control. Mark the centreline on the floor with a pencil.
-
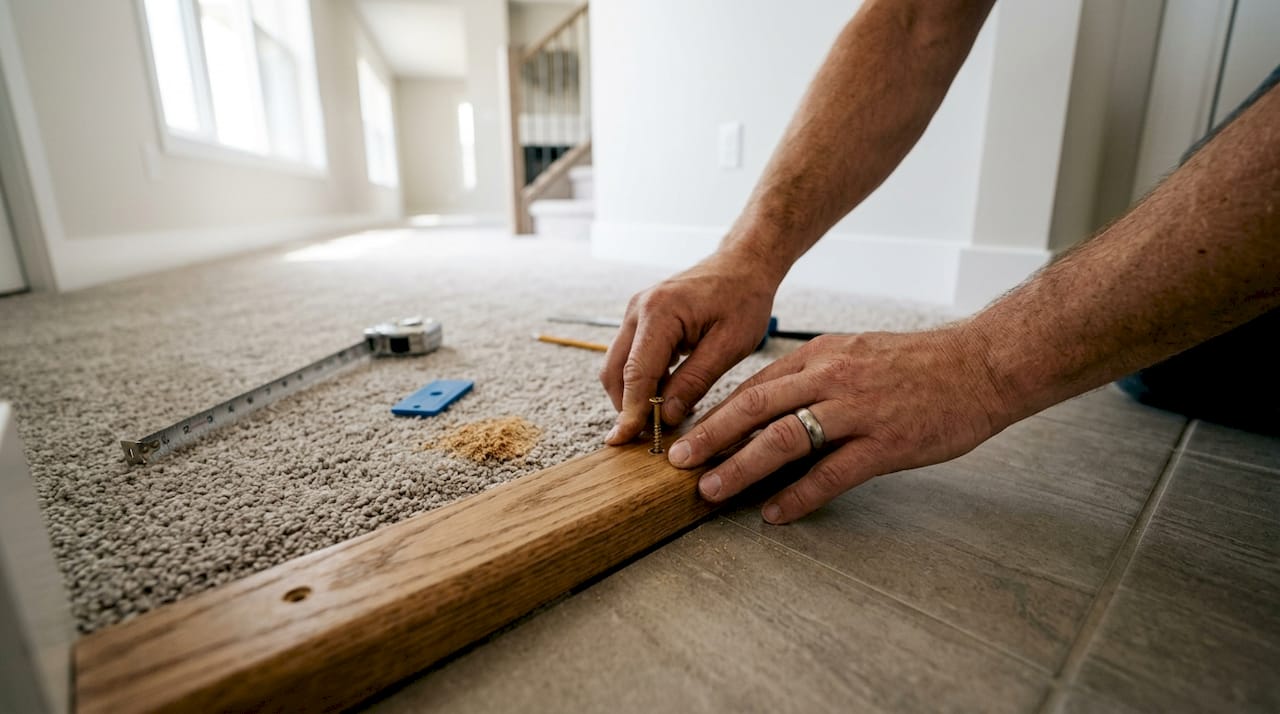
Mark your fixing positions. Place the bar or its base track in position. Mark pilot hole positions starting 50 mm from each end, then every 250–300 mm along the length. These spacings prevent the bar from lifting between fixings and distribute load evenly.
-
Choose your fixing method. Two methods work well, and the right choice depends on your subfloor and foot traffic.
- Screw-down fixing: Drill pilot holes at each marked position. For concrete subfloors, use a masonry bit and insert rawl plugs before screwing down. This method suits busy doorways and uneven floors. It is the more secure option in most UK homes.
- Adhesive fixing: Self-adhesive fixings work well on flat tile or sealed wood floors with light foot traffic. The surface must be clean, dry, and grease-free. Apply contact adhesive to both the bar and the floor, allow it to become tacky, then press firmly into position.
-
Fit the base track or fix the bar directly. Some threshold systems use a separate base track that screws down first, with the top profile clipping or pressing over it. If your bar uses a track, screw it flat and straight before fitting the top. Use a spirit level to confirm it sits true.
-
Fit the top profile. Press or tap the top profile into place using a tapping block and hammer. Never strike the bar directly with a hammer, as this dents the finish. Work along the length gradually rather than pressing one end down fully before the other.
-
Check door clearance and walk the bar. Close the door and confirm it swings freely without catching. Walk over the bar several times. A correctly fitted bar feels solid with zero movement. Any flex or noise at this stage means a fixing is loose or the subfloor needs attention.
Pro Tip: If you are fitting into a concrete subfloor and the rawl plug spins in the hole, the hole is too large. Fill it with a slightly larger plug or use a two-part filler, allow it to cure fully, then re-drill.
Common mistakes and how to fix them
Most threshold problems trace back to one of a handful of errors. Knowing them in advance saves a second trip to the floor.
- Wrong profile for the height difference. A T-bar fitted over a 10 mm height difference rocks and creates a trip hazard. If this happens, remove the bar and fit a ramp-style reducer instead.
- No expansion gap under floating floors. This causes the floor to buckle toward the doorway, especially in rooms with underfloor heating. Remove the bar, pull back the floor edge, cut the correct gap, and refit.
- Subfloor flex causing creaking. The threshold is not the problem. The subfloor is. Fixing thresholds over floor edges that flex always leads to noise and eventual failure. Secure the subfloor first.
- Door catching on the bar. The profile sits too high. Either choose a lower-profile bar or plane the door base slightly. Always measure door clearance before buying.
- Adhesive lifting after a few weeks. This usually means the surface was not clean enough, or the adhesive was not given enough tack time before pressing. Remove the bar, clean both surfaces with a degreaser, apply fresh adhesive, and allow it to become properly tacky before refitting.
A threshold bar that lifts at one end is almost always an adhesive failure, not a product failure. The fix takes ten minutes if you catch it early.
For old properties with uneven floors, use a flexible adhesive rather than a rigid one, and consider transition strips designed for uneven floors that accommodate variation across their width.
Key takeaways
Correct threshold bar installation depends on choosing the right profile, maintaining expansion gaps, and securing fixings at the correct spacing of 50 mm from each end and every 250–300 mm along the bar.
| Point | Details |
|---|---|
| Profile selection is critical | Use a T-bar for level floors and a ramp reducer for height differences up to 15–20 mm. |
| Expansion gaps protect floating floors | Leave 10–12 mm beneath the bar for laminate and LVT to prevent buckling and warranty issues. |
| Fixing spacing prevents lifting | Place fixings 50 mm from each end, then every 250–300 mm for a solid, creak-free result. |
| Subfloor stability comes first | Never fix a threshold over a flexing floor edge. Reinforce the subfloor before fitting. |
| Material quality determines longevity | Solid brass bars with powder-coated finishes outlast wooden, plastic, and aluminium alternatives. |
What I have learned from years of threshold installations
The jobs that go wrong are almost never about the bar itself. They are about the five minutes of preparation that did not happen. I have seen beautiful floors ruined by a threshold fitted without an expansion gap, and I have seen cheap trims dent and discolour within a season. Both problems are avoidable.
My strongest advice is this: spend more time on the dry-fit than on the actual fixing. Lay the bar in position, close the door, check clearance, press on the floor edge, and look at the height difference between the two surfaces. If anything feels off at that stage, sort it before you drill. Once the holes are in, you are committed.
On material choice, I will not compromise. Wooden trims split when moisture gets into the grain. Plastic trims crack under a loaded trolley or even a heavy suitcase. Aluminium trims scratch and dent with normal use. Solid brass with a powder-coated finish is the only material that holds up to real domestic life without looking tired within a year. The ten luxury finishes available from Qualitycarpettrims mean you can match any interior without settling for a bar that looks like an afterthought.
The other thing most guides miss is the finishing detail. Concealed fixings, a bar that sits flush with both floor surfaces, and a clean cut at each end are what separate a professional result from a DIY one. Take the extra two minutes to file the cut ends smooth and check the bar is level before you press it home. That is the difference between a floor that looks finished and one that looks fitted.
— Matt
Qualitycarpettrims threshold bars: built to last
If you have followed this guide, you know exactly what a quality threshold bar needs to do. It needs to hold firm, sit flat, and look good for years without bending, splitting, or denting.

Qualitycarpettrims supplies solid brass door threshold bars hand-finished in 10 luxury finishes, from brushed gold to satin chrome, to match any interior scheme. Every bar is made in the UK and built to the fixing standards covered in this guide. Whether you need a T-bar for level floors, a reducer for a height difference, or an extra wide threshold for a tricky gap, the full range is available to order online with fast UK delivery. Browse the complete collection and order a free sample before you commit.
FAQ
What is the correct fixing spacing for a threshold bar?
Place fixings 50 mm from each end of the bar, then every 250–300 mm along its length. This spacing prevents lifting between fixings and distributes load evenly across the bar.
Do I need an expansion gap under a threshold bar?
For floating floors like laminate and LVT, leave an expansion gap of 10–12 mm beneath the bar. This gap allows the floor to move with temperature and humidity changes without buckling.
How do I stop a threshold bar from creaking?
Creaking almost always comes from a flexible subfloor rather than the bar itself. Reinforce the floor edge before fitting, and confirm the bar feels solid with zero movement when walked on after installation.
Can I use adhesive instead of screws to fit a threshold bar?
Adhesive works well on flat, sealed surfaces with light foot traffic. For busy doorways or concrete subfloors, screw-down fixing with rawl plugs is the more secure and durable method.
What type of threshold bar suits a height difference between floors?
Use a ramp-style reducer for height differences up to 15–20 mm. A T-bar suits floors at the same level with a tolerance of no more than 2–3 mm between surfaces.
Recommended
- Understanding door bars: seamless flooring transitions made easy
- How To Fit A Door Bar – Quality Carpet Trims
- Door bars explained: achieve flawless flooring transitions
- Threshold bars explained: Types, safety & best choices