
Blog
How to install carpet edge trims for durable flooring

Mar
Installing carpet edge trims properly transforms vulnerable carpet edges into durable, safe transitions that enhance your home’s appearance. Without correct trims, carpet edges fray within months, creating unsightly wear and tripping hazards that compromise both safety and aesthetics. This guide walks you through selecting appropriate trims, preparing surfaces correctly, and installing them securely to achieve professional results that extend carpet life by years whilst maintaining clean, polished transitions between rooms and flooring types.
Table of Contents
- Preparing For Carpet Edge Trim Installation
- Choosing The Right Carpet Edge Trim And Fixing Method
- Step-By-Step Carpet Edge Trim Installation
- Common Problems And Quality Assurance
- Get Quality Carpet Edge Trims And Expert Support
- Frequently Asked Questions
Key takeaways
| Point | Details |
|---|---|
| Preparation prevents failure | Proper subfloor preparation eliminates uneven surfaces that cause premature trim wear and aesthetic issues |
| Profile selection matters | Z-bar, reducer strips and ramped profiles suit different height transitions and traffic patterns |
| Fixing methods vary | Self-adhesive works for light traffic whilst screw-down fixings handle heavy use and concrete subfloors |
| Installation precision reduces wear | Correct installation reduces edge wear by 40% compared to untrimmed carpet edges |
| Quality assurance extends longevity | Regular inspection and prompt repairs prevent minor issues escalating into costly carpet replacement |
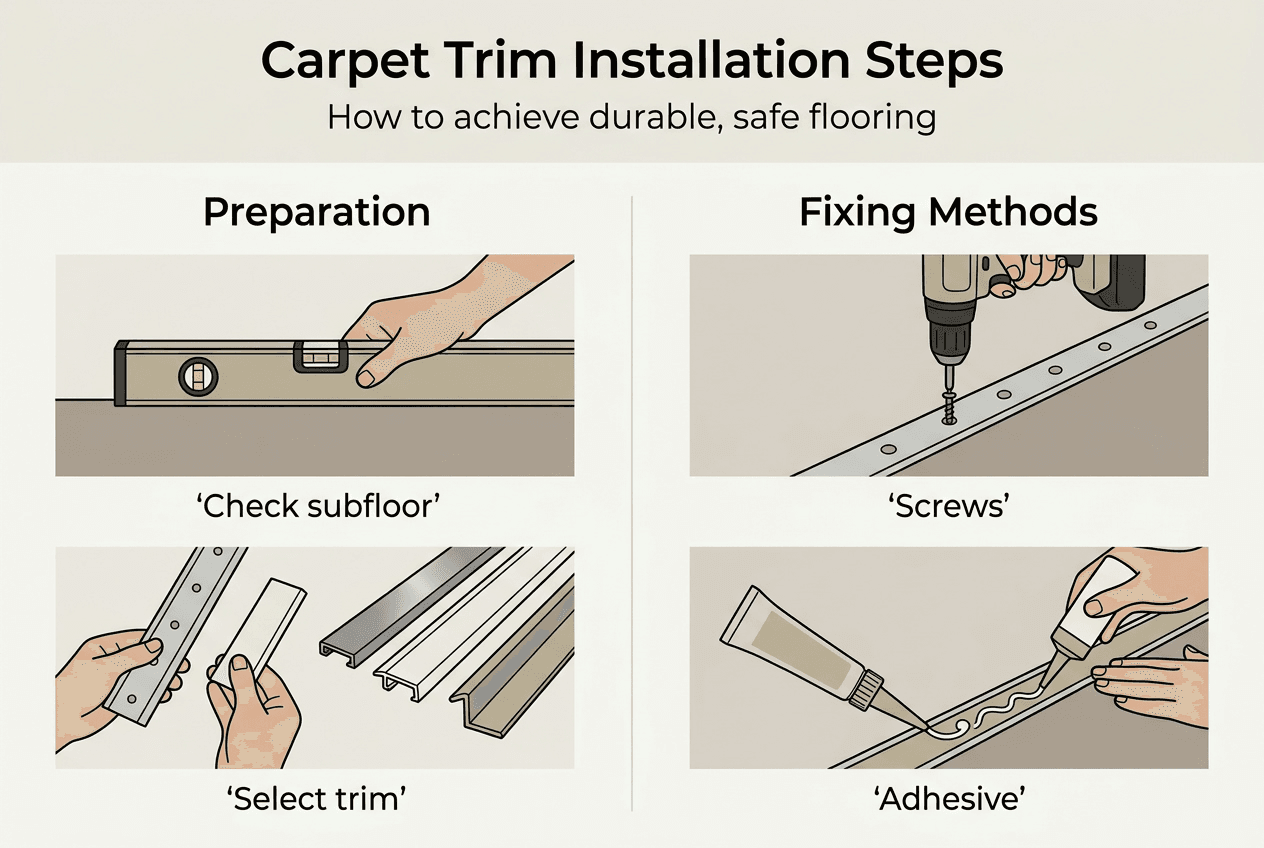
Preparing for carpet edge trim installation
Successful carpet edge trim installation begins with thorough subfloor preparation, as proper preparation is crucial for installation success, with uneven surfaces leading to premature wear and aesthetic issues. Start by removing existing trims, carpet tacks, and debris from the installation area. Vacuum thoroughly to eliminate dust and particles that interfere with adhesive bonding or screw placement.
Inspect the subfloor carefully for damage, rot, or structural weaknesses. Concrete subfloors require moisture testing before proceeding, as excess moisture causes adhesive failure and trim corrosion over time. Use a moisture metre to verify readings below 75% relative humidity for concrete surfaces. Wooden subfloors need checking for loose boards, protruding nails, or squeaks that indicate movement underneath.
Level any uneven areas using self-levelling compound for concrete or plywood shims for wooden subfloors. Height variations exceeding 3mm over a metre span create visible trim undulations and stress points where fixings fail prematurely. Fill cracks and gaps with appropriate filler, allowing complete drying before trim installation begins.
Gather essential tools and materials before starting work to maintain workflow efficiency:
- Tape measure and pencil for accurate measurements
- Hacksaw or mitre saw for cutting metal trims cleanly
- Hammer and nail punch for tack strips
- Screwdriver or drill with appropriate bits
- Adhesive suitable for your subfloor type
- Spirit level for checking alignment
- Safety equipment including gloves and eye protection
Select trims suited to your carpet pile height and expected traffic levels. Thicker carpets require deeper trim channels, whilst high-traffic areas benefit from wider profiles that distribute weight more effectively. Quality Carpet Trims offers step-by-step edge trim installation guidance covering various scenarios and trim types.
Pro Tip: Test fit your chosen trim profile before fixing permanently by placing it dry against the carpet edge to verify the carpet tucks securely into the channel without forcing or leaving gaps.
| Subfloor Type | Preparation Required | Drying Time | Recommended Fixing |
|---|---|---|---|
| Concrete | Moisture test, levelling compound | 24-48 hours | Adhesive or masonry screws |
| Wooden boards | Secure loose boards, fill gaps | 2-4 hours | Wood screws or panel pins |
| Plywood | Check for delamination, sand smooth | 1-2 hours | Wood screws |
| Chipboard | Reinforce edges, seal moisture | 4-6 hours | Longer screws into joists |
Choosing the right carpet edge trim and fixing method
Selecting appropriate trim profiles and fixing methods determines installation longevity and aesthetic success. Z-bar trims create neat transitions between carpet and hard flooring by gripping carpet edges within a metal channel that sits flush with the hard surface. These suit level transitions or minimal height differences up to 3mm. Reducer strips handle height differences between 3mm and 15mm by creating a gentle ramp that eliminates trip hazards whilst maintaining visual flow.

Ramped profiles offer wider transitions ideal for wheelchair access and mobility needs, spreading height changes over greater distances to meet accessibility standards. T-mouldings work for same-height transitions between two carpet areas or carpet to carpet tile joins, holding both edges securely within a central channel.
Material choice impacts durability and appearance significantly. Solid metal trims manufactured in Britain provide superior longevity in high-traffic areas, resisting deformation and maintaining secure carpet grip for decades. Quality Carpet Trims specialises in hand-finished solid metal profiles available in ten finishes to complement any interior scheme, from polished brass to satin chrome and antique bronze.
Fixing method selection depends on subfloor composition and traffic expectations. Self-adhesive trims offer quick installation on smooth, level surfaces in residential settings with moderate foot traffic. The adhesive backing bonds directly to clean subfloors without drilling or hammering. However, the choice between self-adhesive and screw-down fixings depends on subfloor type and traffic levels, with screws providing superior holding power.
Screw-down fixings deliver permanent installation suitable for commercial spaces, rental properties, and areas with heavy traffic or wheeled equipment. Screws penetrate wooden subfloors directly or use wall plugs in concrete and masonry. This method allows trim removal and replacement without surface damage, valuable for future refurbishment projects.
| Fixing Method | Best For | Installation Time | Holding Strength | Removability |
|---|---|---|---|---|
| Self-adhesive | Smooth surfaces, light traffic | 15 minutes | Moderate | Difficult, may damage surface |
| Wood screws | Wooden subfloors, moderate traffic | 30 minutes | High | Easy with correct tools |
| Masonry screws | Concrete, heavy traffic | 45 minutes | Very high | Moderate, leaves holes |
| Panel pins | Temporary fixes, light trim | 20 minutes | Low | Easy but trim may bend |
Consider carpet pile height when selecting trim channel depth. Low-pile carpets under 10mm require shallower channels, whilst deep-pile carpets exceeding 15mm need deeper grips to prevent carpet slipping free under foot traffic. Quality Carpet Trims provides detailed carpet trim profile guidance helping match products to specific carpet types.
Pro Tip: For rooms with underfloor heating, choose metal trims that conduct heat efficiently rather than insulating materials that create cold spots along transitions.
Trip hazard minimisation requires careful profile selection based on height differences and user needs. Regulations recommend maximum ramp gradients of 1:8 for accessible routes, meaning 1mm rise per 8mm horizontal distance. Calculate required ramp length by multiplying height difference by eight to determine if standard reducer strips suffice or custom ramped profiles become necessary.
Explore the complete range and selecting carpet trims guidance to identify products matching your project requirements precisely.
Step-by-step carpet edge trim installation
Accurate measurement forms the foundation of successful trim installation. Measure the exact distance between door jambs or wall edges where the trim will sit, accounting for any irregularities in wall straightness. Mark this measurement on your chosen trim using a pencil and square to ensure perpendicular cuts.
Cut the trim cleanly using appropriate tools for the material. Metal trims require a hacksaw with fine teeth or a mitre saw with a metal-cutting blade to prevent rough edges and burrs. Wooden trims cut easily with standard carpentry saws. Deburr metal edges using a file to remove sharp points that could snag carpet fibres or injure installers.
- Position the trim along the carpet edge with the channel facing the carpet side and the flat section covering the hard flooring edge.
- Check alignment using a spirit level, ensuring the trim sits perfectly straight without gaps at either end.
- Mark fixing positions through pre-drilled holes or at 200mm intervals along the trim length for screw-down installation.
- For adhesive fixing, peel back the protective strip and press firmly along the entire length, working from one end to eliminate air bubbles.
- For screw fixing, drill pilot holes in wooden subfloors or use a masonry bit for concrete, then drive screws until trim sits flush without over-tightening.
- Tuck the carpet edge into the trim channel using a blunt tool like a wallpaper scraper, working along the length systematically.
- Ensure carpet fibres fill the channel completely without visible gaps or loose sections that create wear points.
- Tap the trim gently with a rubber mallet if needed to close the channel securely around the carpet edge.
Check alignment carefully under doorways, as this highly visible location demands perfect positioning. Centre the trim precisely beneath the door when closed to create symmetrical reveals on both sides. This placement also improves draught proofing by minimising gaps between door bottom and trim surface.
Pro Tip: Avoid positioning screws where door stops or architraves will cover them, as future maintenance becomes difficult when fixings hide behind woodwork.
Correct installation reduces carpet edge wear by up to 40% compared to untrimmed edges, making careful attention to detail worthwhile. Verify carpet security by attempting to pull the edge free gently. Properly installed trims resist this force without movement or channel opening.
For rooms with multiple doorways, maintain consistent trim profiles and finishes throughout to create visual harmony. Mixing different trim styles within connected spaces creates a disjointed appearance that detracts from interior cohesion. Quality Carpet Trims offers carpet edge trim solutions in matching finishes across all profile types.
Expansion gaps remain crucial for floating floor installations adjacent to carpeted areas. Leave 10mm clearance between laminate or vinyl edges and the trim to accommodate seasonal movement without buckling. The trim covers this gap visually whilst allowing necessary expansion and contraction cycles.
Find comprehensive door threshold installation tips covering various scenarios and flooring combinations for additional guidance on complex installations.
Common problems and quality assurance
Identifying installation issues early prevents minor problems escalating into expensive repairs or carpet replacement. Inspect completed installations for these common faults:
- Uneven trim edges indicating poor subfloor preparation or inadequate levelling
- Loose sections where adhesive failed to bond or screws missed solid fixing points
- Gaps between carpet and trim channel allowing fibres to escape and fray
- Visible tack strips or carpet backing showing poor tucking technique
- Trim movement underfoot suggesting insufficient fixing density or weak subfloor
Premature wear patterns reveal underlying installation defects requiring attention. Carpet edges pulling free from trim channels indicate insufficient channel depth for the pile height or inadequate initial tucking. Trim rocking or flexing under traffic shows fixing failure, often caused by screws missing joists in wooden subfloors or inadequate concrete anchoring.
Properly installed trims extend carpet life substantially whilst improving room aesthetics through clean, professional transitions. The investment in quality materials and careful installation pays dividends through reduced maintenance costs and delayed replacement schedules. Metal trims particularly offer decades of service when installed correctly, outlasting the carpet itself in many cases.
“Misalignment of tack strips causes uneven transitions and tripping risks, making precise positioning essential for both safety and appearance.”
Maintain expansion gaps for floating floors adjacent to trimmed carpet edges. Laminate and vinyl flooring require 10mm perimeter gaps to accommodate seasonal expansion without buckling. Trims bridge these gaps visually whilst allowing necessary movement, but installers sometimes pack gaps with excess adhesive or force carpet too tightly, restricting movement and causing floor damage.
Pro Tip: Centre trims precisely under doorways for clean sight lines from both rooms and enhanced draught proofing that reduces heating costs whilst improving comfort.
Quality assurance extends beyond initial installation to ongoing inspection and maintenance. Check trims quarterly in high-traffic areas for loosening fixings, worn finishes, or developing gaps. Address issues promptly by re-securing loose sections, replacing damaged trims, or re-tucking carpet edges before significant wear occurs.
Access detailed flooring edge trim installation troubleshooting guidance covering specific problems and solutions for various trim types and installation scenarios.
Learn advanced techniques for achieving seamless flooring transitions between diverse flooring materials whilst maintaining safety standards and aesthetic appeal.
Get quality carpet edge trims and expert support
Having mastered the techniques for installing carpet edge trims successfully, sourcing quality products and expert guidance ensures your project achieves professional results. Quality Carpet Trims specialises in supplying premium solid metal trims hand-finished in Britain to exacting standards. The extensive range covers every profile type needed for residential and commercial projects, from Z-bars and reducer strips to ramped profiles and T-mouldings.

Each product comes with detailed specifications, fitting guidance, and compatibility information to help you select precisely the right trim for your carpet type and installation conditions. The website offers free samples so you can verify finish quality and profile suitability before committing to full orders. Fast delivery across the UK ensures your project stays on schedule.
Expert advice remains available throughout your project via phone and email support. Whether you need help choosing between profiles, understanding fixing methods, or troubleshooting installation challenges, experienced staff provide practical guidance based on decades of industry knowledge. This support benefits both DIY enthusiasts tackling home improvements and professional contractors managing commercial installations.
Explore the complete carpet edge trim solutions range to find products matching your exact requirements. Review the comprehensive guide to selecting carpet trims for detailed advice on matching profiles to specific scenarios. Access the flooring edge trims installation guide for step-by-step instructions covering various trim types and installation methods.
Frequently asked questions
What are carpet edge trims and why are they important?
Carpet edge trims are metal profiles that protect carpet edges from fraying and damage whilst creating safe transitions between flooring types. They reduce trip hazards significantly by eliminating uneven edges and height differences that cause falls. Properly installed trims enhance room aesthetics through neat, professional finishes that complement interior décor whilst extending carpet life by preventing premature edge wear.
How do I choose the best trim profile for my carpet?
Assess the height difference between your carpet and adjacent flooring first, as this determines whether you need Z-bar for level transitions, reducer strips for differences up to 15mm, or ramped profiles for greater changes. Consider traffic levels and safety requirements, selecting wider profiles for high-traffic areas and accessibility needs. Review the carpet trim profiles explained guide to understand how different profiles suit specific scenarios and carpet types.
Can I install carpet edge trims myself or should I hire a professional?
Simple trim installations like reducer strips suit confident DIY enthusiasts with basic tools and careful measurement skills. Z-bar installations require greater precision to achieve professional results, as misalignment creates visible gaps and potential trip hazards. DIY enthusiasts may find the Z-bar method challenging due to precision needed, making professional installation worthwhile for complex projects. Proper subfloor preparation and correct tool use significantly improve DIY success rates. Consult the flooring edge trims step-by-step guide for detailed instructions supporting DIY installations.
What maintenance do carpet edge trims require?
Inspect trims quarterly in high-traffic areas for loose fixings, developing gaps, or finish wear that indicates problems developing. Clean trims regularly using appropriate methods for the finish type to prevent dirt accumulation that degrades appearance and accelerates corrosion. Address any looseness or damage promptly by re-securing fixings or replacing damaged sections before carpet edges suffer wear. Metal trims require minimal maintenance beyond periodic cleaning, whilst proper installation ensures decades of trouble-free service.
Recommended
- Installing Flooring Edge Trims for Seamless Floor Transitions
- Carpet Edge Trim – Quality Carpet Trims
- Vinyl Floor Edge Trim – Quality Carpet Trims