
Blog
How to finish floor edges like a professional

May
TL;DR:
- Properly finishing floor edges enhances both the appearance and longevity of your flooring project. Using techniques like coping for inside corners and premium brass trims provides durable, professional results that resist wear and movement. Accurate measurement, careful fitting, and proper sealing are essential steps for achieving a seamless and lasting finish.
Unfinished floor edges are one of the most common things that make an otherwise decent flooring job look amateur. The gap between your flooring and the skirting board, the raw edge at a doorway, the exposed trim at a step: each one signals that the job is not quite done. Learning how to finish floor edges properly makes a genuine difference, not just to how your room looks, but to how long your floor lasts. This guide walks you through everything, from the tools you need to the cutting techniques that professionals swear by, and the premium trims that will stand the test of time.
Table of Contents
- Key takeaways
- Tools and materials for finishing floor edges
- Measuring, cutting, and fitting your trims
- Installing trims and sealing floor edges
- Common mistakes when finishing floor edges
- Final inspection and keeping edges looking great
- My honest take on finishing floor edges
- Finish your floors with premium brass trims
- FAQ
Key takeaways
| Point | Details |
|---|---|
| Coping beats mitring | Coped inside corners produce gap-free, durable joints that accommodate natural floor movement over time. |
| Sealant quantity matters | Apply light, consistent beads of flexible caulk to avoid restricting floor expansion and causing buckling. |
| Premium trims last longer | Solid brass, powder-coated trims resist splitting, bending, and denting far better than cheaper alternatives. |
| Dry-fit before fixing | Always test your trim fit before applying adhesive to catch alignment issues early and avoid costly mistakes. |
| Cure time is non-negotiable | Allow at least 24 hours of curing before exposing sealed floor edges to water or heavy foot traffic. |
Tools and materials for finishing floor edges
Getting the right tools together before you start is half the battle. A job done with the wrong equipment will show in the finish, no matter how careful you are.
Here is what you will need:
- Measuring tape and pencil for marking accurate cut lines
- Miter saw for straight and angled cuts on trim lengths
- Coping saw for profile cuts at inside corners
- Fine-tooth file or rasp for refining coped joints and removing excess material
- Safety glasses and gloves throughout the cutting process
- Flexible caulk for sealing gaps between trim and floor or wall surfaces
- Trim adhesive or panel pins depending on your chosen fixing method
- Sandpaper (fine grit) for smoothing any rough edges before fitting
When it comes to materials, the trim itself is where most homeowners make a costly mistake. Cheaper options made from plastic, rubber, or aluminium bend, split, and dent within months. They also tend to look cheap, which defeats the purpose of finishing your edges in the first place.
Solid brass trims that are hand-finished with a powder-coated surface are a different proposition entirely. They hold their shape, resist everyday wear, and look polished for years rather than months. The edge trim benefits for safety and appearance are significant, and the difference in longevity between premium and budget trims is substantial.
For flexible caulk, a basic tube is affordable and goes a long way. Caulk typically costs around £3 to £7 per tube, though your overall project cost will vary depending on the trim style and the linear metres you need to cover.
Pro Tip: Buy 10 to 15 percent more trim than your measured length. Cutting errors and waste at corners will eat into your material faster than you expect.
Measuring, cutting, and fitting your trims
This is where precision pays off. Rushing the measurement and cutting stage is the single biggest cause of poor-looking results.
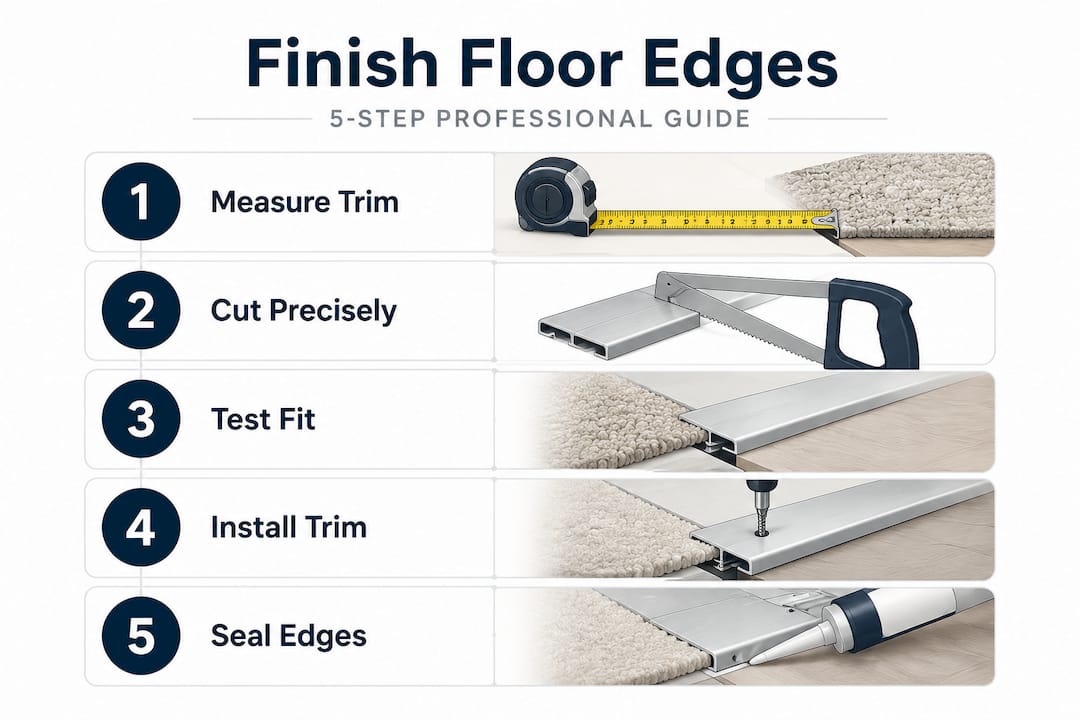
Measuring your edges
Start by measuring each run of trim separately. Do not assume that two parallel walls are the same length; in older homes particularly, rooms are rarely perfectly square. Use a pencil to mark your cut points directly onto the trim rather than relying solely on measurements transferred from paper.
The step-by-step fitting process
- Measure each edge run individually and note both the length and the angle required at each end.
- Set your miter saw to 45 degrees for outside corners where two runs of trim meet on an exposed edge.
- Cut a 45-degree back-cut on the trim that will sit behind the other piece at inside corners. This is the first step in the coping technique.
- Use your coping saw to cut along the profile on the waste side of your pencil mark, following the shaped face of the trim precisely.
- Test the fit against the adjoining trim piece. The coped end should nestle neatly against the face of the fixed piece.
- Refine with a file where needed, removing small amounts of material incrementally. Cutting too much at once is hard to undo.
- Dry-fit the entire run of trims before fixing anything permanently. Walk the length and check for gaps, misalignments, and corner fits.
- Fix the trims using your chosen method once you are satisfied with the dry fit.
The coping technique takes a little practice but the results are worth it. Coping produces gap-free joints that a simple miter cut simply cannot match at inside corners, particularly because coped joints accommodate the natural expansion and contraction of floor materials through seasonal humidity changes.
Pro Tip: Cut your coped pieces slightly longer than needed, then sneak up on the perfect length by trimming small amounts and testing repeatedly. A tight fit is far easier to achieve this way than by trying to hit the exact measurement in one cut.
Here is a quick comparison of the two main corner techniques:
| Technique | Best for | Durability | Skill level |
|---|---|---|---|
| Miter cut | Outside corners | Good | Beginner |
| Coping | Inside corners | Excellent | Intermediate |
For rooms with out-of-square corners, a small angle grinder or oscillating tool can help you fine-tune the back of the coped piece so it sits flat against the wall without rocking or leaving a visible gap at the rear.
Installing trims and sealing floor edges
Once you are happy with the dry fit, it is time to fix the trims in place and seal the edges properly.
Fixing methods:
- Adhesive works well on hard, smooth subfloor surfaces and leaves no visible fixing points. Apply in a zigzag bead along the underside of the trim, press firmly into position, and allow the manufacturer’s stated cure time before walking on it.
- Panel pins are faster and hold well, but the pin heads are visible unless you punch them below the surface and fill over them. This works better on painted or painted-over trims than on natural metal finishes.
- Combination fixing (adhesive plus pins) gives the strongest result on doorway transitions and high-traffic areas where movement stress is greatest.
For sealing, use flexible caulk rather than rigid filler at any joint where two different materials meet. Flexible caulk is essential wherever expansion or movement is expected, because rigid products will crack under normal floor movement. This is particularly true at transitions between tiles and laminate, or anywhere laminate meets a fixed surface.
“Apply sealant in a steady, consistent bead. More is not better. Excess sealant restricts the natural movement of floating floors and risks buckling or warping at the perimeter.”
In kitchens and bathrooms, sealing is not optional. Sealant on vinyl edges requires a minimum of 24 hours of curing before the surface is exposed to water. Fit your trim, seal the edges, then wait before using the room normally.
Sealing laminate edges in moisture-prone areas is particularly important. Apply the thinnest consistent bead you can manage. Wipe away any excess with a damp cloth before it skins over.
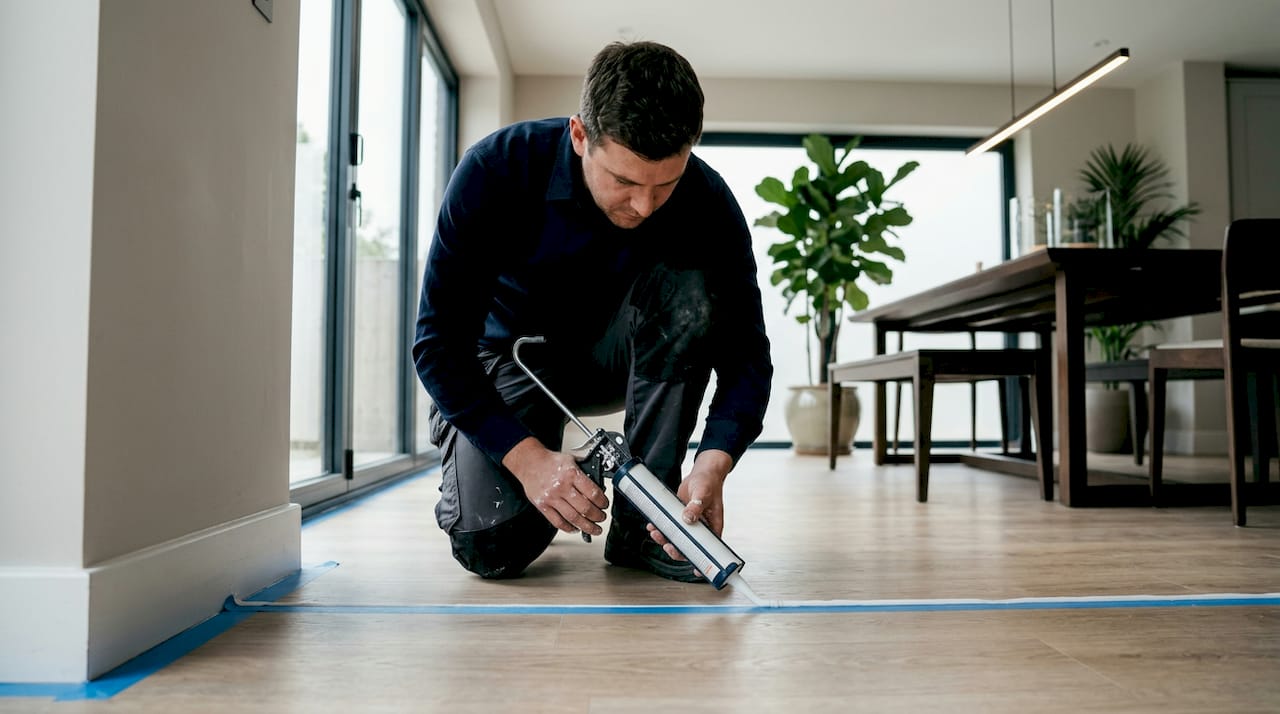
Pro Tip: Use low-tack masking tape along both sides of the joint before applying caulk. Remove the tape while the caulk is still wet for a perfectly clean, straight seal line.
Common mistakes when finishing floor edges
Even experienced DIYers make avoidable errors here. Knowing what they are puts you one step ahead.
- Measuring only once. Always measure twice and cut once. A single digit transposition can waste an entire length of premium trim.
- Using the wrong adhesive. Some adhesives react with brass or lacquered surfaces. Check compatibility before you apply anything permanent.
- Skipping the dry fit. This is the most common shortcut that causes regret. A dry fit catches problems before they are permanent.
- Over-applying sealant. As noted above, excess sealant restricts expansion on floating floors and creates more problems than it solves.
- Forcing a poor-fitting cope. If the coped end will not seat neatly, file it further rather than forcing it. A forced fit creates stress that causes the joint to open up within weeks.
- Ignoring common alignment errors. Misalignment between the trim and the floor surface creates a trip hazard and looks untidy. Shim the trim or adjust the subfloor surface before fixing.
- Using rigid grout at movement joints. Grout is for static joints. Grout is too rigid and will crack at joints between different flooring materials.
If you notice a gap opening up after installation, do not caulk over it immediately. Investigate whether the floor is moving, the trim has shifted, or the fixing was insufficient. Address the cause before the cosmetic fix.
Final inspection and keeping edges looking great
Once your trims are fixed and sealed, a quick inspection checklist will confirm the job is done properly.
- Alignment: Run your finger along the top edge of the trim. It should sit flush or just fractionally proud of the floor surface, with no lip that could catch a foot or a vacuum cleaner.
- Gaps: Check both ends of each trim run and all corner joints. Any visible gap larger than a hairline should be filled with a matching flexible caulk.
- Adhesion: Press firmly along the trim length. Nothing should flex, rock, or sound hollow.
- Seal integrity: Inspect the caulk line for bubbles, thin spots, or areas where the bead has pulled away from either surface.
For maintenance, a simple wipe with a damp cloth is all most powder-coated brass trims need. Avoid abrasive cleaners as they can scratch the finish. If a trim takes a hard knock and scuffs, a light application of a matching touch-up wax or polish will restore the appearance without requiring removal.
When it comes to replacement, quality solid brass trims with a durable powder-coated finish can last for many years in normal residential use. The professional flooring finish you achieve with premium trim is genuinely worth protecting. Inspect edges annually and re-seal any areas where the caulk has dried or cracked.
My honest take on finishing floor edges
I have seen more floor projects let down at the final stage than at any other point. The flooring itself looks perfect, the installation was careful, and then the owner cuts corners on the trims and sealing, and the result looks rushed.
The coping technique is the single thing I wish more DIYers would invest half an hour practising before starting a real job. Cut a few test pieces from scrap. Feel what a good cope looks like versus a poor one. That thirty minutes will save you from tearing out an entire run of trim because the inside corner joint has opened up.
My other strong view is about material choice. I have seen plastic and aluminium trims failing within twelve months in normal household conditions. They bend under furniture legs, split at screw holes, and look tired almost immediately. Solid brass with a quality powder-coat finish does not behave that way. It holds its shape, holds its colour, and still looks intentional years later.
The detail that most guides skip is this: floor edge finishing is where your flooring project either looks professional or exposes every shortcut you took. The floor is the easy part. The edges are where the craftsmanship shows.
— Matt
Finish your floors with premium brass trims

If this guide has given you confidence to tackle your floor edges, the next step is choosing a trim that will do the job justice. At Qualitycarpettrims, every trim is hand-finished in solid brass and available in 10 luxury finishes, from brushed satin to deep bronze, each one designed to complement your interior rather than disappear into it. Unlike cheaper alternatives, our trims will not split, bend, or dent under normal use. Whether you need door threshold bars for a seamless doorway finish or a carpet edge trim for a clean, professional edge, you will find the right profile in our range. Explore the full shop to find the perfect trim for your project.
FAQ
What is the best way to finish floor edges at a doorway?
The best approach is to fit a solid threshold bar that spans the gap between two flooring types. A properly fitted trim covers the raw edge, prevents lifting, and creates a tidy visual transition at the doorway.
How do I seal floor edges in a bathroom or kitchen?
Apply a thin, consistent bead of flexible caulk between the trim and the floor surface. Allow at least 24 hours of curing before exposing the area to water.
Should I use caulk or grout to finish floor corners?
Use flexible caulk at any joint where movement or expansion is expected, including where different flooring materials meet. Grout is appropriate only for fixed, static tile joints and will crack if used at movement points.
How do I finish inside floor corners neatly?
Cope the trim rather than mitring it. Cut a 45-degree back-cut first, then follow the trim profile with a coping saw. The coped piece seats against the face of the fixed piece, producing a tight, gap-free joint.
Can I install floor edge trims myself without professional help?
Yes. With accurate measurements, the right tools, and a little practice on the coping technique, a confident DIYer can achieve a professional-looking finish. Following a detailed step-by-step trim guide will help you get it right first time.
Recommended
- Installing Flooring Edge Trims for Seamless Floor Transitions
- How to solve flooring trim problems like a pro
- Flooring Edge Trims: The Key to a Seamless Finish
- Master professional flooring trim methods: 40% fewer fails