
Blog
Floor trim installation workflow: a DIY guide

Jun
TL;DR:
- A proper floor trim installation requires precise preparation, sequencing, and quality materials like solid brass. Measuring, dry-fitting, coping corners, and fastening into studs ensure a professional finish that lasts decades. Skipping steps compromises the result, whereas thorough prep and correct technique produce a polished, durable outcome.
The floor trim installation workflow is a step-by-step process that takes a flooring renovation from raw edges to a clean, professional finish. Done correctly, it protects your skirting, conceals expansion gaps, and adds a polished look that holds up for years. Done poorly, it leaves gaps, buckled trim, and frustration. The difference almost always comes down to preparation, sequencing, and the quality of the trim you choose. Solid brass and powder-coated trims resist bending, splitting, and denting in ways that cheaper alternatives simply cannot match.
What tools, materials, and preparation do you need for floor trim installation?
The right preparation separates a tidy result from one you will want to redo in six months. Before a single piece of trim is cut, you need the correct materials and a properly prepared workspace.
Choosing your trim material
Solid brass trims with a powder-coated finish are the professional’s choice for good reason. They will not split under pressure, will not bend when knocked, and will not dent the way that wooden, plastic, or aluminium trims do. Wooden trims swell with moisture and crack at joints. Plastic and aluminium trims flex and warp over time, leaving visible gaps. Qualitycarpettrims supplies solid brass trims hand-finished in ten luxury finishes, giving you durability and a premium look that holds its appearance for the life of the floor.
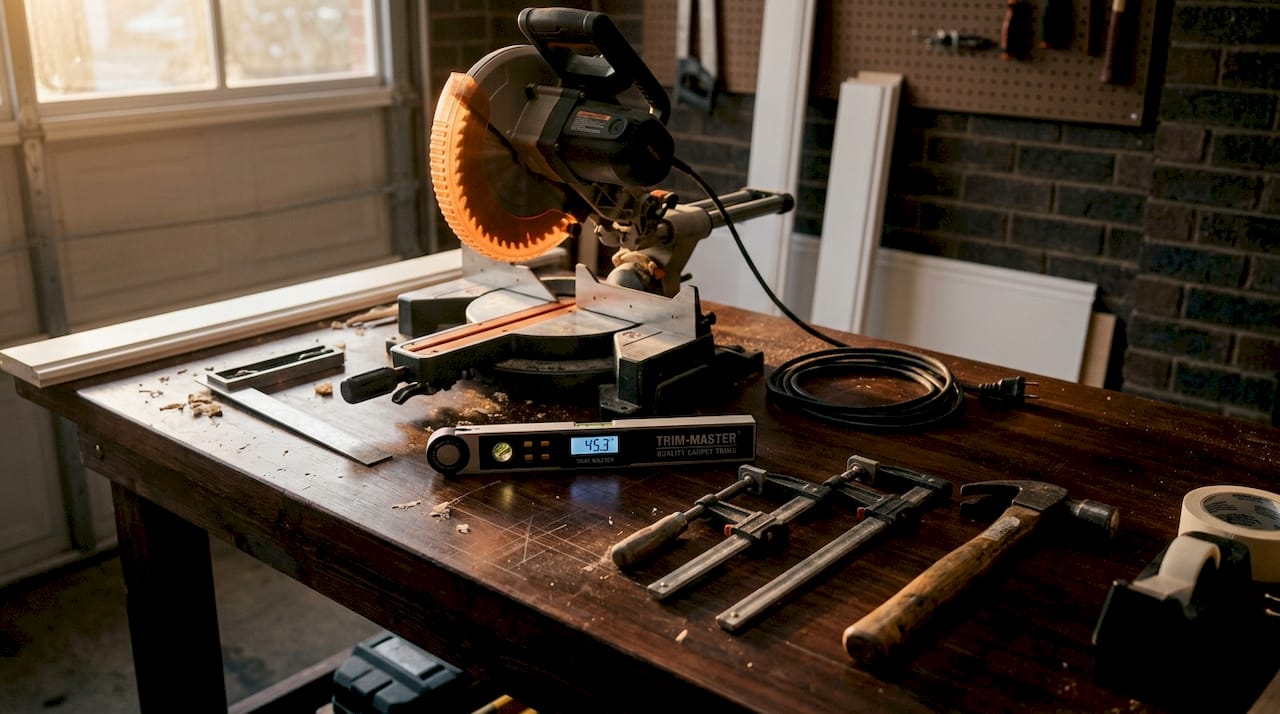
Tools you will need
Gather every tool before you start. Stopping mid-installation to find a missing item breaks your rhythm and leads to rushed cuts.
- Miter saw for angled and straight cuts with precision
- Coping saw for inside corners on imperfect walls
- Nail gun or hammer and finishing nails for fastening
- Stud finder to locate wall studs accurately
- Measuring tape and pencil for marking lengths and stud positions
- Level to check wall and floor conditions
- Caulking gun with paintable caulk for sealing joints
- Safety glasses and ear protection for cutting operations
Preparing the workspace
Clear the room of furniture and debris. Measure every wall, including inside closets, hallways, and any jogs or recesses. Always include closets and hallways in your total linear footage, and do not subtract doors since baseboards stop at door casings rather than running through them. Add a 10% buffer to your total measurement to account for waste from angled cuts and any mistakes. Mark stud locations on the wall with a pencil at a height above where the trim will sit, so the marks remain visible during installation. Check the floor level along each wall with your level, noting any dips or rises that will need addressing.
Pro Tip: Photograph your stud markings before the trim covers them. You will thank yourself if you ever need to re-nail a section later.
| Preparation step | Why it matters |
|---|---|
| Measure all walls including closets | Prevents running short of material mid-project |
| Add 10% material buffer | Covers waste from angled cuts and errors |
| Mark stud positions | Ensures fasteners hit solid backing |
| Check floor level | Identifies areas needing scribing or adjustment |
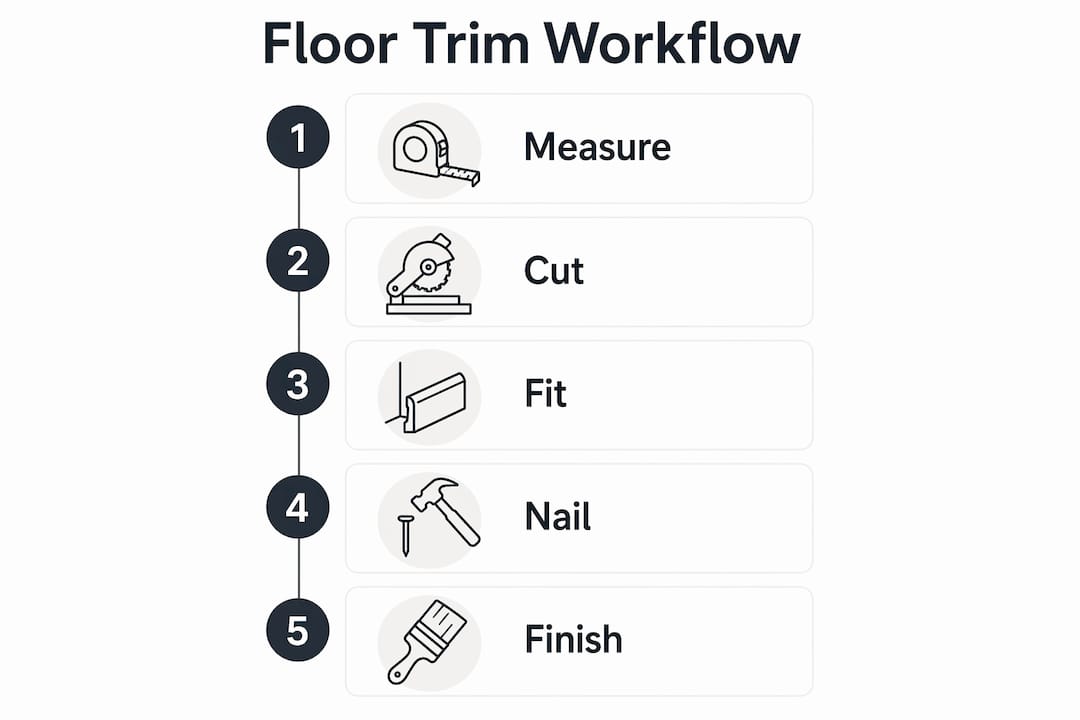
How do you measure, plan, and cut floor trim for a precise fit?
Accurate cutting is the single skill that separates a DIY result from a professional one. Imprecise cuts create gaps that no amount of caulk can fully disguise.
Planning your cuts before you start
Walk the room and decide where each length of trim will start and end. Plan your joints so that seams on long runs fall at stud locations, giving you a solid nailing point. Sequence your cuts in this order:
- Measure the first wall and cut the piece to length with a straight 90-degree cut at each end if it runs wall to wall.
- Move to inside corners and decide whether to miter or cope the joint.
- Cut outside corners at 45 degrees, always cutting slightly long and trimming back for a tight fit.
- Cut scarf joints on long runs at a 45-degree angle so the overlap faces away from the main entry point of the room.
- Dry-fit every piece before nailing. Dry-fitting sequentially avoids cumulative misfits and makes corner joints far easier to perfect.
Coping vs. mitering inside corners
This is the decision most DIYers get wrong. Coping inside corners ensures tight joints on uneven walls and resists movement over time. Mitering is faster and works well when walls are perfectly square, which is rare in older UK homes. The coping technique involves cutting one piece square to the wall, then cutting the second piece with a profile cut that overlaps the face of the first. The result is a joint that stays tight even as the building moves slightly with the seasons.
Pro Tip: Test your corner angles with a scrap piece before cutting your good trim. A digital angle finder costs very little and removes all guesswork from outside corner cuts.
Cutting techniques for clean joints
A miter saw set to the correct angle produces clean, repeatable cuts. Always cut with the face of the trim pointing upward so any tear-out from the blade occurs on the back edge. For coping cuts, use a coping saw to follow the profile of the trim precisely, undercutting slightly so the face edge makes contact first. For scarf joints on long runs, both pieces should be cut at 45 degrees and glued at the joint before nailing, which prevents the seam from opening as the material settles.
Dealing with imperfect walls
Wavy or uneven floors create a visible gap beneath the trim. The scribing technique solves this. Scribing matches the trim to the floor contour by running a compass along the floor with the pencil touching the trim face, transferring the floor’s shape onto the trim. You then cut along that line with a coping saw or jigsaw, and the trim sits flush with no gap.
What is the step-by-step workflow for installing and finishing floor trim?
With your pieces cut and dry-fitted, the installation workflow follows a clear sequence. Rushing any stage here undoes all the careful preparation that came before it.
The correct trim installation order is door casings first, then any crown moulding, and baseboards last. Installing baseboards too early causes visible gaps and misaligned transitions at door frames.
- Remove old trim carefully. Use a pry bar with a thin piece of scrap wood behind it to protect the wall. Work slowly along the length to avoid tearing the plaster.
- Position the first piece against the wall, aligning it with your stud marks. Hold it in place and check it is sitting flat against the wall face.
- Nail into wall studs, never into the floor. Baseboards must be nailed into studs and never into floating flooring. On floating floors such as LVP, nailing into the floor pins it down and prevents the natural expansion and contraction that the floor needs to move freely. This causes buckling and can void your floor warranty.
- Apply construction adhesive at the back of the trim where studs are absent, particularly on long runs between stud positions, to prevent bowing.
- Work around the room sequentially, fitting each piece in the order you dry-fitted them. Do not skip ahead.
- Fill nail holes with a fine surface filler once all pieces are secured. Apply in thin layers and allow each layer to dry fully before sanding.
- Caulk all seams where the trim meets the wall using paintable caulk. Run a thin, consistent bead and smooth it with a damp finger. Avoid over-caulking, which creates a thick ridge that looks worse than a small gap.
- Sand lightly once filler is dry, then apply your finish coat of paint or leave the powder-coated brass trim as it is.
A typical room takes 3 to 4 hours for cutting and preparation, 2 to 3 hours for fitting, and 1 to 2 hours for finishing, plus additional time for paint drying between coats. Plan accordingly and do not compress the finishing stage.
Pro Tip: Inspect your caulk joints under a raking light source, such as a torch held at a low angle. This reveals any ridges or gaps that look invisible under normal room lighting.
- Never pin a floating floor by nailing through the base of the trim into the floor surface
- Allow filler to dry completely before sanding, as sanding wet filler creates a rough, pitted surface
- Use a nail set to drive finishing nails just below the surface without splitting the trim face
- Keep a damp cloth nearby when caulking to wipe excess immediately before it skins over
How do you handle tricky situations and final finishing touches?
Even a well-planned installation throws up surprises. Knowing how to handle them keeps the project moving without compromising the finish.
Uneven floors are the most common challenge. Where scribing is not practical, shoe moulding or quarter-round trim can be fitted along the base of the skirting to cover the gap. This is a legitimate professional technique, not a workaround. The key is to nail the shoe moulding into the skirting, not the floor, so floating floors remain free to move.
For outside corners, always cut slightly long and test the fit before committing. Outside corners are visible from multiple angles and any gap is immediately obvious. Sand the joint lightly after fitting to blend the two faces.
If you are integrating LED skirting into your installation, planning for driver placement is something most DIYers overlook entirely. The driver hardware cannot simply be hidden behind the trim because it generates heat and requires ventilation and occasional access. Plan a discreet access point before the trim goes up, not after.
Pro Tip: Dry-fit the entire room before nailing a single piece. Walk around and view each joint from a standing position. Problems that are invisible at floor level become obvious from standing height.
- Check each joint in multiple lighting conditions before declaring the job done
- Touch up paint at joints after caulk has fully cured, not before
- If a gap opens at an inside corner after fitting, cope the joint rather than filling with excess caulk
- For troubleshooting trim problems that appear after installation, address them before the paint dries for the easiest fix
Key takeaways
A successful floor trim installation workflow depends on correct sequencing, precise cutting, and fastening into wall studs rather than the floor.
| Point | Details |
|---|---|
| Sequence your installation | Fit door casings first, then baseboards last to avoid gaps at transitions. |
| Add a 10% material buffer | Always over-order to cover angled cuts, mistakes, and waste. |
| Nail into studs, not the floor | Floating floors must remain free to expand and contract beneath the trim. |
| Cope inside corners on imperfect walls | Coping produces tighter, more durable joints than mitering on uneven walls. |
| Dry-fit before nailing | Fitting each piece sequentially before fastening prevents cumulative errors at corners. |
Why preparation is the part most DIYers underestimate
I have watched homeowners spend hours agonising over which finish to choose and then rush the preparation stage entirely. They skip the stud-finding step, guess at their measurements, and start nailing before they have dry-fitted a single piece. The result is a room that looks almost right but never quite right, with gaps at corners and trim that bows slightly away from the wall between fixings.
The single biggest lesson I have taken from working with floor trim installations is this: the cutting and nailing are the easy part. The preparation, the measuring, the stud-marking, and the dry-fitting are where the quality of the result is actually determined. If you spend 60% of your total project time on preparation and cutting, the installation itself becomes almost mechanical.
I am also firmly of the view that the trim material matters far more than most guides admit. Wooden trims look fine on day one. Within a few years, they swell at joints, crack at corners, and need repainting constantly. Plastic and aluminium trims flex and dent. Solid brass with a powder-coated finish simply does not do any of those things. It is a one-time investment that holds its appearance without the ongoing maintenance cycle. For a professional floor finish, the material choice is not a minor detail. It is the foundation of the whole result.
Approach this project as a skill you are building, not a task you are rushing through. Each room you complete will be faster and cleaner than the last.
— Matt
Upgrade your installation with premium solid brass trims
If you are investing the time to follow a proper installation workflow, the trim itself should be worth the effort.

Qualitycarpettrims supplies solid brass flooring trims and door bars, hand-finished in ten luxury finishes to complement any interior. Unlike wooden, plastic, or aluminium alternatives that split, bend, and dent within a few years, these trims are built to last the life of your floor. Every product is British-made, hand-finished, and backed by a quality guarantee. Whether you are finishing a single room or a full renovation, browse the premium matwell trims range to find the right profile and finish for your project. Free samples are available so you can match your floor before you commit.
FAQ
What is the correct order for installing floor trim?
Install door casings first, then any crown moulding, and baseboards last. This sequence prevents visible gaps at door frames and ensures clean transitions between trim types.
How much extra trim material should I order?
Add a 10% buffer to your total linear footage to cover angled cuts, mistakes, and waste. Always measure closets and hallways, and do not subtract door widths from your total.
Can I nail baseboard trim into a floating floor?
No. Baseboards must be nailed into wall studs only. Nailing into a floating floor such as LVP pins the floor down and prevents the expansion and contraction it needs, which causes buckling and potential warranty issues.
Should I cope or miter inside corners?
Cope inside corners on walls that are not perfectly square, which covers most UK homes. Coping produces tighter joints that resist movement over time. Mitering is faster but only works reliably on perfectly square corners.
How do I fix trim that does not sit flush on an uneven floor?
Use the scribing technique. Run a compass along the floor with the pencil marking the trim face, then cut along that line to match the floor contour exactly. Alternatively, fit shoe moulding along the base of the skirting, nailed into the trim rather than the floor.
Recommended
- Step by step flooring trim installation guide
- Floor trim fitting guide for a professional finish
- How to solve flooring trim problems like a pro
- Installing Flooring Edge Trims for Seamless Floor Transitions