
Blog
Fixing uneven floor transitions: your practical DIY guide

Jun
TL;DR:
- Fixing uneven floor transitions requires diagnosing subfloor issues first, then selecting the appropriate, durable profile. Solid brass trims with powder coating provide long-lasting performance and resistance to wear, unlike cheaper materials. Proper assessment, correct installation, and addressing underlying subfloor movement are essential for safe, lasting results.
Fixing uneven floor transitions is the process of correcting height mismatches and unstable strips where two different floor surfaces meet, using the right transition profile and, where necessary, repairing the subfloor beneath. The industry term for these profiles is “transition strips” or “threshold strips,” and selecting the wrong type is the single most common reason repairs fail. Whether you are dealing with a slight height difference between laminate and tile or a more pronounced step between rooms, the solution depends on accurately diagnosing the cause before reaching for any trim. This guide covers measurement, profile selection, installation technique, and long-term maintenance, with a focus on solid brass trims that genuinely last.
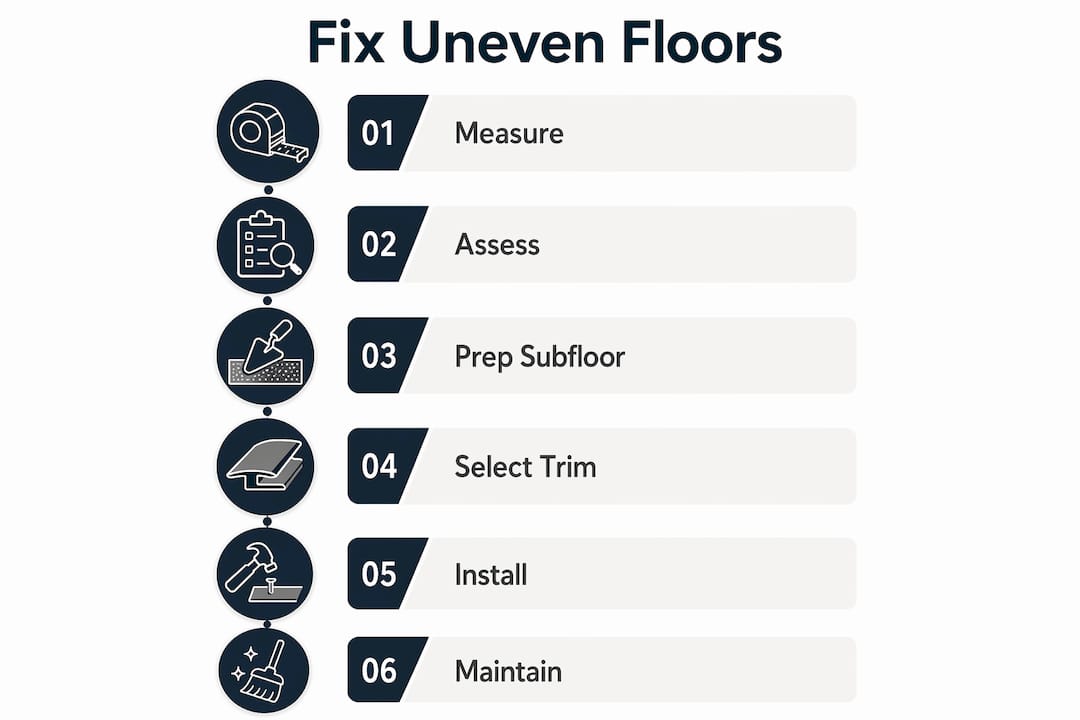
How to measure and assess uneven floor transitions properly
Accurate assessment is the foundation of any successful repair. Incorrect profile selection or poor measurement leads to unstable walking surfaces and repeat failures, so take your time here before purchasing anything.
Taking precise height measurements
Place a spirit level or metal straightedge across the transition zone, spanning both floor surfaces. Measure the gap between the underside of the straightedge and the lower floor at its deepest point. This figure is your actual height difference, and it must include the finished floor height with all underlayment and substrate layers accounted for. A common mistake is measuring the bare board thickness rather than the installed height, which produces a trim that sits either too high or too low once fitted.
Note whether the height difference is gradual or sudden. A gradual slope over 300mm or more is far easier to manage with a standard reducer strip. A sudden step within a very short distance often points to a subfloor problem rather than a trim problem.
Diagnosing subfloor issues before you buy
Signs like squeaks and cracked grout near the transition zone suggest underlying subfloor movement that a new trim alone will not fix. Press down firmly on both sides of the transition with your foot. If you feel flex or hear a creak, the subfloor is moving. This is a structural issue, and fitting a new strip over it will produce the same failure within months.
Check for moisture damage at the same time. Visible water stains or spongy flooring near transitions indicate possible moisture damage, which requires professional inspection before any DIY repair proceeds. Attempting to level or trim over a wet or rotting subfloor is a waste of materials and time.
Pro Tip: Use a damp-proof moisture meter on the subfloor before ordering any materials. Readings above 75% relative humidity in a concrete subfloor indicate moisture that must be addressed first.
The tools you need for a thorough assessment are a spirit level, a steel rule, a pencil, a moisture meter, and a notepad to record measurements from multiple points along the transition. Measure at least three positions across the doorway width, as subfloor height can vary from one side to the other.
What transition strip should you use for different height differences?
Reducers bridge floors of different heights with a sloped cross-section, while T-mouldings connect same-level floors with a T-shaped profile that sits centrally over the join. Choosing between them is straightforward once you know your height difference.

Reducers versus T-mouldings: a direct comparison
| Profile type | Best use case | Height difference |
|---|---|---|
| T-moulding | Equal-height floors, floating floor joins | 0mm to 2mm |
| Reducer strip | One floor higher than the other | Up to approximately 12mm (1/2 inch) |
| Custom threshold | Large step, accessible doorway, structural build-up needed | Over 12mm |
Reducers are the correct choice for height differences up to approximately 12mm (half an inch), creating a gentle slope that prevents tripping. Beyond that threshold, a steep reducer slope becomes a trip hazard rather than a solution, and the lower subfloor must be built up or levelled before any trim is fitted.
For accessible doorways, building codes limit threshold rises to 12mm and require slopes no steeper than 1:2 for rises over 6mm. This is not optional guidance. If you are fitting transitions in a property that must meet accessibility standards, plan the profile and any subfloor work upfront rather than adjusting after installation.
Why material choice matters more than most guides admit
Cheaper trims made from wood, plastic, or aluminium split, bend, and dent under regular foot traffic. They look tired within a year and often fail at the fastening points, leaving a rocking strip that becomes a genuine trip hazard. Solid brass trims with a powder-coated finish resist this kind of wear entirely. They will not deform under load, the finish does not chip the way painted aluminium does, and they maintain their appearance for the lifetime of the floor.
Qualitycarpettrims supplies solid brass transition strips hand-finished in ten luxury powder-coated colours, giving you a trim that performs as well as it looks. The difference between a brass reducer and a cheaper alternative becomes obvious within two or three years of daily use.
Step-by-step methods to fix uneven floor transitions
Before cutting or fitting anything, clear the transition zone completely and vacuum out any debris, old adhesive residue, or loose material from the subfloor channel. A clean surface is the difference between a trim that bonds securely and one that lifts within weeks.
Correcting the subfloor before fitting the trim
If your assessment revealed subfloor movement, address it first. For timber subfloors, screw down any loose boards with appropriate screws, countersinking the heads so they sit flush. Add plywood shims to build up a lower section, gluing and screwing them firmly. Pouring self-leveling compound on a flexing wood substrate risks cracking, so stabilise the subfloor with shims or new plywood before using any compound.
For concrete subfloors with gradual unevenness, self-leveling compound works well for corrections up to approximately 38mm (1.5 inches). Mix and pour carefully, working in batches that overlap while still wet to avoid seams. The compound sets in 15 to 20 minutes, so prepare your area fully before mixing.
Installing the transition strip
- Measure and mark the trim to length using a steel rule and pencil. Cut solid brass trims with a junior hacksaw or fine-tooth metal saw, then file the cut end smooth.
- Dry-fit the trim in position and check the profile sits correctly over both floor surfaces without rocking.
- Apply construction adhesive to the subfloor channel or the underside of the trim base, following the adhesive manufacturer’s open time guidance.
- Press the trim firmly into position and check alignment before the adhesive grabs.
- Where the subfloor allows, secure with the appropriate fixings through the trim’s pre-drilled holes into the subfloor only.
- For floating floors such as laminate or LVP, never screw through the flooring panels. Fix only to the subfloor and leave the correct expansion gap on each side of the trim to allow for floor movement.
Pro Tip: For floating floors, use a profile with a channel system rather than a fixed base. The trim clips into a track screwed to the subfloor, allowing the floor to expand and contract freely beneath it.
| Step | Action | Common mistake to avoid |
|---|---|---|
| Subfloor prep | Secure loose boards, fill voids | Skipping this step entirely |
| Measurement | Include underlayment in height calculation | Measuring bare board only |
| Cutting | File cut ends smooth | Leaving sharp burrs on brass |
| Fixing | Fasten to subfloor only | Screwing through floating floor panels |
| Expansion gap | Leave correct gap on both sides | Fitting trim tight against floating floor |
How to maintain and troubleshoot floor transitions long-term
A well-fitted solid brass transition strip should require almost no maintenance. Problems that do arise are almost always traceable to the original installation or to changes in the subfloor beneath.
- Rocking or loose strips point to failed adhesive or fastening. Remove the strip, clean off old adhesive, check the subfloor for movement, and refit with fresh construction adhesive and new fixings.
- Gaps opening between the trim and the floor on a floating floor indicate the expansion gap was not left correctly, or the floor has moved more than expected due to temperature or humidity changes. Refit the trim with the correct gap.
- Trim sitting proud on one side after a period of time suggests subfloor settlement. This requires lifting the trim, assessing the subfloor level again, and correcting before refitting.
- Moisture damage signs such as staining, swelling, or a soft subfloor near the transition require professional assessment. Transition failures commonly follow only replacing the trim without addressing nearby subfloor deflection or moisture, causing repeated problems.
Transitions serve more than aesthetic purposes. They protect floor edges, manage movement between different materials, and prevent trips. A rocking or poorly fitted strip is not a cosmetic issue. It is a safety issue that compounds over time.
Professional repair versus replacement depends on the condition of the strip profile and the stability of the subfloor. If the subfloor is sound and the strip itself is undamaged, refastening and re-adhering is appropriate. If the subfloor shows deflection or the strip has deformed, replacement with a solid brass profile and a full subfloor check is the correct course of action.
Key takeaways
Fixing uneven floor transitions requires diagnosing the subfloor condition first, selecting the correct profile for the height difference, and using solid brass trims that will not deform or fail under regular use.
| Point | Details |
|---|---|
| Assess before you buy | Measure finished floor height including underlayment and check for subfloor movement before selecting any trim. |
| Match profile to height difference | Use a reducer for gaps up to 12mm and address the subfloor structurally for anything larger. |
| Material quality determines longevity | Solid brass powder-coated trims outlast wood, plastic, and aluminium alternatives by years. |
| Floating floors need expansion gaps | Never fix transition strips through floating floor panels. Fasten to the subfloor only. |
| Moisture must be resolved first | Fitting any trim over a damp or damaged subfloor guarantees repeat failure. |
Why I always start with the subfloor, not the trim
The most common mistake I see homeowners make is buying a new transition strip before they have looked at what is happening underneath the floor. A shiny new reducer fitted over a flexing, damp, or uneven subfloor will fail within a year. The trim is not the problem. It is just where the problem becomes visible.
I have seen properties where the same transition zone has been re-trimmed three or four times with cheap aluminium or plastic strips, each one bending or splitting within months. The subfloor was moving the whole time, and nobody addressed it. When the homeowner finally fitted a solid brass reducer over a properly levelled and secured subfloor, the problem disappeared entirely.
My honest view is that the material of the trim matters far more than most guides acknowledge. Solid brass does not bend under a door trolley, does not split when a chair leg catches it, and does not look tired after two years of foot traffic. The ten powder-coated finishes available from Qualitycarpettrims mean you are not compromising on appearance either. You get a trim that looks as good as it performs.
The other thing I would say is this: if you find moisture or significant subfloor movement during your assessment, stop and call a professional. Structural subfloor issues are not a DIY repair in most cases, and attempting to patch over them costs more in the long run than addressing them properly at the start.
— Matt
Premium solid brass trims for a lasting finish

If your assessment has confirmed the subfloor is sound and you need a trim that will genuinely last, Qualitycarpettrims supplies solid brass threshold strips and reducers hand-finished in ten luxury powder-coated colours. These trims will not split, bend, or dent the way cheaper alternatives do, and they are manufactured in the UK to a standard that holds up under daily residential use. Browse the full range of trims for uneven floors to find the right profile and finish for your project, with expert advice and fast delivery available. For a premium option suited to hallways and doorways, the matwell flooring trim range offers a polished result that complements any interior.
FAQ
What is the difference between a reducer and a T-moulding?
A reducer bridges two floors of different heights with a sloped profile, while a T-moulding connects two floors at the same height with a central T-shaped section. Use a reducer when one floor sits higher than the other by up to approximately 12mm.
How do I fix a floor transition gap between two rooms?
Measure the height difference accurately including underlayment, select the correct profile (reducer or T-moulding), prepare the subfloor, and fit the trim using construction adhesive and fixings into the subfloor only. For gaps larger than 12mm, build up the lower subfloor before fitting any trim.
Can I screw a transition strip directly into a laminate floor?
No. Fastening through floating floor panels causes buckling by restricting the natural expansion and contraction of the floor. Fix the trim track or base to the subfloor only and leave the correct expansion gap on each side.
When should I call a professional instead of doing it myself?
Call a professional if you find subfloor movement (flexing, squeaking, cracked grout), visible moisture damage, or spongy flooring near the transition zone. These are structural issues that a new trim will not resolve and that worsen if left unaddressed.
How long do solid brass transition strips last compared to cheaper trims?
Solid brass trims with a powder-coated finish last the lifetime of the floor under normal residential use. Wood, plastic, and aluminium trims split, bend, and dent within a few years of regular foot traffic, requiring replacement far sooner.
Recommended
- Achieve seamless floor transitions: step-by-step UK workflow
- Step by step flooring transitions guide for a polished finish
- Transition Strips For Uneven Floors In All Shapes And Sizes.
- Achieve seamless floor transitions: step-by-step UK guide