
Blog
Carpet reducer explained: Safe transitions for UK homes

May
TL;DR:
- Improper flooring transitions increase safety hazards and visual imperfections in UK homes. Carpet reducers create gradual slopes to bridge height differences, preventing trips and protecting carpet edges. Choosing and installing the correct profile based on measurement ensures a durable, professional finish suitable for high-traffic areas.
Improper flooring transitions are responsible for more stumbles, scuffs, and untidy edges in UK homes than most people realise. When carpet meets tile, hardwood, or laminate at a different height, the exposed gap or abrupt step becomes both a safety concern and an eyesore. A carpet reducer is the purpose-built solution that smooths this junction, creating a gradual slope that protects both the carpet edge and the people walking over it. This guide explains exactly what a carpet reducer is, which types exist, how to install one correctly, and when a different profile might serve you better.
Table of Contents
- What is a carpet reducer and why is it needed?
- Types of carpet reducers and transition strips
- How to install a carpet reducer: Step-by-step guide
- When to use a carpet reducer vs edge trims
- A fresh perspective: What DIYers often miss about carpet reducers
- Quality carpet reducers and trims: Find the perfect fit for your floor
- Frequently asked questions
Key Takeaways
| Point | Details |
|---|---|
| Carpet reducer prevents trip hazards | A carpet reducer creates a smooth slope to bridge the height difference between carpet and other flooring, improving safety. |
| Choose the right transition profile | Use a reducer for uneven heights and a carpet trim for tidying raw edges—select carefully for best results. |
| DIY installation is possible | Installing a carpet reducer can be a straightforward DIY task with proper preparation and technique. |
| Incorrect choice affects finish | Selecting the wrong profile or poor installation can lead to unsightly, unsafe, or ineffective flooring transitions. |
What is a carpet reducer and why is it needed?
A carpet reducer is, at its most basic, a flooring transition strip designed to bridge two floor surfaces sitting at different heights. One side of the reducer sits flush with or slightly over the higher surface, while the other tapers down in a gentle slope to meet the carpet. The result is a ramp-like profile that eliminates the abrupt vertical edge between the two floors.
“A carpet reducer is a flooring transition strip or profile used when carpet meets another floor with a different height, typically creating a sloped ‘reduced’ edge from the higher surface down to the carpet to avoid a trip lip.”
Without this strip, you are left with an exposed carpet edge that frays over time and a height difference that catches feet and wheels alike. Buggy wheels, mobility aids, and even vacuum cleaners can snag on an unprotected edge. The preventing a “trip lip” function alone makes a reducer worth every penny in a busy household.
Carpet reducers are most commonly installed in these locations:
- Doorways where a carpeted room meets a tiled hallway or kitchen
- Open-plan living areas where carpet flows into laminate or engineered wood
- Hallways that transition between different flooring zones
- Stair landings where carpet meets a hard surface at the top or bottom tread
It is important to distinguish a carpet reducer from other transition strips for uneven floors. A T-mould, for example, connects two surfaces at the same height. A reducer is specifically for height differences, and using the wrong profile in the wrong situation will either look awkward or fail structurally within weeks. Our full carpet transition guide covers the broader terminology in plain language if you want to build on this foundation.
Types of carpet reducers and transition strips
Not all carpet reducers are the same product, even if the term is used loosely in hardware shops and online listings. In practice, the strip you buy may be labelled a reducer threshold, semi-ramp, or Z-bar depending on whether you are primarily bridging a height difference or simply securing the carpet edge.
Understanding the distinctions between these profiles saves you from buying the wrong thing and having to redo the job.
| Profile type | Primary purpose | Height difference needed | Best used for |
|---|---|---|---|
| Reducer threshold | Bridge height gap with a slope | 6mm to 20mm | Carpet to tile, carpet to hardwood |
| Semi-ramp | Gentle, low-profile slope | 3mm to 10mm | Carpet to thin vinyl or LVP |
| Z-bar / carpet edge trim | Secure carpet edge, prevent fraying | Minimal or none | Carpet ending at a doorway or room edge |
| Carpet gripper bar | Hold carpet end in place | None | Carpet to hard floor at same level |
The key point from flooring research is this: “Reducer is for different heights; Z-bar/carpet trim is mainly for meeting carpet with another type and preventing fraying.” These are not interchangeable profiles, and using one in place of the other is one of the most common DIY mistakes made during flooring installation.
A reducer threshold is the most recognisable form. It sits over the height gap with a sweeping slope on one side. A semi-ramp is flatter and works well when the height difference is modest, such as when luxury vinyl planks (LVP) meet a thicker carpet. The Z-bar has a Z-shaped cross section: one flange tucks under the carpet edge, another presses down on top, and the body bridges to the adjacent floor. This profile is ideal when the carpet edge needs to be locked down firmly to prevent fraying, even if the floors are roughly at the same level.
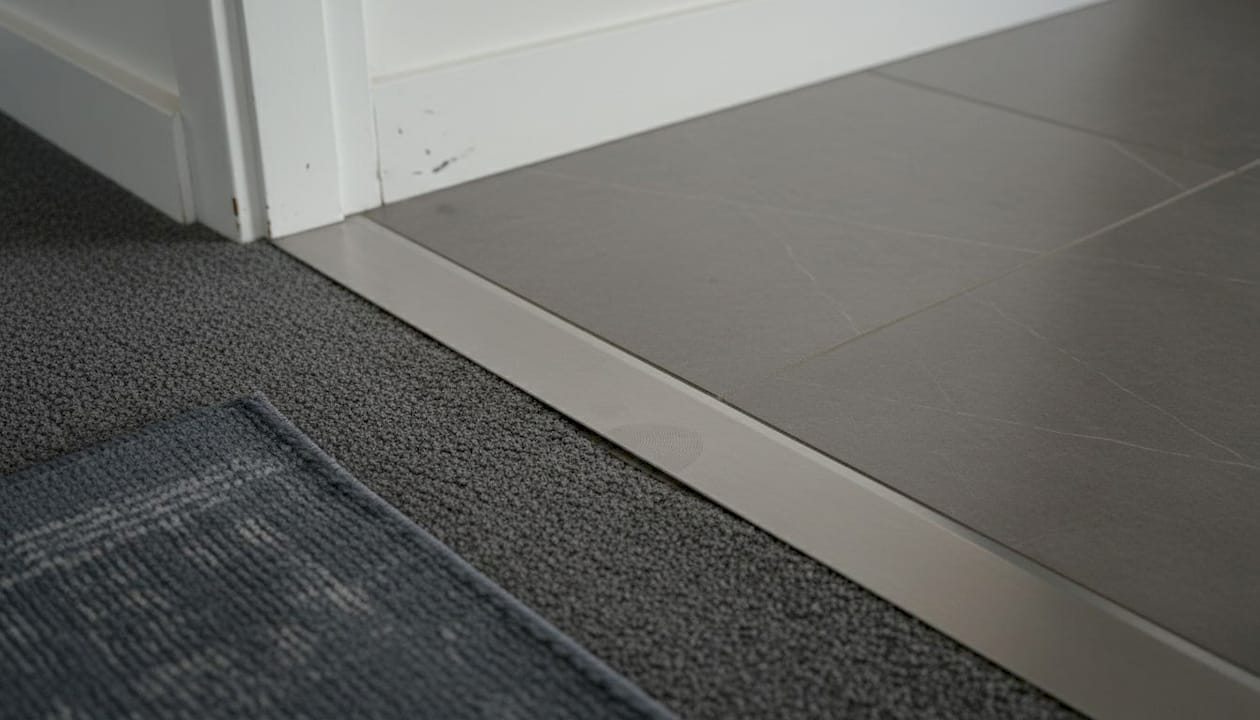
Pro Tip: Measure the height difference with a steel ruler across the transition point before ordering any trim. A 3mm gap needs a very different solution to a 15mm gap, and getting this measurement right before you buy saves considerable time and money.
Browse the full range of transition strip types to compare profiles side by side, or read our detailed guide on connecting carpet to hardfloor for scenario-specific advice. If any of the flooring transition terminology is still unclear, that glossary is a useful reference point before you purchase.
How to install a carpet reducer: Step-by-step guide
Installing a carpet reducer is well within the capability of a competent DIYer. The process typically takes under an hour for a single doorway, and the tools required are basic: a tape measure, pencil, hacksaw or mitre saw, drill, and the fixings supplied with the strip.
Follow these steps for a clean, secure installation:
- Measure and cut the reducer to length. Mark the strip at the correct width of the doorway or transition point, then cut cleanly with a hacksaw. File any rough edges smooth to avoid scratching the floor on either side.
- Mark the fixing positions. Lay the base track (if your system uses one) in position and mark through the fixing holes onto the subfloor with a pencil.
- Drill and fix the base track. Use the appropriate fixing for your subfloor. Concrete requires wall plugs and screws, while timber subfloors accept direct screws. On a solid concrete floor, adhesive can be used if drilling is not possible.
- Prepare the carpet edge. Trim any excess carpet backing and underlay that might prevent the reducer from sitting flat. The carpet fibres should be free to sit naturally under the lip of the reducer without being crushed or bunched.
- Seat and secure the cover strip. Snap or slide the sloped cover strip over the base track, checking that it presses down evenly along its full length. Some systems use concealed screws through the cover strip itself.
- Check and adjust. Walk over the transition several times. The reducer should feel solid underfoot with no rocking or lifting. Check that the carpet edge is fully protected under the lip with no fraying fibres exposed.
Pro Tip: If the subfloor is slightly uneven at the transition point, use thin shims under the base track before fixing it down. Even a millimetre or two of unevenness can cause the cover strip to rock once fitted, which creates noise and accelerates wear.
For transitions between carpet and tile specifically, the positioning of the reducer relative to the grout line matters. Aim to place the reducer so that it sits over a full tile rather than over a cut tile edge, which is weaker. Our carpet to tile transition strip page includes specific guidance for tiled surfaces.
When to use a carpet reducer vs edge trims
Choosing between a carpet reducer and a carpet edge trim is not always obvious, and getting it wrong creates two common problems: an awkward finish that looks unprofessional, or a trim that fails to function as intended and lifts within months.
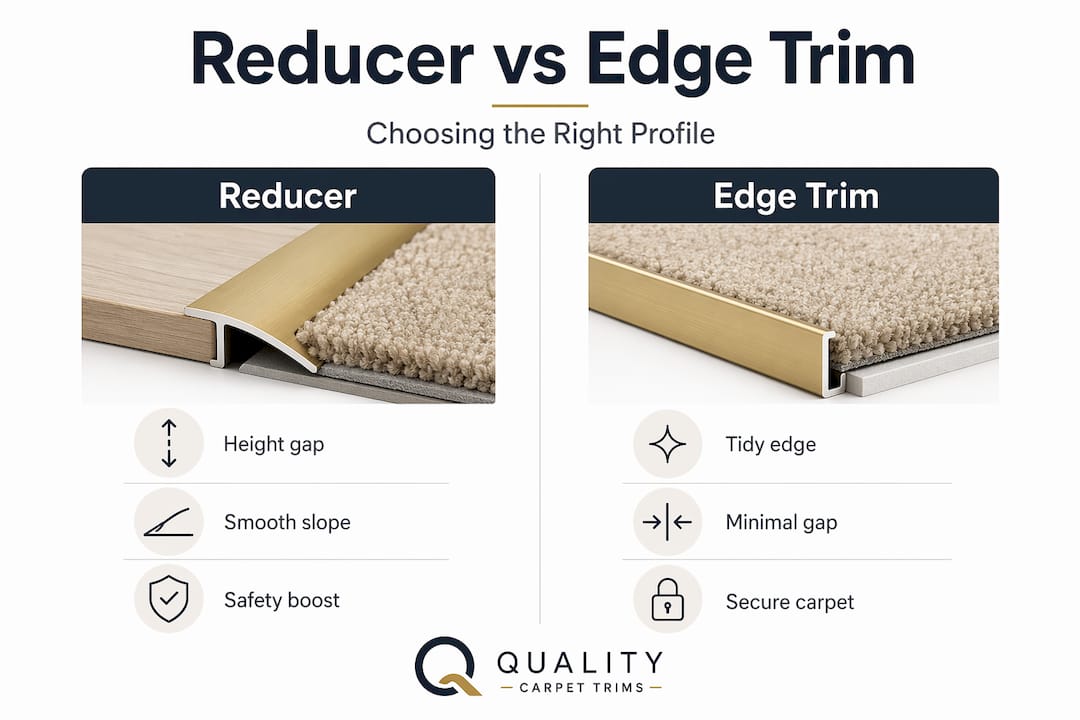
The principle is straightforward once you know it. “If the goal is mainly to tidy and secure the raw carpet edge rather than bridge an elevation change, a carpet-specific trim or Z-bar may be more appropriate than a reducer, and using the wrong profile can look awkward or fail to function properly.”
Here is a practical decision table:
| Situation | Recommended profile | Why |
|---|---|---|
| Carpet 10mm+ higher than adjacent floor | Reducer threshold | Creates safe slope over height gap |
| Carpet edge needs securing, similar heights | Z-bar or carpet edge trim | Prevents fraying without unnecessary bulk |
| Carpet to carpet at similar heights | Carpet to carpet threshold | Designed specifically for this junction |
| Carpet meets LVP with 5mm difference | Semi-ramp reducer | Low-profile option for modest height change |
| Carpet ending at a door frame | Edge trim | Tidies the raw edge neatly |
For DIYers, the key decision is height difference plus carpet edge condition: choose a reducer when bridging a noticeable height change, and choose a carpet edge trim or Z-bar when anchoring and protecting the carpet edge even if the heights are similar.
Common errors that homeowners make with these profiles include:
- Using a reducer where heights are equal. The sloped profile looks odd and may rock underfoot if there is no genuine height difference to bridge.
- Using a Z-bar over a significant height gap. The Z-bar does not provide a ramp, so there is still an abrupt edge that can be a trip hazard.
- Fitting the trim over bunched underlay. The trim will sit high and unevenly, leading to movement and potential cracking of the strip or fixings.
- Choosing based on colour match alone. A beautifully matching trim that is the wrong profile will cause problems regardless of how good it looks.
Understanding the transition strip basics will help you make an informed choice, and if you are dealing with carpet meeting carpet, our carpet to carpet threshold strips are designed for exactly that scenario.
A fresh perspective: What DIYers often miss about carpet reducers
Here is the uncomfortable truth that most flooring guides gloss over: the majority of DIYers choose their carpet reducer based on how it looks in the packet, not on what the floor actually needs. This leads to thousands of homes in the UK with transition strips that are technically installed but functionally wrong.
Appearance matters, of course. A well-matched finish integrates into a room beautifully. But if you select a profile that is too shallow for your height difference, or too bulky for a low-traffic hallway, you will be replacing it within a few years. The strip bears real daily stress, particularly in doorways where feet land on the same spot hundreds of times a week.
Foot traffic is the factor that most guides ignore entirely. A doorway between a living room and a kitchen in a family home sees a fundamentally different level of stress compared to a transition in a spare bedroom. For high-traffic areas, the securing method matters enormously. A reducer held down with adhesive alone on a concrete floor will eventually shift. Screwed fixings are almost always more durable.
Another thing that installers learn quickly from experience: hallways deserve extra care. The long, narrow shape of a hallway means that any flex or movement in a reducer feels amplified as you walk along it. A strip that seems fine in a wide doorway will wobble annoyingly if it is not secured at multiple points along its length. Space fixings no more than 20 to 25 centimetres apart in hallway installations.
The distinction between edge trims and reducers also matters far more than most people assume, even when the height difference appears minimal. A 4mm difference feels negligible when you measure it, but underfoot it is enough to cause a noticeable catch in the step. Never dismiss a small height gap. Our seamless transition expert tips go deeper into the reasoning behind profile selection for tricky situations.
The bottom line is this: invest five minutes measuring and identifying your specific situation before you buy anything. The correct product installed correctly will last decades. The wrong product, however neatly fitted, will let you down.
Quality carpet reducers and trims: Find the perfect fit for your floor
Getting the right reducer makes the difference between a transition that looks and feels professionally finished and one that causes frustration for years to come.

At Quality Carpet Trims, we supply solid metal door bars and threshold strips hand-finished in ten beautiful finishes to complement any interior. Every product is British-made and designed to meet the real demands of UK homes, from busy family hallways to elegant open-plan living spaces. Whether you need a reducer threshold for a significant height change or a carpet edge trim to tidy a vulnerable carpet end, you will find a profile to suit your specific situation. Explore our guides, use our product selector, and order with confidence knowing that expert advice is always available when you need it.
Frequently asked questions
What makes a carpet reducer different from a Z-bar?
A carpet reducer bridges height differences between two floors with a sloped edge, while a Z-bar is designed primarily to secure the carpet edge and prevent fraying rather than compensating for a height change.
Do I need a carpet reducer if my carpet meets a floor at a similar height?
If the height difference is minimal, a carpet edge trim or Z-bar is usually the better choice; reducers are specifically designed for noticeable height changes where a slope is needed to avoid a trip hazard.
Is installing a carpet reducer a DIY-friendly task?
Most modern reducers are straightforward to install at home, but securing the base track correctly to the subfloor and preparing the carpet edge carefully are both essential steps for a safe, lasting result.
Can a carpet reducer help with safety in high-traffic areas?
Yes, a properly installed carpet reducer prevents trip hazards by creating a gradual slope between floor levels, which is particularly important in doorways and hallways where foot traffic is constant.
Recommended
- What is a carpet transition bar? Your 2026 guide
- What Is Carpet Transition? Achieving Seamless Floors
- What is a carpet transition? Your 2026 pro guide
- Floor level transition guide for UK homeowners 2026