
Blog
Trim finishes explained: How to achieve seamless flooring

May
TL;DR:
- Proper trim finishes are essential for achieving a professional, polished look in flooring installations by covering gaps and protecting edges. Selecting the right profile and material depends on the flooring type, location, and traffic, while accurate measurement and installation are critical for durability. Planning trims in advance and investing in quality products significantly enhance both the aesthetic and longevity of the finished floor.
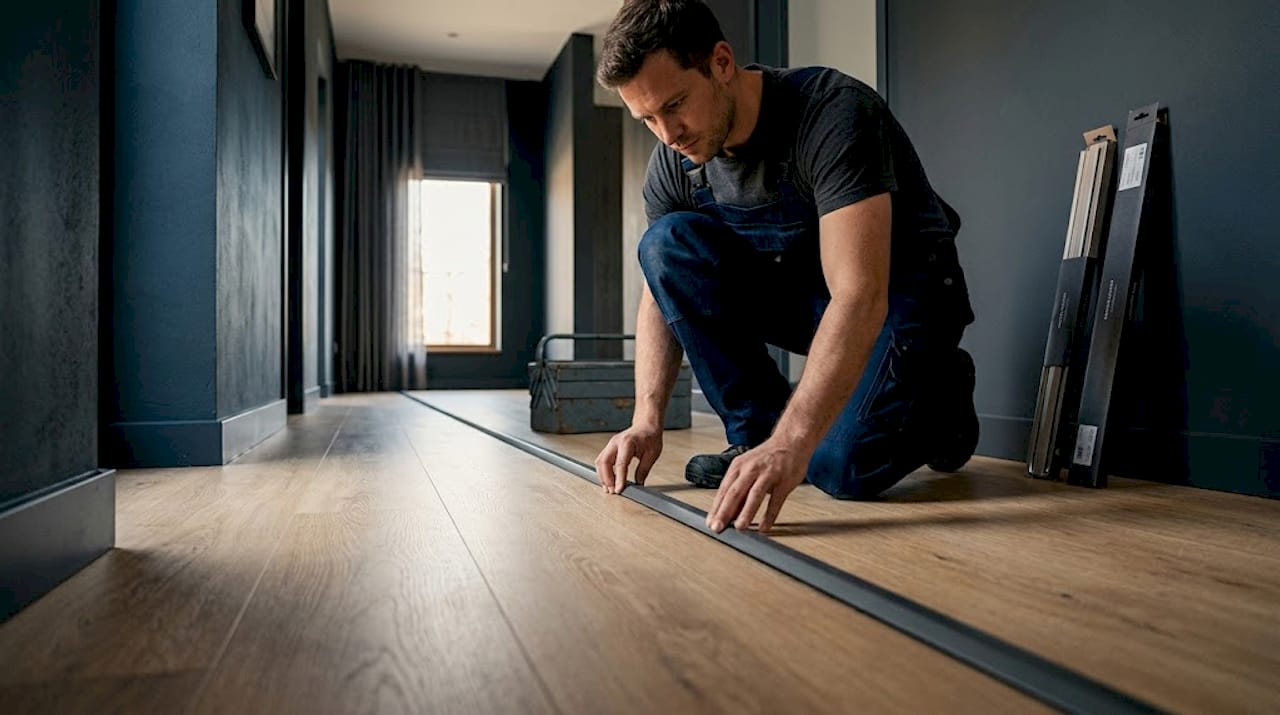
You spend days carefully laying beautiful new flooring, every plank perfectly aligned, only to stand back and spot the problem: raw, unfinished edges where the floor meets the wall, or an awkward gap where two different floor surfaces collide. It looks unfinished. It looks amateur. And it completely undermines the quality of everything you have worked so hard to achieve. Trim finishes are the element most DIYers and even some contractors overlook until it is too late, yet they are the single most visible indicator of whether a flooring installation was done properly or done in a rush.
Table of Contents
- What is a trim finish?
- Types of trim finishes and profiles
- How to install trim finishes for best results
- Factors that influence trim finish quality and durability
- Expert perspective: What most guides miss about trim finishes
- Achieve flawless floors with the right trim finish solutions
- Frequently asked questions
Key Takeaways
| Point | Details |
|---|---|
| Defines trim finish | A trim finish is a specialist profile that hides edges and transitions for a seamless, durable flooring result. |
| Profile choice matters | Selecting the right trim profile and material ensures both a professional look and long-term performance. |
| Proper installation | Trims must be installed to allow for expansion and matched visually for the best outcome. |
| Maintenance tips | High-traffic areas may need more robust fittings and periodic checks to maintain a flawless finish. |
| Expert sourcing | Trusted suppliers and understanding terminology simplify achieving quality, UK-standard flooring finishes. |
What is a trim finish?
A trim finish is far more than a cosmetic afterthought. At its core, a trim finish refers to specialised trim profiles or strips that provide a clean, professional, and protective covering for exposed edges of flooring, transitions between different materials, and expansion gaps left during installation. It is the detail that separates a project that looks truly finished from one that still looks like a work in progress.
Think of it this way: a premium hardwood floor without proper trims is like a beautifully tailored suit with frayed cuffs. The main event is impressive, but one overlooked detail destroys the overall impression. Trim finishes solve several problems simultaneously, and understanding each one helps you plan better from the start.
“The trim finish is not just decorative. It is doing real structural work: protecting vulnerable flooring edges, accommodating natural floor movement, and bridging the visual gap between surfaces in a way that looks intentional rather than improvised.”
Here is what a well-chosen trim finish actually does in practice:
- Covers expansion gaps left around the perimeter of wood and laminate floors, preventing draughts and trapping debris
- Protects exposed edges of carpet, vinyl, or hardfloor from lifting, fraying, or chipping over time
- Creates smooth transitions between different flooring surfaces such as carpet meeting tiles, or laminate meeting hardwood
- Prevents trip hazards at doorways and level changes, which matters especially in commercial or family settings
- Adds a cohesive visual finish that ties the entire room together and reinforces the quality of the wider design
In homes, you will need trim finishes at almost every doorway, along skirting boards, at the base of staircases, and wherever two flooring types meet. In commercial settings, the importance multiplies because high foot traffic means both aesthetics and safety are non-negotiable. Getting familiar with trim terminology explained early in your project planning will save considerable confusion and rework later.
Types of trim finishes and profiles
Understanding which trim profile suits your situation is where many projects go wrong. There is no single “best” profile. The right choice depends on your flooring type, the specific location, your budget, and the visual result you want to achieve.
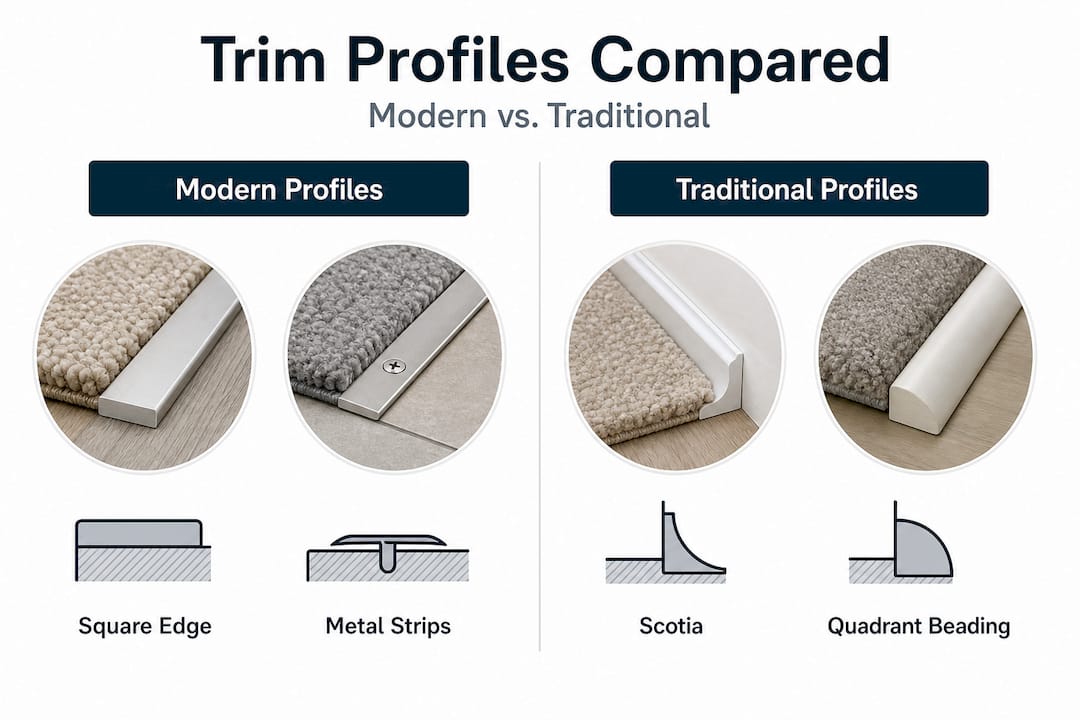
Here is a practical comparison of the most commonly used trim profiles:
| Profile type | Best use | Durability | Cost level | Visual style |
|---|---|---|---|---|
| Square edge trim | Laminate, hardwood perimeter | High | Mid to high | Clean, modern, robust |
| Scotia beading | Budget renovation, quick fixes | Medium | Low | Soft, curved, traditional |
| Quadrant beading | Skirting board to floor joins | Medium | Low | Curved, traditional |
| Full skirting refit | Premium installations | Very high | High | Seamless, architectural |
| Door bar/threshold | Doorways, floor transitions | Very high | Mid | Flat, practical, sleek |
The square edge trim comparison shows why this profile has become the first choice for modern interiors. It sits flush against the wall, covers the expansion gap fully, and creates a crisp line that suits contemporary flooring beautifully. It is harder to fit well, but the results are noticeably superior.
Scotia and quadrant beading are quicker to install and cost less, which makes them popular for renovation projects where existing skirting boards stay in place. However, as laminate scotia vs skirting comparisons clearly illustrate, these lighter profiles are less durable over time and can begin to look tired in high-use areas. Full skirting replacements take more time and investment but deliver a premium, seamless look that adds real value to the finished space.
For tile and stone floors, the profile options differ again. Dedicated tile edging profiles include metal finishing strips, schluter-type profiles, and round-edge trims that protect fragile tile corners while offering a polished look. The material you choose here matters enormously because tiles expand and contract differently to wood or vinyl.
Pro Tip: When choosing between scotia and square edge trim, always consider the room’s use first. A busy hallway or kitchen needs the robustness of a square edge profile. Save the softer, budget-friendly beading for low-traffic rooms like bedrooms where aesthetics take priority over sheer durability.
The key variables when choosing the right trim finish come down to three questions: Where is it going? How much foot traffic will it see? And what existing materials do you need to match?
- Material matters: Solid metal trims outperform MDF or PVC equivalents in high-traffic areas
- Shape affects installation complexity: Square edge requires precision cutting; beading is more forgiving
- Finish matching is critical: Mismatched tones between flooring and trims stand out badly in natural light
How to install trim finishes for best results
Even the best trim profile will fail if fitted incorrectly. Installation quality is where DIY results diverge most sharply from professional ones. The core principles are consistent whether you are fitting a simple beading or a complex threshold bar.
Follow these steps for reliable, professional-quality results:
- Measure carefully before you cut anything. Measure the length of each wall run twice and account for corner angles. A trim cut even 2mm too short will leave a visible gap at the join that no amount of caulk will disguise effectively.
- Prepare the surface. Make sure the floor is fully laid, dry, and clean before you fit any trims. Any debris or adhesive residue under the trim will cause it to sit unevenly and may cause it to lift later.
- Dry-fit all pieces first. Lay the trim in position without fixing it to check the fit, alignment, and mitre angles at corners. This step catches problems before they become permanent mistakes.
- Fix trims to the wall or skirting, not to the floor. This is critical for floor expansion: attaching trim directly to a floating floor prevents the floor from expanding and contracting naturally, which causes buckling. Use adhesive strips, finishing pins, or screws into the wall depending on the profile type.
- Apply caulk to any remaining gaps. Once trims are fixed, a fine bead of paintable caulk at the top edge where trim meets wall creates a clean, professional line that also prevents moisture ingress.
- Match your material and finish to the flooring wherever possible. Natural oak trims will vary slightly in tone from plank to plank, which is normal, but choosing a profile in a wildly different finish creates a jarring visual break.
“Always fix trims to the wall or skirting board, never to the floor itself. The floor needs room to breathe with seasonal temperature and humidity changes. Restricting that movement is the single most common cause of laminate buckling and squeaking.”
For seamless floor transitions at doorways, the sequencing matters too. Lay the floor in both adjoining rooms before fitting the threshold bar, so you know the exact finished heights of both surfaces and can choose a profile that bridges the difference cleanly.
Pro Tip: When fitting trims in a long, straight run, avoid using multiple short pieces joined end to end where a single length would do. Joins in the middle of a run draw the eye immediately and make even well-fitted trims look cheap. Order lengths that cover the full run wherever possible.
Good professional trim installation methods also emphasise the value of carpentry trim best practices around sequencing: fit ceiling coving and door architraves before floor trims so that any adjustments at the wall junction do not damage freshly fitted beading.
Factors that influence trim finish quality and durability
Fitting the trim correctly is only half the equation. What you fit, and where you fit it, determines whether your trim finishes look as good in five years as they do today.
| Material | Durability | Moisture resistance | Best location | Maintenance |
|---|---|---|---|---|
| Solid metal | Excellent | Excellent | Doorways, high traffic | Very low |
| Solid oak/hardwood | Very good | Moderate | Living areas, bedrooms | Low to moderate |
| MDF | Moderate | Poor | Dry, low-traffic spaces | Moderate |
| PVC | Low | Good | Wet rooms (budget use) | Low |
For high-quality UK projects, prioritise solid oak or matching engineered trims from established suppliers for both durability and aesthetics, and always leave expansion gaps of 5 to 10mm covered but not constrained by the trim. This is particularly important in older UK homes where underfloor heating is increasingly common, as heating systems cause more dramatic floor movement than ambient temperature changes alone.
Moisture is a serious consideration that many buyers underestimate. In kitchens, bathrooms, and hallways with frequent wet foot traffic, scotia loosens over time in high-moisture environments, while square edge trims made from solid metal or properly sealed hardwood resist moisture damage far better. If you are fitting in a wet area, the material you choose matters more than the profile shape.
Key factors to assess before choosing your trim:
- Foot traffic volume: Hallways and kitchens need harder, denser materials than bedrooms
- Moisture exposure: Kitchens, bathrooms, and utility rooms demand moisture-resistant trims
- Underfloor heating: Greater floor movement requires trims that allow expansion without breaking the seal
- Subfloor type: Concrete versus timber subfloors affect which fixing method is appropriate
For further guidance on specific issues you encounter on-site, solving trim problems proactively before the floor is fully laid is always easier than diagnosing failures afterwards. And for projects that need to meet building or commercial standards, understanding UK standards for trims ensures your installation is compliant as well as beautiful. For material comparisons relevant to tile and stone floors, these performance insights give useful context across a range of finish types.
Expert perspective: What most guides miss about trim finishes
Most installation guides focus on the mechanics: measure, cut, fix, caulk. What they rarely address is the planning mistake that causes more failed trim installations than poor technique ever does.
The biggest error we see, time and again, is treating trim finishes as an afterthought. Contractors order flooring, lay it, and then figure out the trims. The problem is that by that point, key decisions have already been made that the trim now has to work around: skirting board heights, door frame clearances, threshold heights between rooms, and the specific profile of existing architraves. Trying to retrofit the trim solution to a floor that is already laid creates compromises you will live with for years.
Plan your trims before you order your flooring. Know which profiles you are using at every junction, what thickness they add, and how that affects door clearances. In period properties especially, the interaction between new flooring thickness, existing skirting heights, and door undercuts is genuinely complex, and it is far cheaper to solve on paper than on the floor.
The second thing most guides ignore is the disproportionate visual impact of trim finish quality. You can lay a mid-range laminate floor and finish it with beautifully hand-finished solid metal door bars, and the whole room looks premium. Conversely, you can lay an expensive hardwood floor and trim it with mismatched, poorly fitted MDF beading, and the floor looks worse than it deserves to. Trim quality punches above its weight in the final result.
Invest in well-finished, properly matched trims. The cost difference between a quality trim and a budget alternative is modest compared to the overall project cost, but the visual difference is enormous. The guidance at solving real-world trim issues reinforces this point with practical examples from real installations. Get the trims right, and the rest of the room follows.
Achieve flawless floors with the right trim finish solutions
When it comes to flooring trim finishes, the difference between a result you are proud of and one you want to redo comes down to product quality and the right information at the right time.

At Quality Carpet Trims, we supply solid metal door bars hand-finished in 10 beautiful finishes designed to complement the full range of modern UK interiors. Our products are British-made, hand-finished to order, and built to last in even the busiest homes and commercial spaces. Whether you are just getting started and need to understand your options with our guide to understanding trim terminology, ready to compare specific products in our browse trim solutions, or working through a specific project decision using our resource on choosing the right trim, we have what you need to finish every floor the way it deserves.
Frequently asked questions
What is the difference between a trim and a finishing strip?
A trim provides a decorative and protective border along edges and perimeters, while a finishing strip is specifically designed to cover the gap and create a smooth transition where two flooring surfaces meet. Both are forms of specialised trim profiles but serve slightly different primary functions.
Can I install trim finishes myself or should I hire a professional?
Most trims can be fitted successfully by a confident DIYer, provided you measure carefully and use the correct fixing method. Complex layouts, tight door clearances, or premium installations benefit from professional fitting, as accurate measurement and correct fixing are where most DIY mistakes occur.
How do I choose the right trim finish for my floor type?
Match the trim material and colour as closely as possible to your flooring, and choose a profile suited to the specific location and traffic level in that space. For durability and appearance, prioritise solid oak or engineered trims and always ensure expansion gaps of 5 to 10mm are covered but unrestricted.
What causes trim to loosen or fail over time?
High foot traffic, moisture, and incorrect fitting are the primary causes of trim failure. Scotia profiles loosen over time in high-traffic or moisture-prone areas, making a square edge or solid metal profile a much more reliable choice for hallways, kitchens, and commercial spaces.
Is it essential to cover expansion gaps in wood or laminate flooring?
Yes, expansion gaps are required by all floating floor installations to allow for natural movement, and those gaps must be covered by trims to prevent draughts, debris, and an unfinished appearance. However, the trim must cover but not constrain the expansion gap, as fixing the floor in place causes buckling and structural damage over time.
Recommended
- Installing Flooring Edge Trims for Seamless Floor Transitions
- Flooring Edge Trims: The Key to a Seamless Finish
- How to solve flooring trim problems like a pro
- Carpet to Tile Transition: Achieving Seamless Floors