
Blog
Perfect bathroom floor transitions: step-by-step UK guide

Apr
TL;DR:
- Properly fitted transition strips improve safety, protect edges, and enhance bathroom appearance.
- Selecting the correct profile height and fixing method is key for a professional, durable finish.
- Most DIY homeowners can successfully install bathroom transitions using suitable tools and guidance.
That awkward ridge between your bathroom tiles and the hallway carpet is more than just an eyesore. It is a trip hazard, a gap that collects grime, and a sign that the finishing work was rushed. A well-fitted bathroom floor transition strip solves all three problems at once. Whether you are moving from ceramic tile to carpet, vinyl to laminate, or tile to tile, getting this join right makes the difference between a bathroom that looks truly finished and one that looks like a weekend bodge job. This guide walks you through every stage, from choosing the right strip to checking the final result.
Table of Contents
- What is a bathroom floor transition and why is it important?
- Tools and materials: what you need for a professional finish
- Step-by-step: how to fit a bathroom floor transition like a pro
- Checking your results: how to ensure a perfect finish and lasting safety
- Common myths and what the experts want you to know about floor transitions
- Find the perfect finish for your bathroom floor transition
- Frequently asked questions
Key Takeaways
| Point | Details |
|---|---|
| Preparation is crucial | Clean, level and measure gaps carefully to get a professional-looking result. |
| Product choice matters | Select a compatible transition strip for your floor types and heights, using reputable UK brands. |
| Proper installation steps | Follow precise steps and use the right tools for durability and a neat, safe join. |
| Accessibility counts | Choosing gentle slopes and low lips ensures safety for all users and meets accessibility needs. |
What is a bathroom floor transition and why is it important?
A bathroom floor transition strip is a narrow length of profiled material fitted across the join between two different floor surfaces, typically at a doorway. Its job is to bridge the gap cleanly, cover any raw edges, and create a smooth, safe passage from one room to the next. You will most often find them at bathroom doorways where tiles meet carpet, vinyl meets laminate, or one tile level differs slightly from another.
The benefits go well beyond looks. A properly fitted transition:
- Covers the expansion gap that floating floors need to move without buckling
- Protects the cut edges of tiles and vinyl from chipping or lifting
- Reduces the risk of trips, particularly important in households with older relatives or young children
- Seals out moisture at the bathroom threshold, slowing the migration of damp into adjoining rooms
- Gives the whole floor installation a polished, intentional appearance
In the UK, accessibility standards require gentle slopes and low lips at thresholds, though there are no strict building regulations specifically governing bathroom floor transitions. That said, keeping the profile as low as possible is always the right approach, especially in homes where accessibility matters.
Common products used in UK bathrooms include Tile Rite and Schlüter-SCHIENE trims, both of which are widely stocked and available in a range of finishes. For joins between different flooring types, a carpet to laminate threshold is a popular choice where a carpeted hallway meets a tiled bathroom floor.
| Transition type | Typical height (mm) | Best use case |
|---|---|---|
| T-bar / T-profile | 8 to 12 | Same-level floors, tile to tile or laminate to laminate |
| Reducer / ramp | 10 to 18 | Floors at slightly different heights, tile to vinyl |
| Threshold / door bar | 6 to 15 | Doorways, carpet to tile or carpet to laminate |
| Edge trim / nosing | 4 to 10 | Exposed tile edges, step edges |
Choosing the correct profile from the start saves a great deal of frustration later. Measure the height difference between your two floors before you buy anything.
Tools and materials: what you need for a professional finish
Getting the right tools together before you start is one of the most overlooked steps in any flooring project. Arriving at the job with the wrong saw or missing a drill bit wastes time and often leads to poor cuts.
Tools you will need:
- Tape measure and pencil
- Mitre saw or a fine-toothed hacksaw
- 2-metre straightedge or spirit level
- Cordless drill and driver
- Phillips and flathead screwdriver bits
- Masonry drill bit (if fixing into concrete)
- Vacuum cleaner or stiff brush
- Safety glasses and gloves (PPE)
Materials you will need:
- Your chosen transition strip or door bar
- Screws and wall plugs (for concrete or screed subfloors)
- Flexible flooring adhesive (for timber or plywood subfloors)
- Silicone sealant (optional, for moisture-prone thresholds)
For a carpet to tile threshold, you will typically need a clip-in system where a track is fixed to the subfloor first and the cover strip snaps in afterwards. Clip-in systems are preferred for DIY tasks, and products such as Tile Rite and Schlüter-SCHIENE are widely available from UK tile and flooring suppliers.
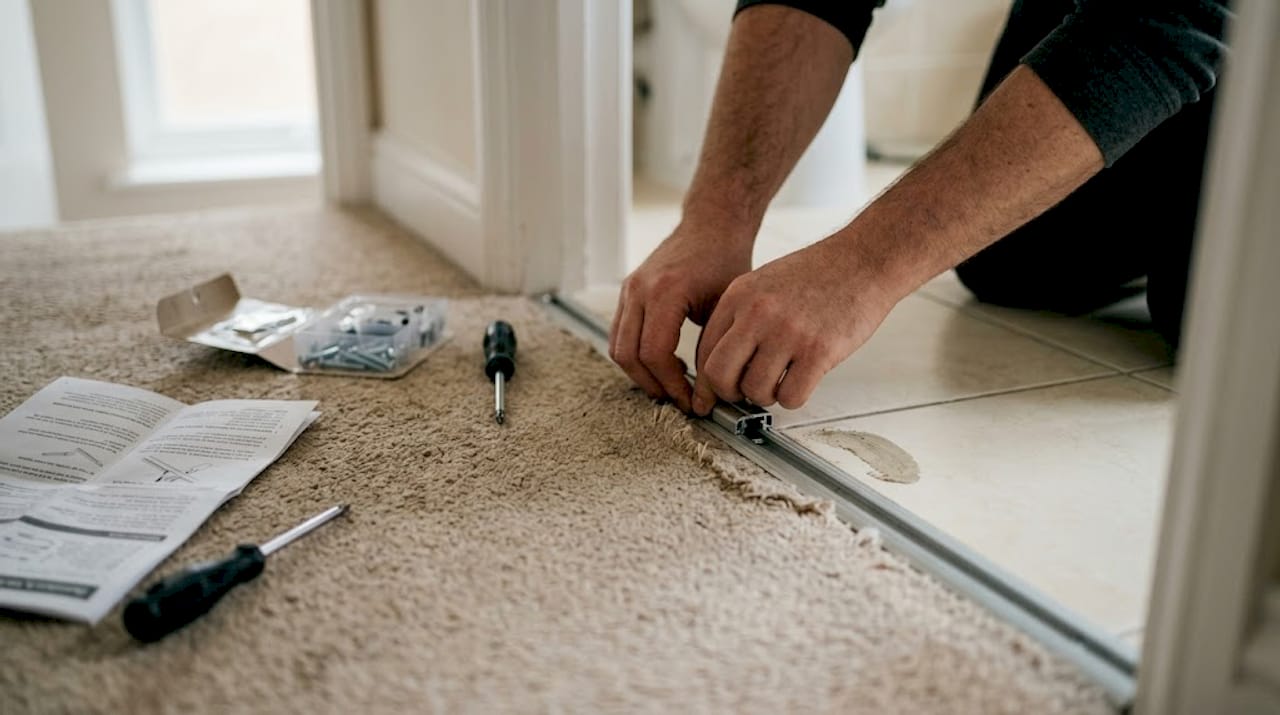
Pro Tip: Always dry-fit the entire strip before committing to screws or adhesive. Lay it in position, check the alignment from both sides of the doorway, and confirm the height sits flush. Fixing mistakes after the adhesive has cured is far more difficult and sometimes means replacing the strip entirely.
| Profile type | Height range | Typical finish | Best for |
|---|---|---|---|
| Clip-in door bar | 6 to 14 mm | Gold, silver, bronze | Carpet to tile, carpet to vinyl |
| Screw-down T-bar | 8 to 12 mm | Chrome, brushed nickel | Tile to tile, laminate to laminate |
| Adhesive reducer | 10 to 18 mm | Various | Vinyl to tile, height differences |
| Solid metal bar | 6 to 12 mm | Hand-finished, 10 options | Premium finish, long-term durability |
For a step-by-step transition fitting guide, the key principle is always to fix to the subfloor rather than the floating floor itself.
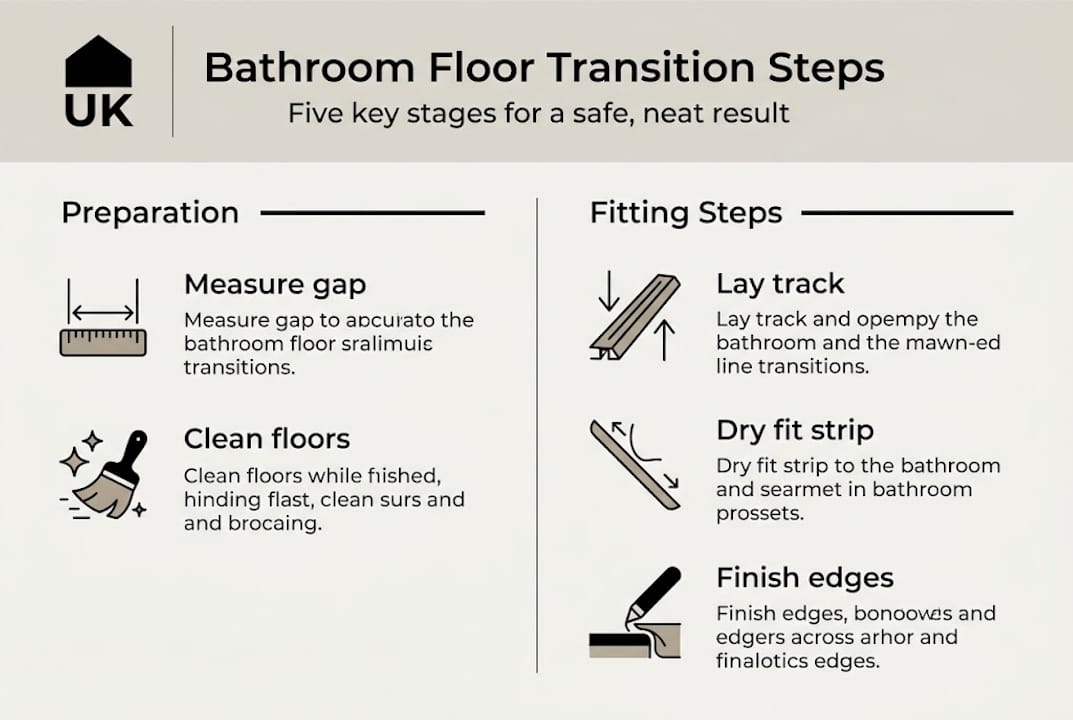
Step-by-step: how to fit a bathroom floor transition like a pro
With your tools assembled and your strip dry-fitted, here is the full installation process.
-
Prepare the subfloor. Vacuum or brush the threshold area thoroughly. Remove any old adhesive, grout residue, or debris. The surface must be clean, dry, and flat. Even a small lump under the track will cause the cover strip to rock.
-
Measure the doorway width. Measure at three points: left side, centre, and right side. Use the smallest measurement to cut your strip. This avoids a piece that is fractionally too long and bows under pressure.
-
Cut the strip to length. Use a mitre saw for a clean, square cut. A fine-toothed hacksaw works well too, but clamp the strip securely before cutting to prevent it from moving. Deburr any sharp edges with a file.
-
Fix the track or base. For concrete or screed subfloors, drill pilot holes, insert wall plugs, and screw the track down firmly. Fix the track to the subfloor, never to the floating floor, and always leave a small expansion gap at each end. For timber subfloors, flexible adhesive is a reliable alternative to screws.
-
Snap or press the cover strip into place. Most clip-in systems require firm, even pressure along the length of the strip. Use a rubber mallet if needed, working from the centre outwards.
-
Check door clearance. The finished strip must allow the door to open and close freely.
A minimum door clearance of 10mm is the UK standard for most transition strips. Measure from the top of the fitted strip to the bottom of the door before finalising the installation.
Pro Tip: If your bathroom door drags on the new strip, you may need to trim the door slightly at the base. A hand plane or belt sander works well for small adjustments.
For more context on choosing the right profile height, the floor level transitions explained guide covers the most common UK scenarios in detail.
Checking your results: how to ensure a perfect finish and lasting safety
Once the strip is fitted, take ten minutes to check the result properly. Rushing this stage is how small problems become big ones six months down the line.
What to check immediately after fitting:
- The strip sits level across its full width with no rocking or flex
- No screw heads protrude above the surface of the cover strip
- The expansion gap at each end is present and not blocked by adhesive
- The height difference between the two floors is bridged smoothly with no sharp lip
- The door opens and closes without catching
If you spot issues, here is how to address the most common ones:
| Problem | Likely cause | Quick fix |
|---|---|---|
| Strip rocks or flexes | Uneven subfloor or loose track | Re-fix track, pack low spots with self-levelling compound |
| Visible gap at one end | Strip cut too short | Add a small piece of matching silicone or replace the strip |
| Door catches on strip | Strip too high | Choose a lower-profile option or adjust door clearance |
| Strip discolours quickly | Moisture ingress | Apply silicone bead along bathroom-side edge |
| Cover strip pops off | Track not fixed firmly | Re-screw track with additional fixings |
For ongoing maintenance, wipe the strip down with a damp cloth and a mild, non-abrasive cleaner. Avoid harsh chemical cleaners on metal finishes as they can strip the surface coating over time. After installation, always check for gentle slopes and low lips to ensure the threshold remains accessible and safe for all users.
For further inspiration on profile options, browse the tile to tile threshold options available for UK bathrooms.
Common myths and what the experts want you to know about floor transitions
The most persistent myth about bathroom floor transitions is that a neat result requires a professional fitter. It does not. With the right product, the right tools, and a methodical approach, most homeowners achieve results that are indistinguishable from professional work. The key is preparation, not skill.
The second myth is that cheaper strips are just as good. They rarely are. Unbranded, lightweight strips flex under foot traffic, corrode in moist bathroom environments, and lose their finish within a year. A quality solid metal bar, hand-finished in a colour that suits your home, will outlast a budget strip many times over and will still look sharp a decade from now.
The uncomfortable truth is that most failed transitions come down to one of two things: the wrong product for the application, or skipping the dry-fit stage. Neither of these is a skill issue. They are both decisions made before the first screw goes in.
Our expert transition guide for homeowners covers the full range of UK scenarios if you want to dig deeper into profile selection.
Pro Tip: Invest in the correct profile and a finish that complements your existing hardware. A gold strip against chrome door furniture looks mismatched and draws the eye for the wrong reasons.
Find the perfect finish for your bathroom floor transition
Choosing the right transition product is the single biggest factor in achieving a result you will be proud of. At Quality Carpet Trims, we supply solid metal door bars hand-finished in 10 beautiful finishes, designed to complement any UK bathroom interior.

Whether you need to understand flooring trim terminology explained before you buy, are looking for a specific matwell flooring trim, or want to browse the full range of threshold strips options, we have everything you need to finish your bathroom floor to a professional standard. All products are British-made, built to last, and backed by expert advice.
Frequently asked questions
Do I need a professional to install a bathroom floor transition?
Most homeowners can install bathroom floor transitions successfully using DIY-friendly products. Clip-in systems are preferred for DIY tasks and require only basic tools.
Are there UK regulations for bathroom floor transitions?
There are no strict building regulations governing bathroom floor transitions specifically, but accessibility standards require gentle slopes and low lips to ensure safety for all users.
How do I choose the right transition strip for my bathroom?
Base your choice on the height difference between your two floors, the materials involved, and the finish you want. Tile Rite and Schlüter-SCHIENE cover most common UK bathroom transition scenarios.
What is the minimum door clearance for a bathroom threshold?
A 10mm door clearance under the door is the UK standard for most transition strips, ensuring the door swings freely over the fitted profile.
Recommended
- Floor level transition guide for UK homeowners 2026
- What is a flooring transition: guide for UK homeowners 2026
- How T-bars create flawless flooring transitions: UK guide
- Vinyl flooring bars: A practical UK guide for seamless transitions
- Step-by-step home decor guide: transform your space – New Way Ref