
Blog
What is a flooring transition: guide for UK homeowners 2026

Mar
Thousands of UK homeowners unknowingly live with tripping hazards lurking between their carpet and tile, or laminate and vinyl. Poorly chosen flooring transitions create uneven surfaces that pose daily safety risks whilst detracting from your interior design. This guide reveals what flooring transitions are, which profiles suit your home, and how to select quality trims that protect your family whilst enhancing every room’s aesthetic appeal.
Table of Contents
- Understanding Flooring Transitions: Definition And Purpose
- Types Of Flooring Transitions And Profiles
- Material Compatibility And Quality Considerations
- Safety And Regulatory Standards In The UK
- Common Misconceptions About Flooring Transitions
- Installation Guidance And Common Pitfalls
- Choosing The Right Flooring Transition For Your Home
- Explore Quality Flooring Transitions From Quality Carpet Trims
- Frequently Asked Questions About Flooring Transitions
Key takeaways
| Point | Details |
|---|---|
| Definition and roles | Flooring transitions connect different floor materials, prevent trip hazards, and maintain visual flow between rooms. |
| Profile variety | T-bars, reducers, and thresholds each accommodate specific height differences and material junctions in UK homes. |
| Material quality matters | British-made solid metal trims outlast aluminium, wooden, and PVC alternatives whilst meeting UK safety standards. |
| Installation precision | Proper measurement, profile selection, and fitting technique ensure lasting safety and aesthetic performance. |
| Informed selection | Match transitions to flooring types, interior style, traffic levels, and regulatory requirements for optimal results. |
Understanding flooring transitions: definition and purpose
A flooring transition is the finishing element that bridges two different floor materials or levels within your home. You’ll find these trims wherever carpet meets tile, laminate joins vinyl, or hardwood transitions to stone.
These components serve three critical functions in UK interiors. First, they eliminate height differences that create trip hazards, particularly important for households with elderly residents or young children. Second, they protect exposed flooring edges from moisture infiltration and physical damage. Third, they provide visual continuity that ties your design scheme together across adjoining spaces.
UK building regulations recognise flooring transitions as essential safety features. Without proper transitions, even minor height variations become accident risks. Insurance claims frequently cite inadequate floor junctions as contributing factors in domestic trips and falls.
Consider typical applications throughout your home. Kitchen doorways transition from ceramic tile to hallway carpet. Living room thresholds separate engineered wood from dining area laminate. Bathroom entries require waterproof transitions from vinyl to bedroom carpet. Each junction demands a specific profile and material choice to function safely and look polished.
Pro Tip: Photograph each flooring junction in your home before shopping for transitions. These images help you identify height differences and material types, ensuring accurate profile selection when you consult with suppliers.
Quality transitions also accommodate natural floor movement from temperature and humidity changes. Rigid installations without expansion allowances crack under stress, creating new hazards. Properly specified trims flex slightly whilst maintaining secure positioning, extending service life considerably.
The visual impact shouldn’t be underestimated. A poorly matched transition draws attention to itself, disrupting your carefully chosen colour palette and material selections. Conversely, a well-chosen trim in the right finish creates seamless laminate transition results that visitors never notice, which is precisely the goal.
Types of flooring transitions and profiles
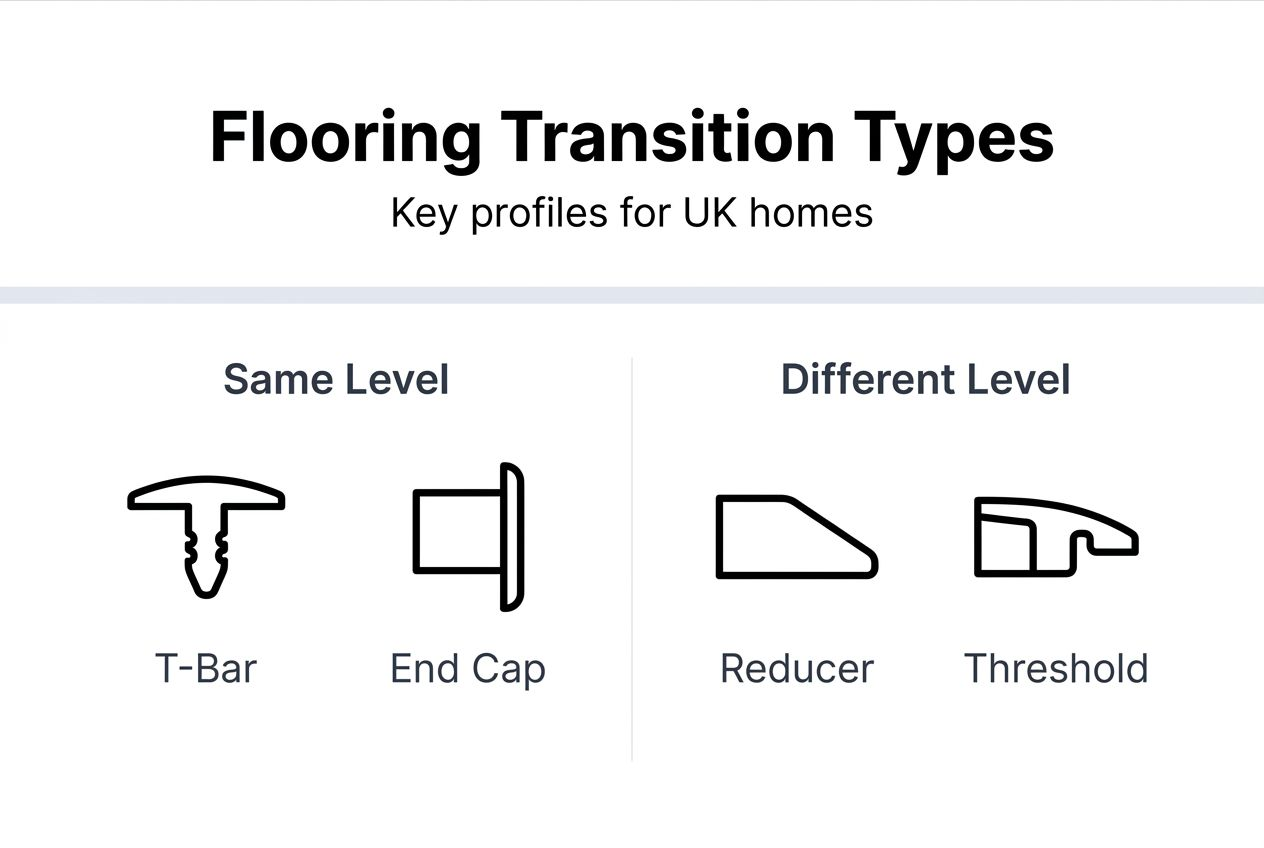
Three primary profile types dominate UK residential installations, each addressing specific height challenges and material combinations.
T-bar transitions suit same-height junctions where two floors meet at identical levels. These profiles feature a central stem that slots into the gap between materials, with wings extending across both surfaces. You’ll use T-bars when connecting laminate to laminate or vinyl to vinyl in doorways. The symmetrical design accommodates expansion gaps whilst providing a neat finish line.
Reducer transitions tackle height differences up to 15mm, stepping down from one level to another. One side sits atop the higher floor whilst the opposite edge tapers to meet the lower surface. Common applications include carpet to hardwood junctions or raised laminate to existing tile. The gradual slope minimises trip risk whilst accommodating substantial level changes.
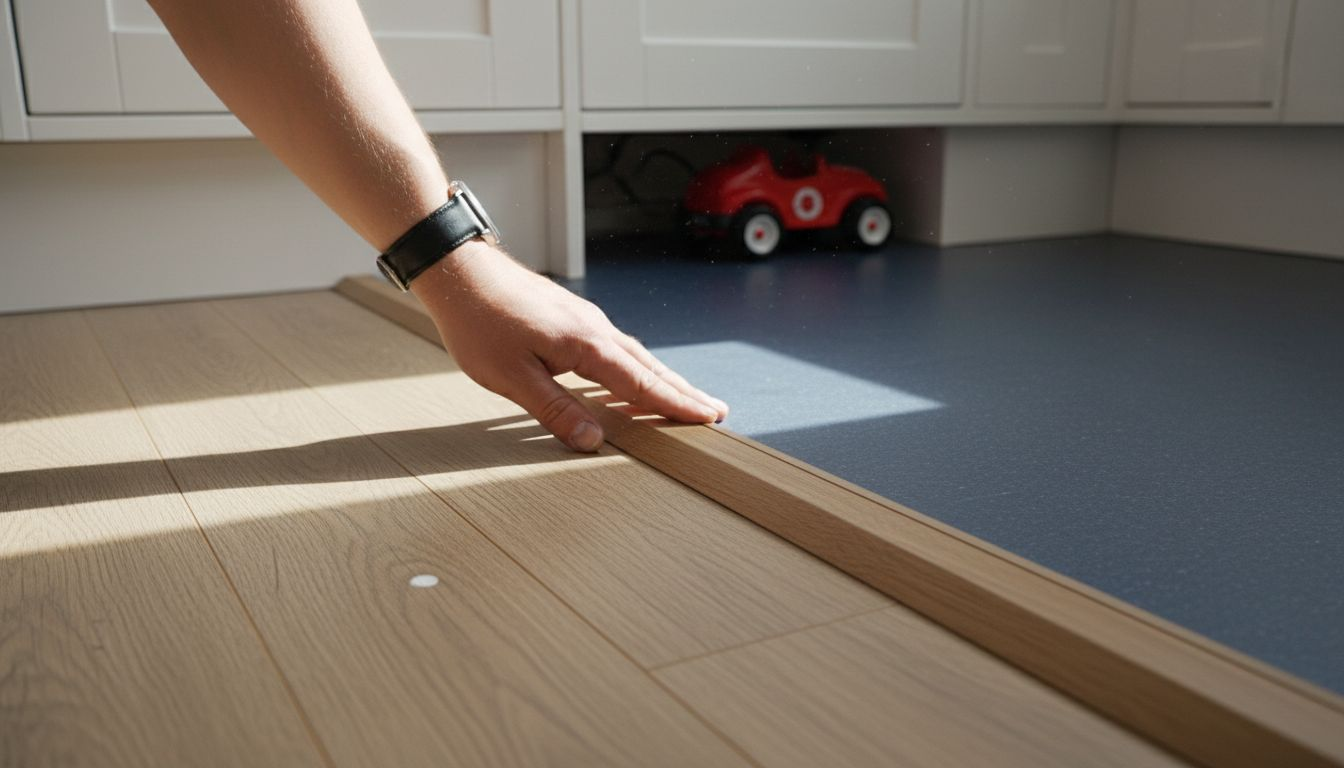
Threshold transitions handle the most challenging situations: significant height differences exceeding 15mm, exterior doorways, or moisture barrier requirements. These robust profiles often feature weatherproof designs for external applications or raised lips that prevent water migration between rooms. Bathroom and patio door entries typically require threshold transitions.
| Profile Type | Height Difference | Typical Application | Key Feature |
|---|---|---|---|
| T-bar | 0-3mm | Same-level junctions | Symmetrical wings, expansion accommodation |
| Reducer | 3-15mm | Stepped-down transitions | Gradual slope, trip hazard reduction |
| Threshold | 15mm+ | Doorways, moisture barriers | Robust construction, weatherproof options |
Beyond these core profiles, specialised variants address niche requirements. End caps finish exposed flooring edges at staircases or raised platforms. Stair nosings protect tread edges whilst improving visibility. Corner trims wrap external angles where two walls meet flooring.
Profile selection depends entirely on accurate height measurement. A T-bar installed over a 10mm difference creates an immediate tripping hazard. Understanding flooring transition terminology prevents costly mistakes and ensures your specification matches the physical requirements.
Material junctions influence profile choice beyond height considerations. Carpet to tile benefits from reducers with gripper accommodation on the carpet side. Laminate to vinyl works best with T-bars featuring expansion slots. Each pairing has optimal solutions developed through decades of UK installation experience.
Pro Tip: When measuring height differences, place a straight edge across both flooring surfaces and measure the gap underneath at the junction point. This technique reveals the true vertical difference more accurately than measuring each floor separately.
Uneven subfloors require additional consideration. Slight dips or rises along the junction line demand flexible transition strips designed for uneven floors that can accommodate undulation without creating new trip points. Rigid profiles over wavy subfloors rock loose quickly, failing both aesthetically and functionally.
Material compatibility and quality considerations
The material composition of your flooring transition directly determines its lifespan, safety performance, and compatibility with adjoining surfaces.
Solid metal trims represent the premium choice for UK homes prioritising longevity. Hand-finished brass, nickel, or bronze transitions resist wear from foot traffic, maintain secure fixing over decades, and complement quality interior schemes. These materials naturally resist corrosion in moisture-prone areas like kitchens and bathrooms.
Aluminium alternatives may seem attractive through lower initial costs, but they bend under impact, oxidise in damp conditions, and show wear patterns within months of installation. Many budget trims use aluminium cores with thin decorative coatings that chip away, exposing the base metal and creating unsightly appearances.
Wooden transitions suit period properties or rustic design schemes but require regular maintenance. Moisture exposure causes swelling, warping, and finish degradation. High-traffic areas quickly show dents and scratches. Wood also struggles with the expansion and contraction cycles that modern floating floors experience.
PVC and composite materials fail even faster. Using transitions incompatible with flooring types causes adhesive failures and surface damage. PVC becomes brittle with age, cracking under normal use. The plasticised surface never achieves the polished appearance of metal, particularly in high-end renovations where every detail matters.
British manufacturing standards ensure consistent quality control absent from imported alternatives. UK-made solid metal trims undergo rigorous testing for dimensional accuracy, finish durability, and fixing system reliability. Quality Carpet Trims exclusively supplies British-made products, deliberately avoiding aluminium, wooden, and PVC trims that compromise performance.
Compatibility extends beyond the trim material itself. Adhesives, screws, or clips must suit both the transition and the flooring materials being joined. Inappropriate fixing methods damage subfloors, void flooring warranties, or simply fail to hold transitions securely. Manufacturer guidance specifies tested combinations for reliable results.
Finish options multiply once you’ve selected the base material. Polished brass suits traditional interiors. Satin nickel complements contemporary schemes. Antique bronze adds character to period renovations. Quality trims offer ten hand-finished options, allowing precise matching to your existing hardware and fixtures.
Pro Tip: Request material samples before committing to large orders. Physical samples reveal true colour, texture, and weight characteristics that photographs cannot convey. Test samples against your actual flooring materials under your home’s lighting conditions for accurate assessment.
The weight of solid metal trims provides an often-overlooked benefit. Heavier profiles stay positioned during installation, resist accidental displacement, and convey quality through tactile feedback. Lightweight alternatives shift during fitting, requiring additional fixings that complicate installation and increase failure points.
Understanding what flooring trim truly means in terms of material composition, manufacturing standards, and compatibility requirements empowers informed purchasing decisions that protect your renovation investment for decades.
Safety and regulatory standards in the UK
UK building regulations directly address flooring transitions through specific requirements designed to prevent accidents and ensure accessibility.
Part M of the Building Regulations limits threshold height differences to 15mm maximum for accessible routes within dwellings. This standard applies to doorways, corridor junctions, and room entries where level changes occur. Transitions exceeding this height require ramped profiles or are prohibited entirely in new construction and major renovations.
Part K governs protection from falling, including trip hazards created by flooring level changes. Regulations require that any unavoidable height difference features chamfered or rounded edges to minimise trip risk. Sharp 90-degree vertical steps are specifically prohibited. Compliant transitions incorporate these safety features into their profile design.
Accessibility considerations extend beyond pure height measurements. Contrast between flooring materials helps visually impaired residents identify level changes. Tactile differences warn of transitions through foot feedback. Regulatory guidance encourages designers to combine these sensory cues with appropriate profile selection.
Safety statistics underscore the importance of proper transition specification. Domestic trips and falls account for thousands of UK hospitalisations annually, with uneven flooring surfaces cited as a primary contributing factor. Properly installed transitions demonstrably reduce these incidents by eliminating the height variations and exposed edges that cause most accidents.
Insurance implications follow regulatory compliance. Insurers may dispute liability claims where non-compliant transitions contributed to falls. Maintaining documented evidence of regulation-compliant installations protects homeowners legally and financially. Professional installation certificates provide this documentation when DIY approaches cannot.
Material specifications within regulations focus on slip resistance and durability. Transitions must maintain their safety features throughout their service life, not just at installation. Profiles that wear smooth, deform under traffic, or develop sharp edges through degradation fail to meet ongoing compliance requirements.
Fire safety regulations intersect with flooring transitions in certain applications. Transitions crossing fire compartment boundaries must not compromise the fire resistance of floors. Specific fire-rated profiles exist for these situations, though most residential applications fall outside this requirement.
Pro Tip: Photograph your completed transition installations from multiple angles and retain all product documentation. This evidence proves regulatory compliance should questions arise during property sales or insurance claims.
Local authority building control officers may inspect flooring transitions during renovation sign-offs. Non-compliant installations require rectification before completion certificates are issued. Understanding requirements before purchase prevents costly replacements and project delays.
The interaction between underfloor heating and transitions deserves consideration. Regulations require that floor finishes and transitions do not impede heat distribution or create thermal bridging that damages flooring materials. Appropriate fixing methods and profile selections accommodate heating systems without compromise.
Common misconceptions about flooring transitions
Several persistent myths about flooring transitions lead UK homeowners toward poor purchasing decisions and installation failures.
Misconception one: all metal trims offer equivalent durability. Aluminium, stainless steel, and solid brass occupy vastly different quality tiers. Aluminium bends easily and corrodes. Stainless steel, whilst durable, typically appears in budget-grade pressed profiles lacking the refined finish of hand-finished solid metal. Only solid brass, bronze, or nickel transitions provide the longevity and appearance premium renovations demand. Quality Carpet Trims deliberately excludes inferior metal options, stocking only solid metal trims that justify their premium positioning.
Misconception two: transitions serve purely decorative purposes. This dangerous belief ignores the primary safety function these components provide. Transitions exist first to eliminate trip hazards and protect flooring edges, with aesthetic enhancement as a secondary benefit. Treating them as optional decorative elements results in exposed edges, height differences, and preventable accidents. Every flooring junction requires appropriate transition specification, regardless of design preferences.
Misconception three: installation quality matters little for pre-manufactured products. Even the finest transition fails when improperly fitted. Incorrect height measurement, inadequate fixing, or misaligned placement creates trip hazards worse than no transition at all. Professional installation or meticulous DIY technique following manufacturer guidance is essential. The product quality and installation quality must both meet high standards for successful results.
Misconception four: carpet transitions require different standards than hard floor transitions. Both applications demand equal attention to safety, quality, and compatibility. Carpet-specific features like gripper accommodation or pile height considerations add complexity but don’t diminish the importance of proper specification. Each junction type has optimal solutions, none more critical than others.
Misconception five: transition profiles are interchangeable across applications. T-bars, reducers, and thresholds serve distinct purposes matching specific height differences and junction types. Using a T-bar where a reducer is required creates an immediate trip hazard. Conversely, installing reducers at same-height junctions looks clumsy and wastes money. Accurate height measurement and profile matching are non-negotiable requirements.
Misconception six: cheaper transitions save money overall. Budget trims require replacement within months or years, whilst quality solid metal transitions last decades. The true cost calculation includes installation labour, potential flooring damage from failed transitions, and the inconvenience of premature replacement. Premium trims represent superior value through their extended service life and maintained appearance.
Misconception seven: online research eliminates the need for expert consultation. Whilst information helps, nothing replaces experienced guidance tailored to your specific flooring materials, height differences, and installation conditions. Free expert advice from specialist suppliers like Quality Carpet Trims prevents expensive mistakes and ensures optimal solutions for your unique requirements.
These misconceptions persist because they contain superficial logic that fails under scrutiny. Understanding the reality behind each myth empowers confident decision-making based on facts rather than assumptions.
Installation guidance and common pitfalls
Successful flooring transition installation follows a systematic approach that prevents the common errors plaguing DIY and rushed professional jobs.
Step one: measure the height difference accurately. Place a straight edge across both flooring surfaces and measure the vertical gap at the junction. Record this measurement at multiple points along the junction line, as variations indicate uneven subfloors requiring specific solutions. Measurements determine whether you need a T-bar (0-3mm), reducer (3-15mm), or threshold (15mm+).
Step two: measure the junction length precisely. Account for door frame widths, wall-to-wall spans, or custom lengths for non-standard openings. Add 3mm to standard doorway widths to ensure complete coverage without visible gaps. Custom cutting may be required for exact fits in period properties with non-standard dimensions.
Step three: select the appropriate profile and material. Match your measured height difference to the correct profile type. Choose material and finish to complement your flooring and interior hardware. Consider traffic levels when specifying gauge and construction robustness. Request samples to verify appearance and quality before committing to purchase.
Step four: prepare the subfloor thoroughly. Remove debris, vacuum dust, and ensure the surface is level and stable. Uneven subfloors require levelling compound application before transition installation. Moisture barriers may be necessary in damp-prone areas. Preparation quality directly affects installation success and longevity.
Step five: install following manufacturer specifications exactly. Each profile type has specific fixing methods: adhesive, screws, clips, or combinations. Deviation from tested methods risks failure. Maintain specified expansion gaps for floating floors. Ensure the transition sits flush without rocking or gaps underneath.
Common mistake one: incorrect profile selection for the height difference. This creates trip hazards or unstable installations that fail quickly. Always verify your measurements against profile specifications before purchase.
Common mistake two: inadequate subfloor preparation. Installing over debris, uneven surfaces, or moisture creates loose fits and premature failures. Invest time in thorough preparation for lasting results.
Common mistake three: using inappropriate fixing methods. Screwing transitions designed for adhesive installation damages flooring and fails to secure properly. Adhesive-only fixing of profiles requiring mechanical attachment causes detachment under traffic. Follow manufacturer guidance without shortcuts.
Common mistake four: ignoring expansion gaps for floating floors. Laminate and engineered wood require gaps around perimeters for thermal movement. Transitions pinning these floors cause buckling and damage. Profile designs accommodate expansion when installed correctly.
Common mistake five: forcing ill-fitting transitions into place. If a profile doesn’t sit flat naturally, the subfloor requires preparation or the profile is wrong for the application. Forced installations create trip hazards and stress points that fail rapidly.
Pro Tip: Dry-fit your transition before applying adhesive or drilling fixing holes. This trial run reveals measurement errors, subfloor issues, or compatibility problems whilst they’re still easily correctable. Once adhesive sets or holes are drilled, corrections become costly and time-consuming.
Detailed guidance for installing flooring edge trims provides step-by-step visual instructions that supplement written guidance. Video demonstrations clarify techniques that text descriptions cannot fully convey.
Specific junction types have unique considerations. The flooring transitions guide for reducing trip hazards addresses safety-critical aspects of reducer installation. Understanding carpet to tile transitions prevents moisture issues and gripper accommodation errors.
Post-installation inspection verifies quality. Check that the transition sits flush without rocking. Verify no sharp edges protrude that could catch feet. Ensure fixings are secure and flush. Test by walking across repeatedly, listening for movement or clicking that indicates loose installation.
Choosing the right flooring transition for your home
Selecting optimal transitions for each junction in your home requires balancing multiple factors specific to your situation.
Flooring material pairing drives initial profile consideration. Carpet to vinyl typically requires reducers accommodating the carpet’s greater thickness. Laminate to laminate at identical heights suits T-bars with expansion accommodation. Tile to hardwood often needs thresholds managing moisture barrier requirements alongside height differences. Each pairing has established best practices developed through decades of UK installation experience.
Interior design style influences finish selection within your chosen profile. Contemporary minimalist schemes favour satin or polished nickel that recedes visually. Traditional interiors benefit from antique brass or bronze that adds warmth and character. Period properties may require custom finishes matching original hardware. Your transition finishes should coordinate with door handles, light switches, and other metalwork for cohesive design.
Traffic levels in each area dictate construction robustness requirements. Hallway thresholds endure constant foot traffic and luggage wheels, demanding heavy-gauge solid metal construction. Bedroom carpet-to-carpet transitions in low-traffic guest rooms tolerate lighter-duty solutions. Kitchen doorways require moisture-resistant materials and finishes that withstand frequent cleaning. Match specification to actual usage for cost-effective longevity.
Safety requirements override aesthetic preferences where conflicts arise. High-traffic areas with elderly or disabled residents require maximum-visibility transitions featuring contrasting colours and tactile surface changes. Reduced-mobility households benefit from the lowest-profile options within regulatory limits. Child safety considerations include rounded edges and secure fixing that resists tampering.
Maintenance ease varies across materials and finishes. Polished metals require occasional buffing to maintain lustre. Satin finishes hide minor scratches better than high-gloss alternatives. Textured surfaces trap dirt requiring more frequent cleaning. Consider your cleaning routine and tolerance for upkeep when specifying finishes.
Budget allocation should prioritise high-traffic, high-visibility areas for premium transitions whilst accepting modest options in low-traffic spaces. Front entrance thresholds justify premium solid metal specification as they’re seen by every visitor. Hidden junctions in utility rooms tolerate budget-conscious choices without compromising overall impression.
Future-proofing considers potential flooring changes. Versatile profiles accommodating range of heights provide flexibility if you replace flooring later. Timeless finishes like brushed nickel remain stylish through changing trends, whilst highly specific colours date quickly.
Pro Tip: Create a transition specification schedule listing every junction in your home with measured height differences, flooring materials, traffic levels, and design requirements. This comprehensive approach ensures consistent quality and prevents overlooking junctions during ordering.
The blog at Quality Carpet Trims provides ongoing guidance on transition selection, installation techniques, and design inspiration for UK homeowners undertaking renovations. Regular articles address emerging trends and reader questions.
Balancing these considerations produces a specification that meets safety requirements, matches your design vision, suits your maintenance preferences, and fits your budget. Compromise intelligently where necessary, never on safety or critical-path junctions, but potentially on finish choices in low-visibility areas.
Explore quality flooring transitions from Quality Carpet Trims
Now that you understand transition fundamentals, transform that knowledge into lasting safety and beautiful finishes throughout your home.

Quality Carpet Trims supplies exclusively British-made solid metal transitions in ten hand-finished options designed for UK homes. Browse matwell flooring trim solutions for entrance areas, explore carpet to carpet trims for seamless room connections, and discover comprehensive flooring trim insights tailored to your renovation. Free samples, expert advice, and fast delivery support your project from specification through installation, ensuring professional results that protect your family whilst enhancing every room.
Frequently asked questions about flooring transitions
What is the main function of a flooring transition?
Flooring transitions primarily eliminate trip hazards by bridging height differences between flooring materials whilst protecting exposed edges from damage and moisture. The aesthetic benefit of visual continuity is secondary to this critical safety function.
Can I install flooring transitions myself safely?
DIY installation is achievable with careful measurement, proper tools, and adherence to manufacturer guidance. Success requires accurately measuring height differences, selecting the correct profile, preparing subfloors thoroughly, and following specified fixing methods without shortcuts.
Which material lasts longest for flooring trims?
Solid metal transitions in brass, bronze, or nickel outlast all alternatives, maintaining appearance and structural integrity for decades. Aluminium, wooden, and PVC options require replacement within months or years due to wear, corrosion, or brittleness under normal UK household conditions.
Are there legal standards I must follow for flooring transitions?
UK Building Regulations Part M limits threshold heights to 15mm maximum and requires chamfered edges to minimise trip risk. Part K governs protection from falling, mandating compliant transitions at all level changes. Non-compliance risks insurance disputes and requires rectification for building control approval.
How do I maintain my flooring transitions for durability?
Regular vacuuming removes abrasive grit that scratches finishes, whilst occasional damp wiping removes accumulated dirt. Polished metal finishes benefit from periodic buffing with appropriate metal polish. Check fixings annually for looseness, re-securing as needed before damage occurs to adjacent flooring.
Do I need different transitions for underfloor heating areas?
Underfloor heating requires transitions with fixing methods that don’t penetrate heating elements and materials that tolerate temperature cycling without degradation. Solid metal trims accommodate heating systems when installed with appropriate adhesives rather than screws that could damage pipework or cables beneath.
Recommended
- How to Choose Flooring Transitions: Cut Trip Hazards 30%
- Laminate Transition – Achieving Seamless Flooring Results
- Flooring Transition Terminology: Essential Insights for Designers
- Blog – Quality Carpet Trims