
Blog
What is a flooring expansion gap: a UK homeowner’s guide

Jul
TL;DR:
- Leaving an expansion gap is essential to prevent buckling and extend the floor’s lifespan. Proper installation involves measuring 8mm to 15mm gaps around all edges and fixed objects, then hiding them with trims attached only to the wall. This simple step safeguards your floor’s appearance, durability, and warranty.
A flooring expansion gap is a deliberate space left around the perimeter of a floor installation to allow the material to expand and contract naturally with changes in temperature and humidity. Without this gap, flooring has nowhere to move. The result is buckling, warping, and joint damage that ruins both the look and structure of your floor. Industry standard guidance specifies a gap of 8mm–15mm around all perimeter edges and fixed objects, though the exact size depends on your flooring type and manufacturer requirements. Getting this right from the start is the single most important step in any flooring installation.
Why is a flooring expansion gap important?
An expansion gap is not wasted space. Experts describe it as a non-negotiable structural insurance policy that allows your floor to respond naturally to seasonal humidity and temperature shifts. Timber, laminate, and vinyl all absorb and release moisture. When they do, they move. A gap gives them room to do so without causing damage.
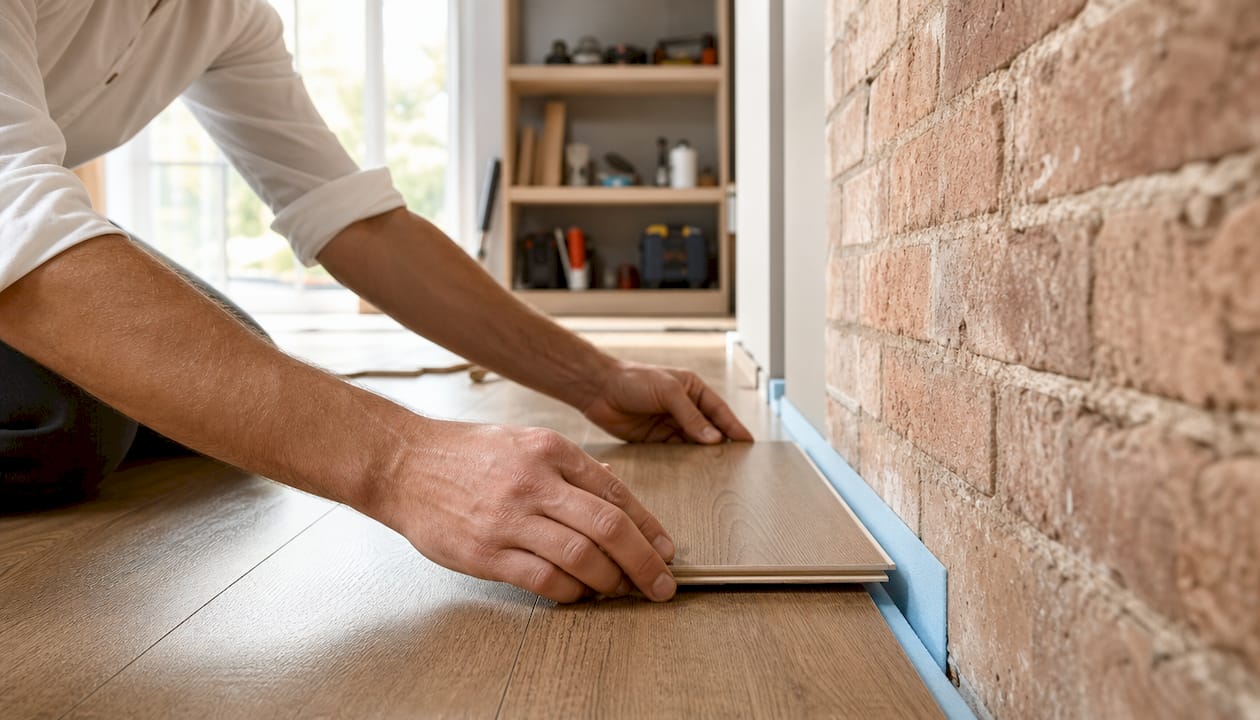
The consequences of skipping this gap are severe. Floors installed without adequate expansion gaps have up to a 70% higher probability of significant buckling, warping, or peaking within five years. That figure reflects how predictable and preventable this type of failure is.
The upside is equally clear. Properly installed floors with correct expansion gaps achieve up to a 30% longer usable lifespan compared to floors laid without proper allowances. That is a meaningful return on a step that costs nothing extra to get right during installation.
Common problems caused by neglecting the gap include:
- Buckling and peaking where boards push against walls and lift at the joints
- Warping along the length of individual boards as pressure builds unevenly
- Gaps forming between boards in dry conditions when the floor contracts with nowhere to settle
- Voided warranties because most manufacturers require correct gap installation as a condition of cover
- Costly repairs that involve lifting entire sections of flooring just to cut back the perimeter boards
Think of the expansion gap as the breathing room your floor needs to stay flat, tight, and intact for years.
How to measure expansion gaps for different flooring types
The correct gap size depends on your flooring material, room size, and the environmental conditions in your home. Getting the measurement right is straightforward once you understand the variables.
Standard gap sizes by flooring type
- Solid hardwood: 10mm–15mm is standard, as solid timber moves more than engineered products due to its single-piece construction.
- Engineered wood: 8mm–12mm is typical. Engineered boards are more dimensionally stable but still require a meaningful gap.
- Laminate: 8mm–10mm around all perimeter edges. All floating floors, including laminate, require expansion gaps without exception.
- LVT (Luxury Vinyl Tile) and SPC vinyl: 5mm–8mm is generally sufficient due to the lower moisture absorption of vinyl products, though always check the manufacturer’s specification sheet.
- Ceramic and porcelain tile: Movement joints are mandatory per ANSI A108.01-3.7 to prevent cracking and debonding. These are not optional.
Factors that affect gap size
Room size matters significantly. Complex layouts and large open-plan spaces require more careful gap planning because cumulative surface area movement is greater. A 6-metre run of laminate moves considerably more than a 3-metre run under the same temperature change.
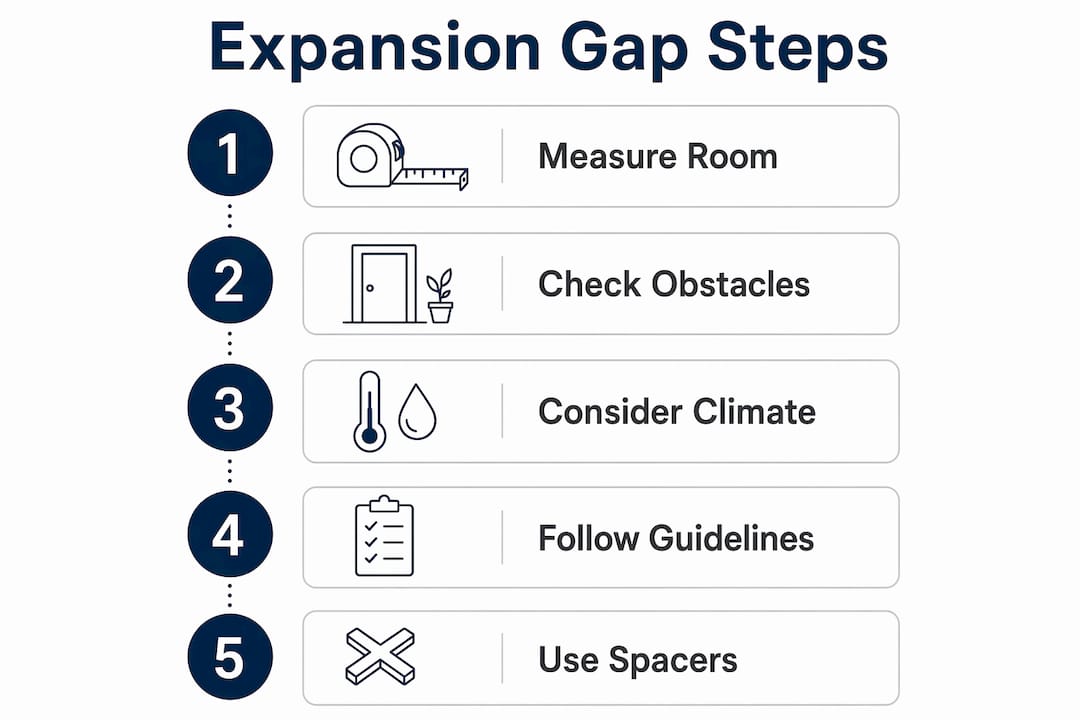
You also need gaps around every fixed object in the room. Door frames, kitchen islands, radiator pipes, and structural columns all count as fixed obstacles. The floor must be free to move away from every one of them.
Temperature and humidity variation in your home affects the calculation too. Kitchens and bathrooms experience more moisture fluctuation than bedrooms. Rooms above underfloor heating systems require larger gaps because heat accelerates expansion.
Always follow the manufacturer’s installation instructions. The National Wood Flooring Association (NWFA) and ANSI both publish guidance that aligns with most manufacturer requirements, but your specific product’s specification takes precedence.
Pro Tip: Acclimatise your flooring for at least 48 hours in the room where it will be installed before laying it. Professional installers recommend using plastic spacers during installation to maintain a uniform gap around the entire perimeter. Test subfloor moisture levels before you start, as a damp subfloor will cause the floor to expand immediately after laying.
Where to leave gaps and how to conceal them neatly
Expansion gaps belong in more places than most homeowners realise. Knowing every location prevents the partial failures that occur when one fixed object is overlooked.
Gaps are required at:
- All perimeter walls around the entire room without exception
- Doorways and thresholds where the floor meets a different surface or room
- Around cabinetry including kitchen units, fitted wardrobes, and bathroom vanity units
- Around radiator pipes where they pass through the floor
- Around structural posts and columns if present
- At transitions between rooms or between different flooring types
The good news is that none of these gaps need to be visible. Expansion gaps are hidden using skirting boards, baseboards, quarter-round mouldings, or scotia trims. The trim sits over the gap, pressing lightly against the floor surface without being fixed to it. This allows the floor to move freely beneath the trim while keeping the gap completely out of sight.
The quality of your trim matters here. Solid brass, powder-coated trims will not split, bend, or dent over time. Cheaper options made from wood, plastic, rubber, or aluminium degrade quickly. Wooden trims split and swell. Plastic and rubber trims crack and discolour. Aluminium trims dent and scratch. None of them hold their finish through years of foot traffic and seasonal movement the way solid brass does.
Pro Tip: Never fix skirting boards or trims directly through the flooring itself. The trim must be fixed to the wall or subfloor only. If you pin it to the floating floor, you lock the floor in place and defeat the entire purpose of the expansion gap. This is one of the most common finishing errors in DIY installations.
Qualitycarpettrims supplies solid brass flooring trims hand-finished in ten luxury colours, designed specifically to cover expansion gaps with a finish that lasts. The trims are made in the UK and built to stay looking sharp for the life of your floor.
Common mistakes that lead to costly flooring repairs
Most flooring failures caused by expansion gaps come down to a small number of predictable errors. Knowing them in advance costs nothing. Fixing them after the fact costs considerably more.
The most common mistakes are:
- Skipping the gap entirely because it “looks wrong” during installation. The gap is correct. The instinct to close it up is not.
- Using the wrong gap size by guessing rather than checking the manufacturer’s specification or the UK flooring compatibility guide.
- Forgetting fixed objects such as radiator pipes or kitchen islands. Skipping gaps around fixed objects voids manufacturer warranties and leads to early floor failure.
- Fixing the trim to the floor rather than the wall, which locks the floor in place.
- Laying flooring before acclimatisation so the boards expand immediately after installation, closing the gap before it can do its job.
The repair process for a buckled floor is neither quick nor cheap. Fixing a buckled floor typically requires lifting and cutting back perimeter boards, which almost always damages the skirting boards and surrounding finishes. In many cases, the entire floor needs relaying.
“Repairing floors due to lack of expansion gaps is rarely straightforward. It often requires lifting and trimming boards with potential damage to skirting and finishes, underscoring the critical role of meticulous initial gap installation.”
Warranties are voided by incorrect installation in the vast majority of cases. Manufacturers specify gap requirements precisely because they know what happens without them. If you skip the gap and the floor fails, you carry the full cost of repair.
The fix is simple: measure correctly, use spacers, check every fixed object in the room, and never fix your trim to the floating floor. Do these four things and you will not have a problem.
Key takeaways
A flooring expansion gap of 8mm–15mm around all perimeter edges and fixed objects is the single most important step in preventing buckling, voided warranties, and costly floor repairs.
| Point | Details |
|---|---|
| Standard gap size | Leave 8mm–15mm around all perimeter edges and fixed objects, adjusted for flooring type. |
| Risk of skipping the gap | Floors without adequate gaps have up to a 70% higher risk of buckling or warping within five years. |
| Lifespan benefit | Correct gaps extend floor lifespan by up to 30% compared to floors laid without allowances. |
| Concealment method | Fix skirting boards and trims to the wall only, never to the floating floor, to keep gaps hidden and functional. |
| Quality of trim matters | Solid brass, powder-coated trims outlast wooden, plastic, rubber, and aluminium options in durability and finish. |
Why I think most DIYers underestimate the expansion gap
After years of seeing flooring projects go wrong, the pattern is almost always the same. The gap gets treated as an afterthought, or worse, as a mistake to be corrected before the skirting goes on. I have seen homeowners fill the gap with silicone, pin the trim directly to the laminate, and then wonder six months later why the floor has lifted in the centre of the room.
The gap is not a flaw in your installation. It is the most deliberate part of it. A floor that moves freely at the edges stays flat in the middle. A floor that is locked tight at the perimeter has only one place to go when it expands, and that is upward.
What surprises me most is how often the finishing trim gets treated as an afterthought too. People spend serious money on the flooring itself and then reach for the cheapest trim they can find. Wooden trims split within a couple of years. Plastic ones crack and yellow. Aluminium ones dent the first time something heavy rolls over them. The trim is the last thing you see every time you walk through a doorway. It deserves the same consideration as the floor beneath it.
Solid brass, powder-coated trims from Qualitycarpettrims are the only option I would recommend for a finish that holds up. They will not split, bend, or discolour. They come in ten hand-finished colours to match any interior. And because they are fixed to the wall rather than the floor, they let the expansion gap do exactly what it is supposed to do.
Plan the gap first. Choose the trim second. Get both right and your floor will look and perform exactly as it should for decades.
— Matt
Finish your floor properly with Qualitycarpettrims
Every expansion gap needs a trim that covers it cleanly and lasts the life of the floor. Qualitycarpettrims supplies solid brass, powder-coated door threshold bars and flooring trims hand-finished in ten luxury colours, made in the UK to a standard that cheaper materials simply cannot match.

Whether you are finishing a doorway, a transition between rooms, or the perimeter of a large open-plan space, the right trim makes the installation look professional and protects the gap beneath it. Browse the full range of premium flooring trims at Qualitycarpettrims and find the finish that suits your home. Free samples are available, and expert advice is on hand if you need help choosing the right profile for your project.
FAQ
What is the standard size for a flooring expansion gap?
The standard expansion gap is 8mm–15mm around all perimeter edges and fixed objects. The exact size depends on your flooring type and the manufacturer’s specification.
Do all types of flooring need an expansion gap?
All floating floors, including laminate, engineered wood, and SPC vinyl, require expansion gaps. Omitting them risks voiding the product warranty and leads to buckling or warping.
What happens if you do not leave an expansion gap?
Floors without adequate gaps have up to a 70% higher risk of buckling, warping, or peaking within five years. Repairs typically require lifting and cutting back perimeter boards, which is disruptive and costly.
How do you hide an expansion gap once the floor is laid?
Expansion gaps are concealed using skirting boards, quarter-round mouldings, or scotia trims fixed to the wall only. The trim covers the gap without restricting the floor’s movement.
Does an expansion gap affect the floor warranty?
Yes. Most manufacturers require correct gap installation as a condition of their warranty. Skipping gaps around fixed objects such as radiator pipes or kitchen islands is one of the most common reasons warranties are voided.
Recommended
- Defining flooring compatibility: the UK DIY and contractor guide
- How to select flooring thresholds: a complete UK guide
- Achieve seamless floor transitions: step-by-step UK guide
- What is a flooring transition: guide for UK homeowners 2026