
Blog
What is a cover strip? The homeowner’s guide

Apr
TL;DR:
- Cover strips create safe, seamless transitions between different flooring surfaces.
- Metal cover strips are durable, professional, and resistant to heavy foot traffic.
- Correct selection and precise installation are essential for a flawless, long-lasting finish.
Cover strips are one of those finishing details that separate a truly professional flooring installation from a rushed, amateur one. Most people assume they exist purely to hide messy cuts or imperfect edges. In reality, a well-chosen cover strip does something far more important: it creates a smooth, safe, and visually cohesive transition between different floor surfaces. Whether you are a homeowner tackling a renovation or a contractor fitting floors in a commercial space, understanding cover strips properly will save you time, money, and the embarrassment of a finish that falls short. This guide covers everything from definitions and types to selection and installation.
Table of Contents
- Defining a cover strip for flooring
- Where and when to use a cover strip
- Types of cover strips and how to choose
- Cover strip installation: tips for a seamless finish
- Why good cover strips are the mark of a professional finish
- Find your ideal cover strips for a flawless floor
- Frequently asked questions
Key Takeaways
| Point | Details |
|---|---|
| Cover strips defined | Cover strips are finishing profiles that create smooth, attractive transitions at flooring joins. |
| Choose by application | Select strips by flooring type, gap size, and traffic level for the best result. |
| Professional installation matters | Accurate measurement and fitting make the difference between an average and an excellent finish. |
| Not one-size-fits-all | Use bendable or wide strips for curves or large gaps but avoid for height differences over 5mm. |
Defining a cover strip for flooring
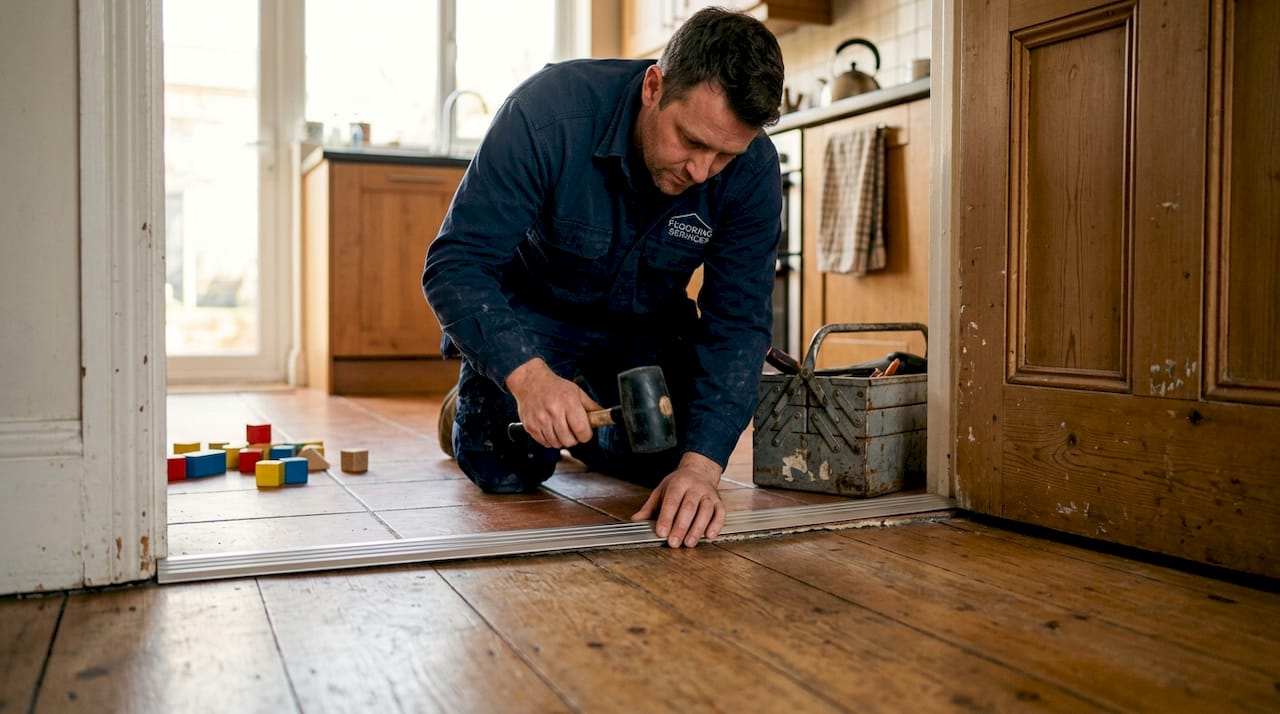
A cover strip is a finishing profile placed over the join between two flooring surfaces, or over an expansion gap within a single floor. Its primary job is to conceal the gap, protect the floor edges, and deliver a neat, finished appearance. Without one, exposed joins look untidy, collect dirt, and can become a trip hazard over time.
Cover strips come in three main material categories:
- Metal: The most durable option and the preferred choice for professionals. Solid metal strips resist heavy foot traffic, wear well over time, and are available in a wide range of hand-finished colours and textures to suit any interior.
- Wood: Suitable for low-traffic areas and period-style interiors, but prone to swelling, warping, and damage from moisture.
- PVC: Inexpensive and easy to cut, but far less durable than metal and prone to cracking, discolouring, and lifting over time.
In terms of shape, cover strips are not one-size-fits-all. Flat strips sit flush across two surfaces at the same height. Stepped or ramp-style strips bridge a modest height difference between floors. Flexible strips bend to follow curved or irregular joins. Wide strips cover larger-than-standard gaps, particularly useful where cuts have not gone perfectly.
The table below summarises the most common cover strip forms and their ideal applications:
| Strip form | Best use case | Typical width |
|---|---|---|
| Flat | Same-level joins | 30 to 50mm |
| Stepped/ramp | Minor height differences | 35 to 55mm |
| Flexible | Curved or irregular seams | 30 to 45mm |
| Wide | Large or imperfect gaps | 50 to 80mm |
It is worth noting that flooring edge trims serve a related but distinct purpose, finishing the exposed edge of a floor rather than bridging a join between two surfaces. The two are often confused, but each has a specific role.
For unusual situations, bendable versions for curves handle curved seams, while wide strips cover imperfect cuts or large gaps. However, if the height difference between two floors exceeds 5mm, a standard cover strip is not the right solution and a more substantial transition profile should be used instead.
Where and when to use a cover strip
Cover strips appear in more places than most people realise. Once you know what to look for, you will spot them in virtually every well-finished interior.
Here are the most common scenarios where a cover strip is the right choice:
- Doorways: The most frequent application. A cover strip runs across the threshold between two rooms with different flooring, such as carpet in a lounge meeting laminate in a hallway.
- Carpet to hard floor joins: Where carpet meets tile, vinyl, or wood, a cover strip protects both edges and prevents fraying or lifting.
- Expansion gaps: Laminate and engineered wood floors need room to expand and contract. A cover strip hides these gaps along walls or between boards without restricting movement.
- Room-to-room transitions: Even when two hard floors meet, a cover strip provides a visual break and protects the edges of both surfaces.
- Conservatories and extensions: Where new flooring meets existing, a cover strip bridges the join neatly.
Knowing when not to use a standard cover strip is equally important. If the height difference between two floors exceeds 5mm, a transition strip for uneven floors is the better solution, as it is specifically designed to handle more significant level changes safely.
For joins between carpet and tile specifically, carpet to tile transition strips are shaped to grip carpet pile on one side while sitting flush against the hard surface on the other. A flat cover strip alone would not perform as well in this situation.
Pro Tip: Always measure the gap width and height difference before purchasing. Buying a strip that is too narrow, or one that cannot accommodate the height change, means a second trip to the supplier and a delayed finish.
The comparison below helps clarify when to choose a cover strip versus a threshold bar:
| Situation | Best solution |
|---|---|
| Same-level join, gap under 5mm | Flat cover strip |
| Height difference up to 5mm | Ramp or stepped cover strip |
| Height difference over 5mm | Threshold bar or reducer |
| Curved or irregular join | Flexible cover strip |
| High-traffic commercial area | Heavy-duty metal cover strip |
For transition strips for uneven floors, the profile design accounts for the level change structurally, which a standard cover strip simply cannot do.
Types of cover strips and how to choose
Choosing the right cover strip comes down to four factors: material, finish, width, and fixing method. Get all four right and the result looks effortless. Get one wrong and the strip either fails prematurely or looks out of place.
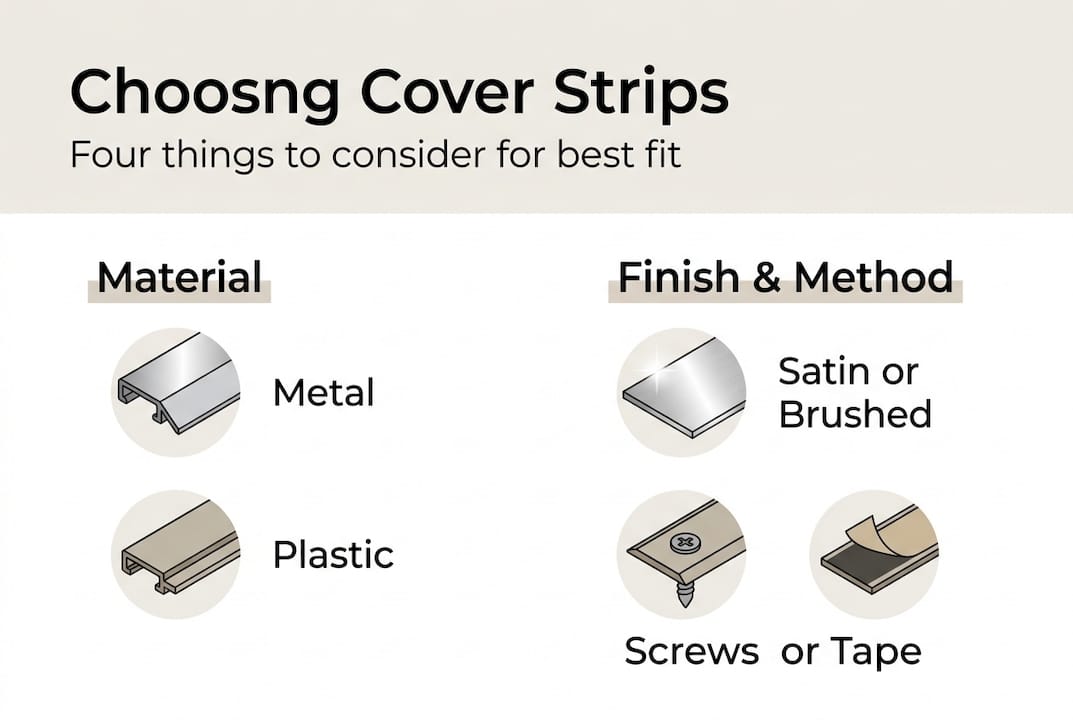
Material is the starting point. As mentioned, solid metal is the strongest and most long-lasting option. It does not warp, crack, or discolour, and it stands up to heavy foot traffic in both residential and commercial settings. Wood and PVC are cheaper upfront but cost more in the long run through replacement and maintenance.
Finish matters more than many people expect. A brushed gold strip on a grey tile floor can look stunning. The same strip on oak laminate might look jarring. Matching or complementing the floor colour and tone is essential for a cohesive result. Solid metal strips are available in a range of hand-finished options, from satin chrome to antique brass, giving you real flexibility.
Key selection factors at a glance:
- Match the strip width to the actual gap, not an approximation
- Choose screw-down fixing for high-traffic or commercial areas
- Use self-adhesive strips only in low-traffic, dry environments
- Select a finish that complements both floor surfaces, not just one
- Confirm the strip profile suits the height difference between the two floors
Pro Tip: Order a sample before committing to a full length. Colours look different under artificial lighting versus natural daylight, and a sample lets you test the fit against your actual floor before purchase.
For guidance on installing edge trims and understanding which profiles suit which floors, detailed fitting information makes the difference between a trim that lasts and one that lifts within months. For commercial projects, it is also worth reviewing UK standards for commercial trims to ensure your installation meets the relevant requirements.
For wide strips covering large gaps, always check the maximum coverage width before ordering. A strip that is too narrow will not conceal the gap fully, and one that is too wide will overhang awkwardly onto the floor surface.
Cover strip installation: tips for a seamless finish
Even the best cover strip will underperform if it is fitted poorly. Installation is straightforward, but the preparation stage is where most problems begin.
Follow these steps for a professional result:
- Measure the gap accurately. Use a tape measure to record the width and length of the join. Note any height difference between the two surfaces.
- Select the correct strip. Based on your measurements, choose the appropriate profile, width, and fixing method.
- Prepare the surfaces. Clean both floor edges thoroughly. Remove any adhesive residue, dust, or debris. Dry surfaces are essential for adhesive-backed strips.
- Cut the strip to length. Use a fine-tooth metal saw or a mitre box for clean, square cuts. Measure twice and cut once.
- Fit the strip. For screw-down types, mark and drill pilot holes to avoid cracking tiles or splitting boards. For adhesive types, apply even pressure along the full length.
- Check the finish. Run your hand along the strip to confirm there are no raised edges or gaps at either side.
“The majority of trim failures we see come down to one thing: skipped preparation. Surfaces that are not clean, dry, and level will not hold a trim securely, regardless of the fixing method used.”
Pro Tip: If you are fitting a strip across a doorway, fit the door first. The gap between the door and the floor affects which strip profile will clear it without catching.
For trim installation guidance covering more complex scenarios, step-by-step resources can help you avoid the most common pitfalls before they become expensive problems. And remember, wide strips for imperfect cuts are a practical solution when the gap is larger than anticipated, rather than attempting to re-cut the floor.
Why good cover strips are the mark of a professional finish
Here is something most people do not consider: the threshold is the first thing you see when you walk into a room. It is the visual full stop at the end of one floor and the opening sentence of another. A poorly fitted or cheap cover strip at that point undermines everything else in the room, no matter how expensive the flooring is.
We see this regularly. A homeowner spends thousands on premium flooring, then fits a flimsy plastic strip across the doorway to save a few pounds. The result looks exactly as you would expect. The strip discolours, lifts at the edges, and draws the eye for all the wrong reasons.
The uncomfortable truth is that cover strips are often treated as an afterthought, something to grab at the last minute from a DIY shed. But seamless floor transitions require the same level of thought and quality as the floors themselves. A solid metal strip, properly fitted and finished to match the floor, is virtually invisible. That invisibility is the point. The best cover strips are the ones you never notice.
Investing in quality here is not extravagance. It is the difference between a floor that looks professionally installed and one that looks like it was almost finished.
Find your ideal cover strips for a flawless floor
If this guide has helped you understand what a cover strip does and why quality matters, the next step is finding the right product for your specific project.

At Quality Carpet Trims, we supply solid metal cover strips and flooring trims hand-finished in 10 beautiful finishes, all manufactured in the UK to the highest standards. Whether you need a standard flat strip for a doorway or a specialist profile for an awkward join, our range covers it. Browse our threshold strips selection for doorway solutions, explore matwell trims for entrance areas, or visit our flooring trim terminology guide if you need help identifying the right profile. Free samples and expert advice are available to ensure you get it right first time.
Frequently asked questions
What is the main purpose of a cover strip?
A cover strip bridges the gap between different flooring types or finishes, providing a neat and safe transition. It also protects floor edges from damage and prevents dirt from accumulating in exposed joins, as wide strips for large gaps demonstrate for more challenging installations.
Can you use a cover strip on uneven floors?
Flexible and wide cover strips work for modest height differences, but avoid standard flat versions for transitions where the height difference exceeds 5mm. For more significant level changes, a dedicated transition profile is the safer and more appropriate choice.
What is the difference between a threshold and a cover strip?
A threshold usually handles bigger transitions or height changes between floors, while a cover strip is designed for neat, flat joins and minor gaps where both surfaces sit at roughly the same level.
Are metal cover strips better than plastic or wood?
Metal cover strips are significantly more durable and are the right choice for high-traffic areas in both homes and commercial spaces. Plastic and wood may suit low-traffic or purely decorative applications, but they will not match the longevity or finish quality of solid metal.
Recommended
- Threshold Strips Guide for UK Homes: Types, Uses and Sizing – Quality Carpet Trims
- What is a threshold strip? A complete 2026 guide
- Complete guide to hardfloor edge strips: seamless floors
- Master the role of threshold strips for flooring transitions
- What Happens on Permanent Lighting Install Day? A Step-by-Step Walkthrough | Starise Lighting Calgary