
Blog
Step by step vinyl transition: your complete DIY guide

Jun
TL;DR:
- A vinyl transition strip connects your flooring to an adjacent surface, ensuring a safe, neat finish. Proper installation involves correct tools, measuring, and securing the strip only to the subfloor to prevent buckling. High-quality solid brass trims offer durability and maintain their shape over time.
A vinyl transition strip, known in the trade as a floor transition profile, is the finishing piece that connects your vinyl flooring to an adjacent surface safely, neatly, and with enough room for the floor to move. Getting this right is not optional. A poorly fitted transition causes buckling, trip hazards, and an amateurish finish that undermines an otherwise excellent renovation. This step by step vinyl transition guide covers every stage: tools, strip selection, track-mounted installation, and finishing touches. Qualitycarpettrims solid brass, powder-coated trims are referenced throughout as the benchmark for durability and finish quality.
What tools and materials do you need to install vinyl floor transitions?
Preparation determines the quality of the result. Arriving at the job with the wrong tools wastes time and risks damaging your new floor.
Essential tools:
- Mitre saw or junior hacksaw (for cutting the track and strip to length)
- Cordless drill with pilot bit
- Measuring tape and pencil
- Rubber mallet
- Screwdriver
- Spirit level
- Construction adhesive (for adhesive-only profiles)
- Safety glasses
Materials checklist:
| Material | Purpose |
|---|---|
| Transition strip and track | Covers the expansion gap between floors |
| Screws (appropriate gauge) | Secures track to subfloor |
| Construction adhesive | Alternative fixing for thresholds and end caps |
| Painter’s tape | Holds strip in position during adhesive cure |
| Filler or putty | Covers countersunk screw heads on stair nosing |
Before you touch a tool, clean the subfloor thoroughly. Dust, adhesive residue, and debris all prevent a flat, secure fix. Measure the doorway or transition zone twice, mark your expansion gap clearly, and check the height difference between the two floors. That height difference dictates which strip profile you need, so measure it before you order anything.
Planning transition strips at the flooring selection phase prevents costly height mismatches and post-installation fixes. Most DIY homeowners make the mistake of ordering the strip as an afterthought. Do not do that.
Pro Tip: Always buy your transition strip at the same time as your vinyl flooring. Matching the finish and confirming the height compatibility before laying a single plank saves you from ripping up work later.
How do you choose the right vinyl transition strip?
The profile you choose depends on two factors: the height difference between the two floors, and the type of surface on each side. Get this wrong and no amount of careful installation will save you.
The four main transition profiles
Reducer strips create a sloped transition between two floors at different heights, most commonly where vinyl meets a lower surface such as ceramic tile or a thinner hardfloor. T-moulding joins two floors of the same height, creating a level, safe crossing point between rooms. End caps finish the exposed edge of vinyl where it meets a vertical surface, such as a sliding door track or a step riser. Stair nosing covers the front edge of a step, protecting the vinyl and providing grip underfoot.
| Profile | Best use | Key benefit | Limitation |
|---|---|---|---|
| Reducer | Vinyl to lower floor | Smooth height change | Not suitable for same-height joins |
| T-moulding | Same-height floors | Level, safe crossing | Requires equal floor heights |
| End cap | Exposed vinyl edge | Neat, protective finish | One-sided only |
| Stair nosing | Step front edges | Safety and durability | Fixed position once screwed down |
Why material matters more than most homeowners realise
Solid metal trims are more durable and premium than flexible vinyl strips. That is not marketing language. Vinyl strips and plastic profiles bend under foot traffic, split at the edges, and lose their finish within a few years. Wooden trims warp with moisture. Aluminium trims dent and scratch. Qualitycarpettrims solid brass, powder-coated trims hold their shape and finish under daily use because brass does not bend, split, or dent the way cheaper materials do. With 10 luxury finishes available, matching the trim to your vinyl colour is straightforward.
Pro Tip: Hold a sample of your vinyl plank next to the trim finish before ordering. Natural light shows colour differences that artificial lighting hides.
Step-by-step guide to installing a vinyl floor transition strip
The track-mounted method is the preferred approach for most vinyl floor transitions. It allows the floor to expand and contract freely, and it lets you remove and replace the strip later without damage.

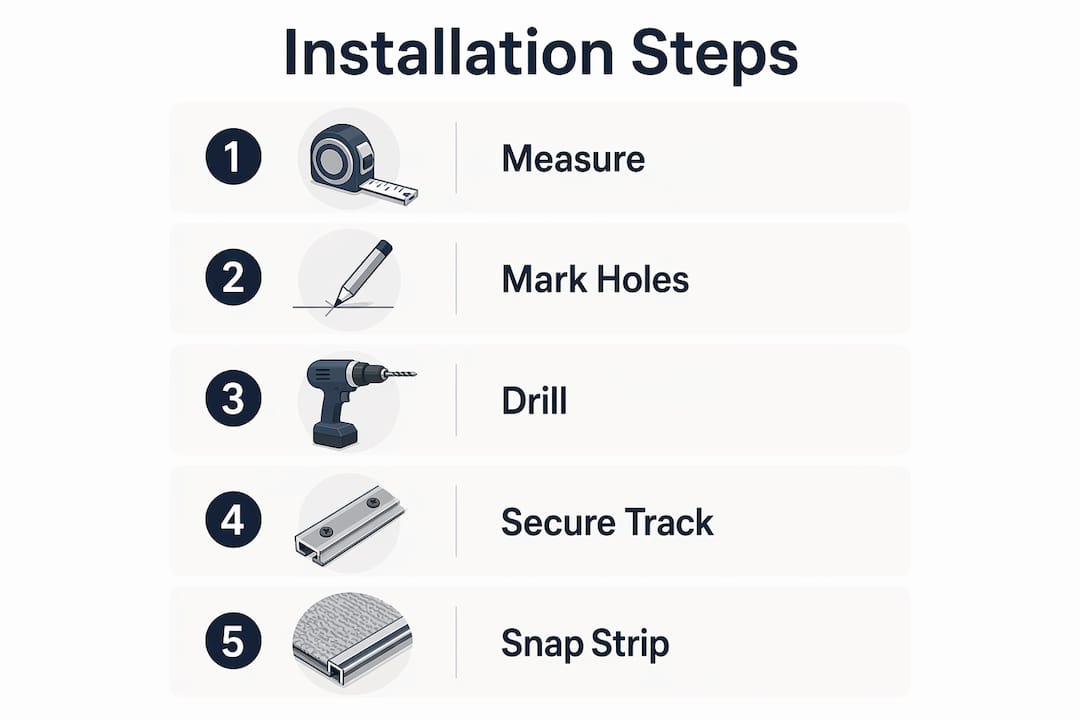
1. Measure and cut the track
Measure the width of the doorway or transition zone precisely. Cut the metal track to length, but leave it 1.5mm short at each end to allow clearance. This small gap prevents the track from pressing against the door frame as the floor moves with temperature changes. Use a mitre saw for a clean, square cut.
2. Mark and drill pilot holes
Position the track centrally over the expansion gap. Mark the subfloor through the pre-punched holes in the track. Remove the track and drill pilot holes every 8–12 inches along the marked line. Pilot holes prevent the subfloor from splitting and keep the track perfectly aligned when you screw it down.
3. Secure the track to the subfloor
Replace the track over the pilot holes and screw it firmly to the subfloor. The screws go into the subfloor only. They must never pass through or grip the vinyl planks beneath. Transition strips must be secured only to the subfloor, never glued or nailed directly to floating vinyl planks, because vinyl needs room for natural thermal expansion. Fastening through the planks causes buckling and can void your flooring warranty.
4. Check the expansion gap
Before fitting the strip, confirm that a 1/4 inch expansion gap exists on each side of the floating floor. This gap runs around the perimeter of the room and through the transition zone. Without it, the floor has nowhere to go when it expands in warm weather, and it will buckle upward.
5. Snap the strip into the track
Press the transition strip down into the track, starting at one end. Work along the length, pressing firmly with your hands. Use a rubber mallet and a scrap of timber as a buffer to tap the strip home if it resists. Never strike the strip directly with the mallet. The strip should click securely into the track without gaps or rocking.
Common mistake: Forcing the strip into a track that is too long. If the strip binds or bows upward, the track is pressing against the frame. Remove the track, trim another 1–2mm from each end, and refit. A strip that sits under tension will pop loose within weeks.
Pro Tip: Track-based installations allow easy removal and replacement without damage, which is ideal for long-term maintenance. If you ever need to replace a damaged plank near the doorway, you can lift the strip cleanly without destroying it.
Alternative installation methods and finishing steps
Not every transition profile suits the track-mounted method. Thresholds and end caps often use adhesive only, while stair nosing typically requires direct screwing.
Adhesive-only method (thresholds and end caps):
- Clean and dry the subfloor contact area completely before applying adhesive
- Apply a continuous bead of construction adhesive along the underside of the strip
- Press the strip firmly into position and apply weighted pressure across its full length
- Adhesive cure time is approximately 24 hours with weight applied throughout; removing weight early weakens the bond
- Leave painter’s tape along the edges to prevent the strip shifting during cure
Direct screw-down method (stair nosing and heavy-traffic zones):
- Mark screw positions at regular intervals along the nosing
- Countersink each hole so the screw head sits flush or below the surface
- Fill countersunk holes with matching putty or filler and allow to dry fully before sanding smooth
- Check that no screw penetrates the vinyl plank beneath the nosing
Finishing and maintenance:
Once the strip is fixed, check the full length for gaps between the strip and the floor surface on both sides. A small bead of colour-matched silicone sealant fills any visible gap at the edge without restricting floor movement. Wipe away excess immediately with a damp cloth. Every six months, press along the strip to confirm it has not lifted. A strip that rocks or clicks underfoot needs refixing promptly before it becomes a trip hazard.
Key takeaways
A successful vinyl floor transition depends on choosing the correct profile, securing the track only to the subfloor, and maintaining the expansion gap throughout.
| Point | Details |
|---|---|
| Choose the profile first | Match the strip type to the height difference and floor types before laying vinyl. |
| Secure to subfloor only | Never fasten through floating vinyl planks; always fix to the subfloor inside the expansion gap. |
| Allow for expansion | Maintain a 1/4 inch gap on each side of the floating floor to prevent buckling. |
| Cut the track short | Leave 1.5mm clearance at each end of the track to prevent binding during floor movement. |
| Choose solid brass trims | Solid brass, powder-coated trims outlast plastic, wooden, and aluminium alternatives without bending or splitting. |
What I have learned from years of vinyl floor transitions
The single most common mistake I see homeowners make is treating the transition strip as a finishing detail rather than a structural decision. By the time they realise the strip does not fit the height difference, the vinyl is already laid and the only fix is expensive.
Planning transition strips at the flooring selection phase prevents costly height mismatches and post-installation fixes. I cannot overstate this. Order the strip when you order the floor. Confirm the profile suits the height difference before a single plank goes down.
The second thing I have learned is that material quality shows up within the first two years. Plastic and vinyl strips look fine on day one. By year two, they have bent, faded, or cracked at the edges. Wooden trims swell and shrink with seasonal humidity. Aluminium dents the moment something heavy crosses it. Solid brass, powder-coated trims from Qualitycarpettrims simply do not do any of those things. The finish stays sharp, the profile holds its shape, and the strip looks as good in five years as it did on fitting day.
For any homeowner tackling this for the first time: the track-mounted method is more forgiving than it looks. Take your time with the measurements, leave the clearance gaps, and do not rush the adhesive cure. A careful first-time DIY installation beats a rushed professional one every time.
— Matt
Qualitycarpettrims: solid brass trims for lasting vinyl transitions
Qualitycarpettrims supplies solid brass, powder-coated flooring transition trims in 10 luxury finishes, hand-finished in the UK for residential and commercial projects. Every trim is built to resist the bending, splitting, and denting that cheaper alternatives suffer within months of fitting.

Whether you are fitting a reducer between vinyl and tile, a T-moulding between two rooms, or an end cap at a doorway, the range covers every profile a vinyl floor transition requires. Free samples, fast delivery, and expert advice make it straightforward to match the right finish to your floor before you commit. Browse the full range of premium flooring trims and find the profile that suits your project.
FAQ
What is a vinyl transition strip?
A vinyl transition strip is a profiled trim that covers the expansion gap between vinyl flooring and an adjacent surface. It protects the floor edge, prevents trip hazards, and allows the floor to expand and contract naturally.
How do I stop a vinyl floor transition from buckling?
Secure the track only to the subfloor, never through the vinyl planks, and maintain a 1/4 inch expansion gap on each side of the floating floor. Fastening through the planks restricts movement and causes buckling.
What is the best material for a vinyl floor transition strip?
Solid brass, powder-coated trims are the most durable option for residential vinyl transitions. Unlike plastic, wooden, or aluminium profiles, solid brass does not bend, split, or dent under regular foot traffic.
How long does construction adhesive take to cure on a transition strip?
Construction adhesive requires approximately 24 hours to cure fully, with weighted pressure applied throughout. Removing the weight early weakens the bond and risks the strip lifting.
Do I need a different strip for each type of flooring join?
Yes. Use a reducer where vinyl meets a lower floor, T-moulding where two floors are the same height, an end cap for exposed vinyl edges, and stair nosing on step fronts. Matching the profile to the join type is the foundation of a correct installation.
Recommended
- Vinyl flooring bars: A practical UK guide for seamless transitions
- Step by step flooring transitions guide for a polished finish
- Achieve seamless floor transitions: step-by-step UK guide
- What is a vinyl transition strip? A complete guide for 2026