
Blog
Professional floor transition steps for polished results

Apr
TL;DR:
- Properly fitted floor transitions improve safety, durability, and visual appeal.
- Accurate measurements, suitable trims, and thorough preparation are essential for professional results.
- Skipping subfloor checks and rushing installation cause most transition failures.
A poorly fitted floor transition is one of those small details that causes big problems. It catches feet, creates unsightly gaps, and in commercial spaces it can even fall foul of UK safety regulations. Whether you’re a homeowner refreshing a hallway or a contractor finishing a multi-room renovation, getting the transition right is the difference between a job that looks professional and one that generates call-backs. This guide walks you through everything: the regulations you need to know, the tools and materials to gather, the installation steps to follow, and how to troubleshoot common mistakes before they become expensive ones.
Table of Contents
- Understanding the importance of professional floor transitions
- Tools, materials and preparations for flawless results
- Step-by-step guide to professional floor transition installation
- Troubleshooting and optimising your transitions
- The truth about professional transitions: what most don’t tell you
- Find the right professional trim for your next project
- Frequently asked questions
Key Takeaways
| Point | Details |
|---|---|
| Prioritise safety | Choose trims and installation methods that reduce trip and slip risks in all areas. |
| Prepare thoroughly | Accurate preparation and quality materials are critical for seamless, durable floor transitions. |
| Follow step-by-step installation | Anchoring to the subfloor and allowing for expansion ensure professional, lasting results. |
| Check for compliance | Verify slip resistance and visual contrast to meet UK safety standards where relevant. |
Understanding the importance of professional floor transitions
Floor transitions are easy to overlook until something goes wrong. A raised edge between two rooms might seem trivial, but it becomes a trip hazard the moment someone catches their foot on it. In commercial settings, that risk carries real legal weight. In residential properties, it simply makes the finish look sloppy and can shorten the life of the flooring around it.
The safety case for getting transitions right is well established. UK regulations emphasise trip prevention, slip resistance, and visual contrast for safer transitions. Specifically, a Pendulum Test Value (PTV) of 36 or above is the accepted benchmark for slip resistance in areas where transitions occur. For visual contrast, a difference of at least 30 Light Reflectance Value (LRV) is recommended on stairs and in public spaces, helping people with visual impairments identify changes in level.
Here’s what poor transitions actually cost you:
- Trip hazards from raised edges, particularly dangerous for elderly residents and young children
- Moisture ingress where flooring types meet without a proper seal
- Edge damage to laminate, vinyl, or carpet where there’s no protective trim
- Failed inspections on commercial projects where slip resistance or contrast requirements aren’t met
- Aesthetic inconsistency that undermines an otherwise high-quality installation
“A professional transition isn’t just about looks. It’s about ensuring the junction between two floor surfaces is safe, durable, and fit for the traffic it will receive.”
Understanding why floor transitions matter for safety, style, and longevity gives you the right mindset before you even pick up a tool. Contractors who treat transitions as an afterthought are the ones fielding complaints six months later. Homeowners who skip proper preparation end up with trims that lift, shift, or crack within a year.
For a broader overview of what’s involved before you start, the transition guide for UK homeowners and contractors covers the full scope of planning considerations. With the stakes and benefits clear, let’s look at what you’ll need to deliver professional results.
Tools, materials and preparations for flawless results
Getting the right tools and materials together before you start saves time and prevents costly mistakes mid-installation. Here’s a practical checklist of what you’ll need:
- Tape measure and pencil for accurate marking
- Mitre saw or junior hacksaw for cutting metal trims cleanly
- Drill and appropriate drill bits for subfloor fixings
- Screwdriver and screws sized for your subfloor material
- Adhesive (contact adhesive or grab adhesive, depending on trim type)
- Spirit level to check subfloor flatness
- Moisture meter to test subfloor moisture content before installation
- Safety glasses and gloves when cutting metal trims
Choosing the right trim type is just as important as the tools. The main profiles you’ll encounter are T-bars (for joining two floors of equal height), reducers (for stepping down between floors of different heights), and edge trims (for finishing exposed edges). Reducers are preferred over flush trims for safety and durability on uneven heights, while flush trims work best for aesthetic unity when surfaces are genuinely level.
| Trim type | Best use | Key benefit |
|---|---|---|
| T-bar | Equal height floors | Clean, symmetrical finish |
| Reducer | Uneven floor heights | Safer ramp between levels |
| Edge trim | Exposed flooring edge | Protects and finishes edges |
| Threshold bar | Doorway transitions | Seals gap, covers expansion |
Before any trim goes down, your subfloor needs attention. Check that it’s flat to within 3mm over a 1.8 metre span. Test moisture levels, especially in kitchens, bathrooms, and ground-floor rooms. High moisture will cause adhesives to fail and metal trims to corrode over time. Measure the full length of each transition run and add at least 10% for waste.
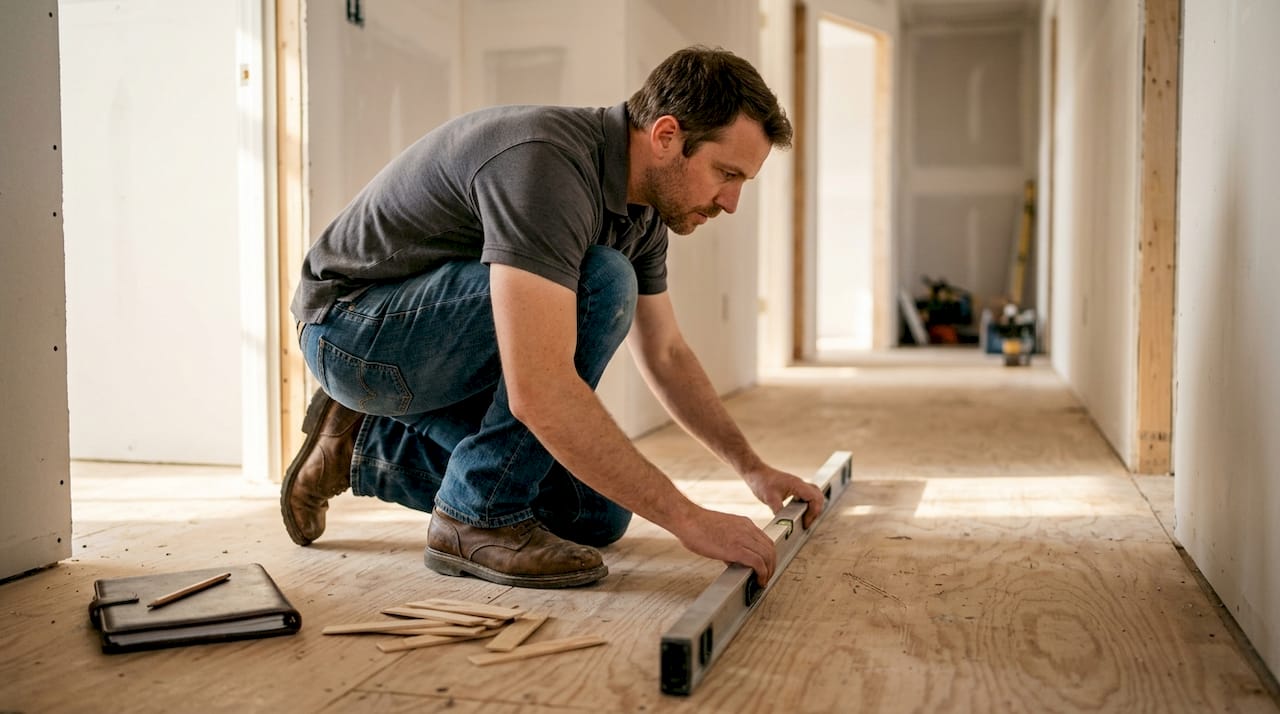
Pro Tip: Always order slightly more trim than your measurements suggest. Cutting errors, awkward angles, and the odd damaged piece are inevitable. Running short mid-job and waiting for a delivery is far more disruptive than having a small amount left over.
Knowing how to reduce trip hazards with transitions starts at the preparation stage, not during installation. If you’re working with transition strips for uneven floors, selecting the correct reducer profile before you start is essential. Once equipped and prepared, you’re ready to approach the step-by-step installation process.
Step-by-step guide to professional floor transition installation
Following a clear sequence prevents the most common installation errors and ensures the finished result is safe, secure, and visually consistent.
- Mark the transition line. Use a pencil and straight edge to mark exactly where the trim will sit. Double-check measurements from both sides of the doorway or junction.
- Dry-fit the trim. Before cutting, place the trim in position and check the fit. Mark any adjustments needed. This step catches problems before they become permanent.
- Cut the trim to length. Use a mitre saw or junior hacksaw for a clean, square cut. File any burrs from the cut end to prevent injury and ensure a neat finish.
- Prepare the subfloor fixing. Drill pilot holes into the subfloor at the recommended spacing, typically every 300mm. Always anchor to the subfloor, not floating floors, to allow proper expansion and contraction of the flooring above.
- Apply adhesive if required. For glue-down trims, apply contact adhesive to both the trim channel and the subfloor. Allow it to become touch-dry before pressing into position.
- Fix the trim securely. Screw the trim base or channel to the subfloor. Check alignment with your pencil mark and adjust before tightening fully.
- Snap or press the cover strip into place. Most modern trims use a two-part system: a fixing base and a decorative cover. Press the cover firmly along its full length.
- Check level and alignment. Use a spirit level to confirm the trim sits flush or at the correct ramp angle. Run your hand across the transition to feel for any raised edges.
Pro Tip: When working with laminate or engineered wood, always leave the manufacturer’s recommended expansion gap at the trim. Failing to do so causes the floor to buckle as it moves seasonally.
| Method | Best for | Risk if misused |
|---|---|---|
| Flush trim | Level, even surfaces | Trip hazard if floors aren’t truly level |
| Reducer trim | Height differences | Aesthetic issues if over-specified |
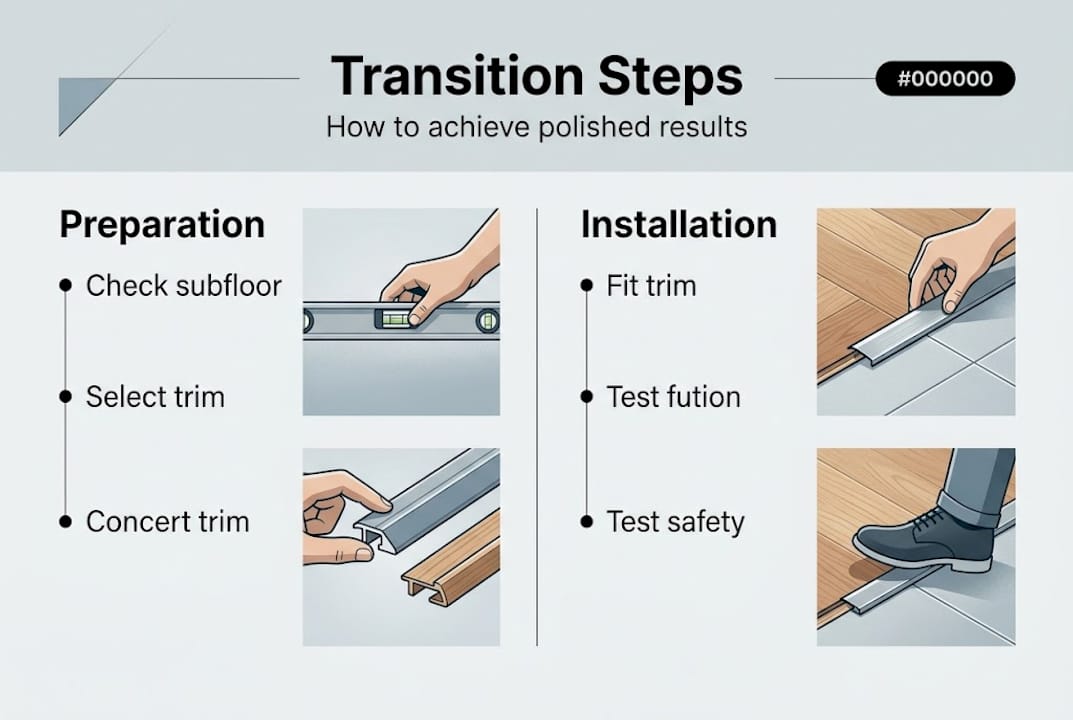
For guidance on subfloor attachment of transition trims and a more detailed step-by-step guide, further reading will reinforce these principles. You can also explore transition methods for the perfect finish for project-specific advice. Even with the best methods, pitfalls can arise, so here’s how to avoid them.
Troubleshooting and optimising your transitions
Even experienced installers encounter problems. Knowing what to look for and how to fix it quickly keeps projects on track.
The most common mistakes include:
- Uneven subfloor beneath the trim, causing the trim to rock or create a raised edge
- Fixing into the floating floor rather than the subfloor, leading to movement and eventual failure
- Wrong trim type selected, resulting in an unsafe ramp angle or a visual mismatch
- Insufficient expansion gap, causing the floor to push against the trim and lift it
- Moisture damage from skipping the moisture check at preparation stage
To check compliance after installation, run through this quick audit. First, test slip resistance by feel: the trim surface should not feel slick underfoot, particularly in wet-prone areas. Second, check level: no edge should protrude more than 2mm above the adjacent floor surface. Third, assess visual contrast: in commercial spaces or on stairs, confirm the trim colour provides adequate LRV contrast against both floor surfaces.
Pro Tip: Moisture is the silent enemy of any floor transition. Even a trim that looks perfect on day one can lift, corrode, or allow water ingress if the subfloor moisture wasn’t checked before installation. A basic moisture meter costs very little and prevents expensive remedial work.
No specific regulation covers internal room transitions in all cases, but safety and durability are implied standards for any compliant installation. For commercial projects, the bar is higher. Checking UK standards for commercial trims before specifying your products ensures you’re meeting the expectations of building control and end users alike. Now, let’s summarise how to check and ensure lasting professional results.
The truth about professional transitions: what most don’t tell you
Here’s something the glossy installation guides rarely admit: the majority of transition failures have nothing to do with the trim itself. They come from rushed subfloor preparation, skipped moisture checks, and installers who assume a floating floor is a suitable fixing point. The trim gets blamed, but the real culprit is almost always the 20 minutes of preparation that didn’t happen.
The best professionals we’ve spoken to don’t rely on expensive materials to cover poor groundwork. They follow a routine, every single time, regardless of how straightforward the job looks. That routine includes checking levels, testing moisture, dry-fitting before committing, and auditing the finished result before the client sees it.
Homeowners often ask whether a premium trim will compensate for a slightly uneven subfloor. It won’t. Understanding the role of transitions in design and safety makes it clear that the trim is the final layer, not the foundation. Get the foundation right and almost any quality trim will perform well for years. Skip it, and even the finest solid metal bar will rock, lift, or fail within months.
Find the right professional trim for your next project
Once you know what you’re doing, the trim you choose makes a genuine difference to the finished result.

At Quality Carpet Trims, we supply solid metal door bars and thresholds, hand-finished in 10 beautiful finishes to complement any interior scheme. Every product is British-made, built for durability, and designed to meet the demands of both residential and commercial projects. Whether you need a matwell flooring trim for an entrance area or guidance on choosing the right trim finish for your specific flooring types, we’re here to help. Browse our full trim range and order free samples to see the quality for yourself before committing.
Frequently asked questions
What is the minimum slip resistance for UK floor transitions?
A Pendulum Test Value of 36 or above is the recommended minimum to avoid slip risks at floor transitions, particularly in commercial and public spaces.
Should I use a flush or reducer trim for an uneven floor level?
A reducer is usually safer and more durable where floors are not level, while flush trims require precise levelling to avoid creating a trip hazard.
Why anchor trims to the subfloor, not the floating floor?
Anchoring to the subfloor allows the floating floor above to expand and contract naturally with temperature and humidity changes, preventing buckling or gaps.
Is visual contrast required for all floor transitions?
A contrast of at least 30 LRV is recommended for stairs and public areas, but the requirement is less strict for transitions between internal rooms in residential properties.
Recommended
- Step by step flooring transitions guide for a polished finish
- Professional flooring transition methods: 5 trim types
- Hardfloor To Hardfloor Trims – We have the floor transition strip you need!
- Carpet to Tile Transition: Achieving Seamless Floors