
Blog
How to choose the right flooring trim: flawless finish

Apr
You’ve spent weeks planning your flooring project, sourced beautiful materials, and laid everything perfectly. Then the trim goes in and suddenly the whole room looks unfinished, or worse, someone catches their foot on a raised edge. It’s one of the most common and frustrating outcomes in home renovation. The right flooring trim isn’t just a finishing touch; it’s a structural and safety decision that affects how your floor performs for years. This guide walks you through every stage of choosing trims that look professional, stay secure, and genuinely last in a British home.
Table of Contents
- Understanding flooring trims: types and their importance
- Preparation: tools and materials checklist
- Step-by-step: the flooring trim selection process
- Verification and troubleshooting: ensuring a professional finish
- What most get wrong about flooring trims
- Find your perfect flooring trim solution
- Frequently asked questions
Key Takeaways
| Point | Details |
|---|---|
| Trim selection matters | Choosing the right flooring trim is crucial for safety, durability, and visual appeal. |
| High-quality saves time | Investing in top-quality trims prevents frequent repairs and lasts much longer than cheaper alternatives. |
| Correct installation is key | Properly fitted trims reduce trip hazards and ensure a professional-looking finish. |
| UK-specific guidance | Understanding local terminology and standards leads to the best results for British homes. |
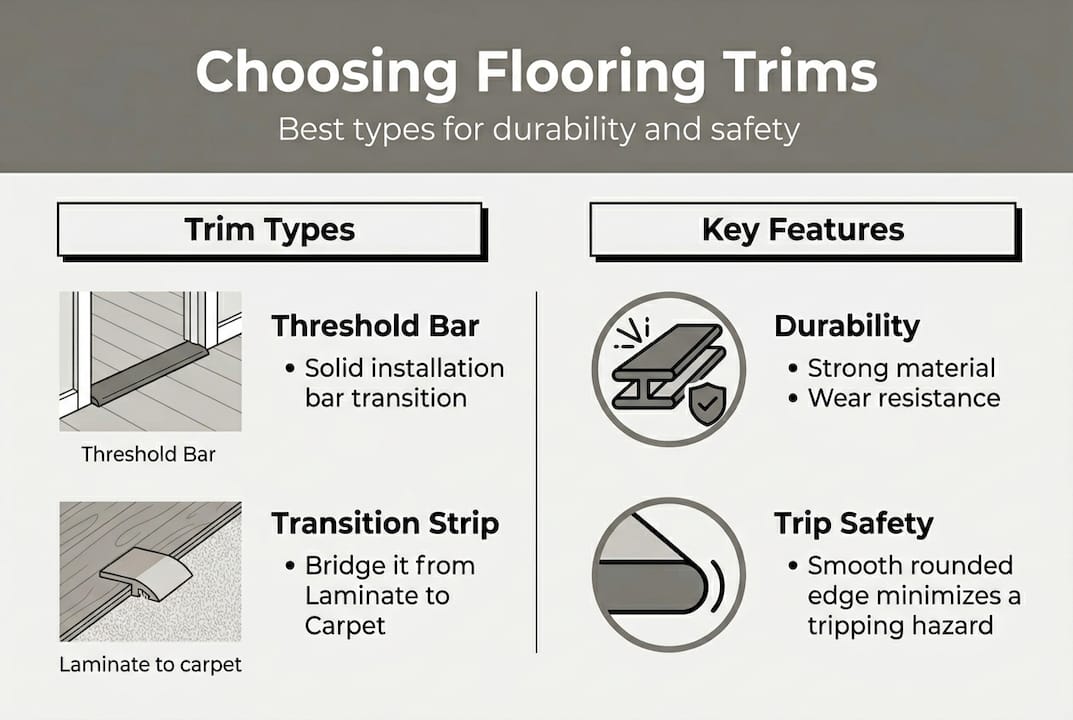
Understanding flooring trims: types and their importance
A flooring trim is any profile used to finish, protect, or connect flooring surfaces. That covers everything from the bar that bridges your carpet and tiles in a doorway, to the edge strip that stops your laminate lifting at the wall. Without the right trim, floors can warp, edges can fray, and transitions become genuine hazards underfoot.
The three main categories you’ll encounter are transition strips, threshold bars, and edge trims. Transition strips connect two different floor types at the same height. Threshold bars cover the gap in a doorway where two surfaces meet, often at slightly different levels. Flooring edge trims protect exposed edges at steps, hearths, or room perimeters where the floor terminates without a wall to butt against.
Each type serves a distinct structural purpose. A threshold bar, for example, holds carpet fibres in place and prevents the edge from unravelling over time. An edge trim on a step nose stops the laminate or vinyl from chipping under foot traffic. Getting familiar with flooring trim terminology early in your project saves a lot of confusion when ordering.
The safety case for quality trims is compelling. Brass carpet to tile trims reduce trip hazards by 30%, which is a meaningful figure when you consider how many household accidents involve floor-level obstacles. A raised or loose trim edge is exactly the kind of thing that causes a stumble, particularly for older family members or young children.
Here’s a quick comparison of the main trim types:
| Trim type | Primary function | Best used for |
|---|---|---|
| Transition strip | Joins two floor types | Carpet to laminate, room to room |
| Threshold bar | Covers doorway gap | Any doorway transition |
| Edge trim | Protects exposed edge | Steps, hearths, room perimeters |
| Matwell trim | Frames recessed mat area | Hallways, entrances |
Investing in high-quality solid metal trims from the outset is far cheaper than replacing a failed cheap trim after eighteen months, and the visual difference is immediately obvious.
Preparation: tools and materials checklist
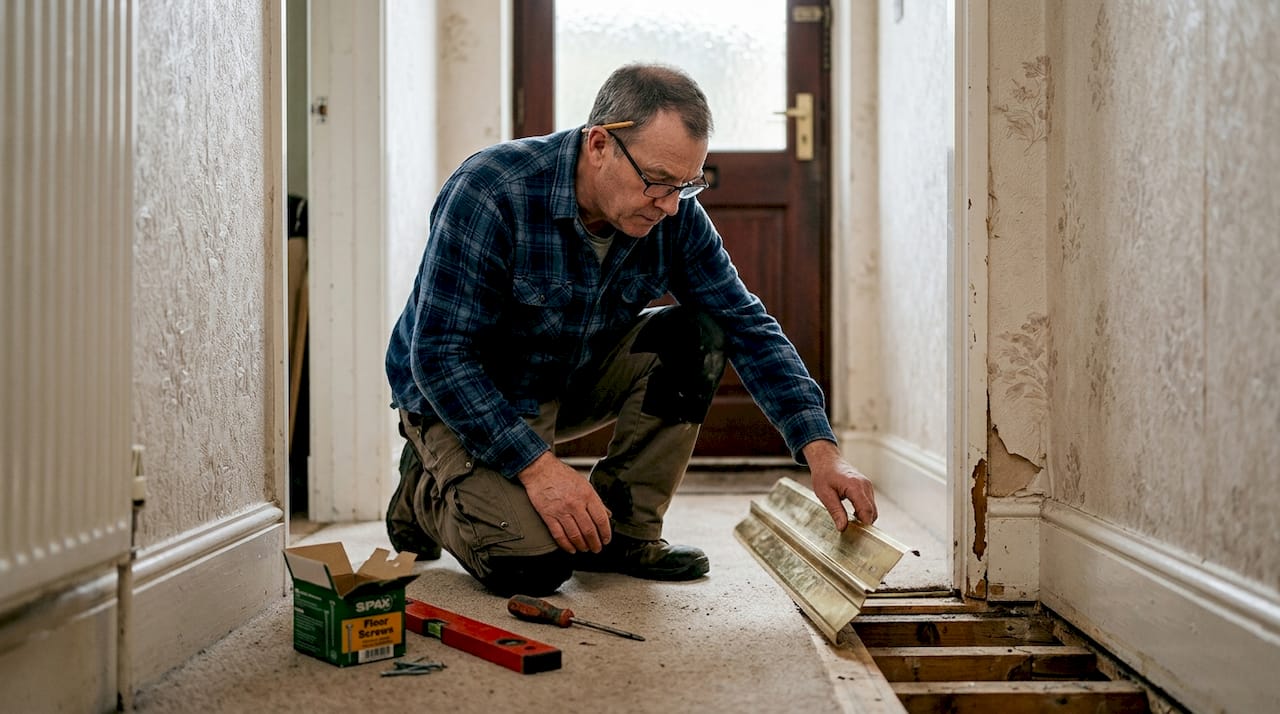
Before you order a single trim, you need accurate measurements and a clear picture of what materials you’re working with. Rushing this stage is where most DIY trim projects go wrong.
Start with your measuring tape and note the exact length of every transition area. Don’t estimate. A trim that’s 20mm short looks amateurish and can leave a gap that collects dirt. You’ll also want to note the height difference between the two floor surfaces at each transition, as this determines which profile will sit flush.
Here’s a practical checklist to work through before purchasing:
- Measuring tape (steel, not fabric, for accuracy)
- Mitre saw or junior hacksaw for cutting trims to length
- Pencil and notepad for recording measurements
- Fixing accessories appropriate to your floor type (screws, adhesive, or track systems)
- Sample of your flooring to match finish and colour
- Floor height gauge or spirit level to check surface differences
Material choice is critical. Solid brass trims are the benchmark for residential use. They resist corrosion, hold their finish, and high-quality trims avoid warping and cracking two to three times longer than budget alternatives. That’s not a marginal improvement; it’s the difference between a trim that looks great for a decade and one that starts lifting within a year.
When assessing trim quality before purchase, look for solid construction with no hollow sections, a consistent hand-finished surface, and clear fitting instructions. Understanding UK trim terminology helps you read product descriptions accurately and avoid ordering the wrong profile.
For installation guidance, reviewing professional trim installation methods before you start means you’ll know exactly what fixings and techniques suit your specific floor types.
Pro Tip: Order a free sample before committing to a full length. Seeing the finish in your actual room lighting, next to your actual flooring, prevents costly colour mismatches.
Step-by-step: the flooring trim selection process
With your measurements and materials checklist complete, you can move through the selection process methodically. This is where confident decisions get made.
- Measure every transition area and record the gap width, the height difference between surfaces, and the total length required. Add 10mm to your length measurement as a buffer for cutting.
- Identify the correct profile type for each location. A doorway between carpet and tile needs a different profile to a step edge or a room perimeter finish.
- Choose your material. Solid brass is the superior choice for longevity. Brass trims last 20 to 30 years compared to aluminium at 10 to 15 years, and aluminium is simply not a product we stock or recommend because the quality difference is too significant to ignore.
- Select your finish. With ten hand-finished options available, you can match your trim to door furniture, light fittings, or other metal accents in the room. This is what separates a professional result from a functional one.
- Confirm compatibility with your specific flooring types. Some profiles are designed for carpet to hard floor transitions; others suit hard floor to hard floor.
Here’s a comparison of longevity across material types:
| Material | Expected lifespan | Finish quality | Recommended? |
|---|---|---|---|
| Solid brass | 20 to 30 years | Hand-finished, premium | Yes |
| Aluminium | 10 to 15 years | Machine-finished, variable | No |
| PVC | 3 to 7 years | Plastic appearance | No |
Pro Tip: When choosing the right trim for a hallway, prioritise a low-profile threshold bar. High-traffic areas need trims that sit as flush as possible to reduce wear and prevent lifting.
Always cross-reference your choices against UK flooring trim standards to ensure your installation meets current residential guidelines.
Verification and troubleshooting: ensuring a professional finish
Once your trims are fitted, a proper check is essential before you consider the job done. A trim that looks right at a glance can still have issues that cause problems within months.
Work through this verification checklist after every installation:
- No movement: Press firmly along the full length of the trim. Any flex or rocking indicates insufficient fixing.
- Flush seating: The trim should sit level with or very slightly above both floor surfaces, with no raised edges that could catch underfoot.
- No visible gaps: At either end of the trim and along both sides, there should be no gap large enough to collect debris or allow moisture ingress.
- Consistent finish: Check the surface in natural light for scratches or inconsistencies introduced during fitting.
- Secure ends: The cut ends of the trim should be clean, with no sharp burrs that could damage flooring or cause injury.
Common mistakes to correct before they become permanent problems include gaps at the ends of threshold bars (usually caused by inaccurate measurement), overlapping trim edges where two profiles meet at a corner, and poor alignment in doorways where the trim isn’t centred under the door.
“Proper flooring trims avoid issues like trip hazards, warping, and unsightly gaps for much longer than cheap alternatives, making quality the most cost-effective choice over any renovation timeline.”
If you find movement after fixing, remove the trim and check whether the subfloor is level. An uneven substrate is the most common cause of a trim that won’t sit flush. When issues persist despite correct installation, seeking advice from a professional fitter is always worthwhile. The safety benefits of brass trims are only realised when the trim is correctly and securely installed.
What most get wrong about flooring trims
Here’s an uncomfortable truth: most homeowners treat trims as an afterthought. They spend their budget on flooring, then look for the cheapest trim available to finish the job. We see the consequences of this regularly. Trims that lift within a year, finishes that corrode, and profiles that were never right for the application in the first place.
The real cost isn’t the trim itself. It’s the labour of removing it, potentially damaging the flooring in the process, and starting again. A solid brass trim costs more upfront. But when you factor in that it won’t need replacing for two to three decades, it’s obviously the better investment.
Another overlooked mistake is mismatching style. A chrome trim in a room with warm brass door furniture looks jarring and unplanned. Trims are visible every single day. They deserve the same consideration as any other design choice in the room.
Finally, experienced DIYers sometimes skip the planning stage because they’ve done it before. But every floor is different. Measuring carefully and reducing trim fails through proper preparation isn’t overcaution; it’s what separates a result you’re proud of from one you quietly regret.
Find your perfect flooring trim solution
Choosing the right trim is easier when you can see the full range in one place and compare options side by side. At Quality Carpet Trims, every product is solid metal, hand-finished in ten beautiful finishes, and made in the UK to a standard that genuinely lasts.

Whether you’re finishing a hallway entrance with matwell trims or working through a whole-house renovation, you’ll find the right profile here. If you’re still building your knowledge, the flooring trim types explained guide is an excellent next step, and our UK trim terminology 2026 resource will make sure you’re ordering exactly what you need. Free samples are available, so you can check the finish in your own home before committing.
Frequently asked questions
Which type of flooring trim lasts the longest?
Brass trims last 20 to 30 years, significantly outperforming aluminium, which typically lasts 10 to 15 years before showing wear or corrosion.
How do proper trims improve home safety?
Quality trims reduce trip hazards by up to 30% by creating secure, flush transitions between different floor surfaces, removing the raised edges that cause stumbles.
Do high-quality trims really prevent warping?
Yes. Premium solid brass trims resist warping and cracking two to three times longer than budget alternatives, maintaining a flush, secure fit throughout their lifespan.
What is the easiest way to install flooring trims correctly?
Measure precisely before ordering, use the correct fixing method for your subfloor type, and always follow the manufacturer’s fitting instructions specific to your chosen trim profile.
Recommended
- Flooring trim types explained: choosing the right finish
- Flooring Edge Trims: The Key to a Seamless Finish
- Flooring Trim: Ensuring Seamless, Safe Transitions
- Why flooring trims are essential for stylish interiors
- Why Select Travertine for Flooring: Luxury and Value – Marmorique