
Blog
How T-bars create flawless flooring transitions: UK guide

Apr
TL;DR:
- T-bars provide a safe, durable, and aesthetically pleasing transition between equal-height hard floors.
- Choosing the correct trim type depends on floor height and surface type to avoid installation issues.
- Proper installation and high-quality materials like solid brass ensure long-lasting, professional-looking finishes.
Many UK homeowners spend considerable time choosing the right flooring, only to overlook the final detail that makes or breaks the finished look: the join between rooms. A poorly fitted transition can create a trip hazard, allow edges to chip, and make even expensive flooring look amateurish. T-shaped transition strips join two hard flooring surfaces of equal height, providing a smooth, professional finish that most people never think about until something goes wrong. In this guide, you will learn exactly what T-bars are, how they compare to other trims, how to install them correctly, and which materials genuinely last.
Table of Contents
- What are T-bars in flooring?
- Key benefits of using T-bars for seamless flooring transitions
- How T-bars compare to reducers and other flooring trims
- Best practices for installing T-bars in UK homes
- Why most UK homeowners overlook T-bars—and what you should actually do
- Quality T-bars and trims: Shop the UK’s trusted range
- Frequently asked questions
Key Takeaways
| Point | Details |
|---|---|
| T-bars provide seamless joins | They bridge hard floor surfaces of equal height, hiding gaps and ensuring a professional finish. |
| Safety and durability benefits | T-bars reduce trip hazards and stand up to heavy foot traffic, especially in brass form. |
| Comparison clarifies selection | Choosing between T-bars, reducers, and flat thresholds depends on height and flooring type. |
| Installation tip matters | Precise measurement and the correct expansion gap are vital for flawless T-bar performance. |
What are T-bars in flooring?
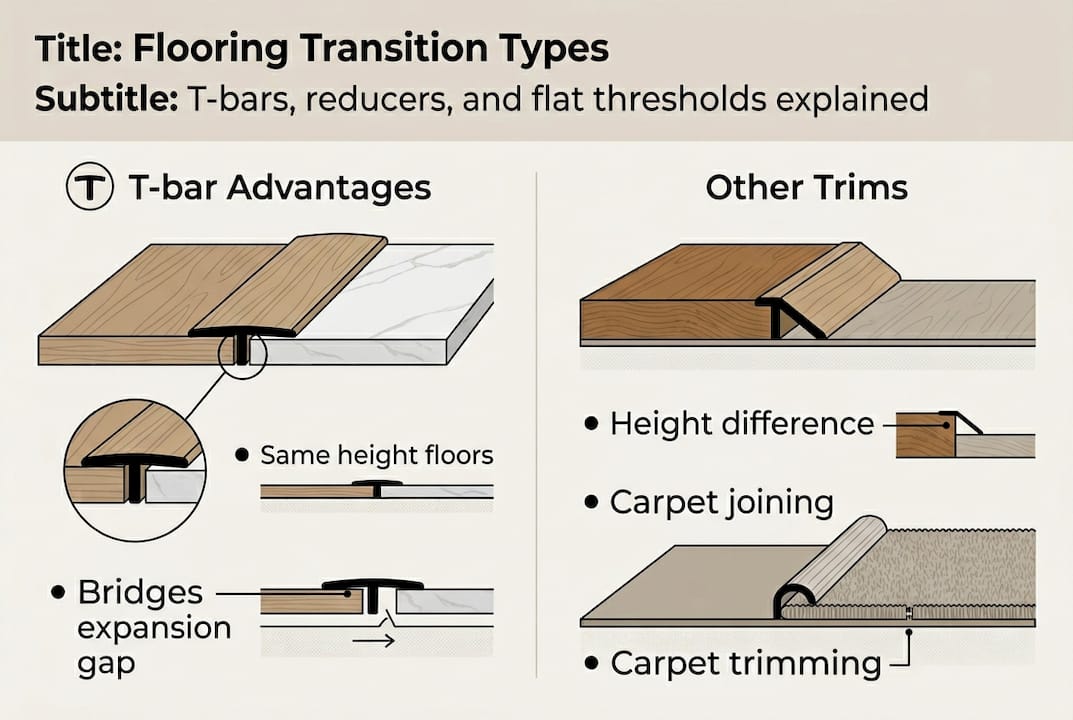
A T-bar is a flooring transition strip shaped, as the name suggests, like the letter T. The vertical stem slots neatly into the expansion gap between two hard floor surfaces, while the horizontal flange sits on top, overlapping both edges. The result is a tidy, secure join that covers the gap without restricting natural floor movement. Understanding flooring transition terminology is useful here, because many homeowners confuse T-bars with reducers, edge trims, or flat thresholds, each of which serves a different purpose.
T-bars join two hard flooring surfaces of equal height, covering expansion gaps and providing a smooth finish. That equal-height requirement is important. If one floor sits higher than the other, a T-bar is not the right choice, and using one anyway will create a visible ridge that looks untidy and may even become a tripping point.
In terms of materials, you will find T-bars available in solid brass, wood, and various metals. However, not all materials perform equally. Solid brass T-bars, hand-finished to complement your interior, offer far superior durability compared to wood or inferior metal alternatives. Our hardfloor to hardfloor trims are crafted from solid metal and finished by hand in ten beautiful options, so you can match your trim to your flooring and your home’s overall style.
Here is a quick overview of standard T-bar sizing to help you plan:
| Specification | Typical range |
|---|---|
| Width of flange | 30mm to 45mm |
| Height of stem | 14mm to 26mm+ |
| Standard lengths | 90cm and 180cm |
| Finish options | Polished brass, satin, antique, and more |
The key features to look for when selecting a T-bar include:
- Flange width: Wide enough to overlap both floor edges without looking bulky
- Stem height: Must match your floor’s actual thickness precisely
- Material: Solid metal for longevity, especially in doorways
- Finish: Should complement, not clash with, surrounding flooring and skirting
- Length: Buy longer than needed and cut to fit for a cleaner result
You can explore the full range of flooring trims explained to understand how T-bars sit within the broader world of flooring accessories. Choosing the right profile from the start saves time, money, and frustration later. Our premier metal thresholds are a popular starting point for homeowners wanting a finish that genuinely lasts.
Key benefits of using T-bars for seamless flooring transitions
Once you understand the basic design, it becomes clear why T-bars are more than just decoration. They serve a genuine functional purpose, and the benefits stack up quickly.
T-bars improve safety by reducing trip hazards, increase durability in high-traffic doorways, fix height imperfections, and enhance aesthetics. That combination of safety and style is rare in a single product.
Here are the main advantages you can expect:
- Reduced trip hazards: Exposed floor edges, especially in doorways, are a genuine safety risk. A T-bar creates a smooth, flush surface that eliminates the raised edge entirely.
- Edge protection: Without a trim, hard floor edges chip and crack over time, particularly in busy areas. A solid metal T-bar acts as a shield.
- Long service life: Quality brass T-bars resist denting and warping for 10 to 20 years, far outlasting wood or PVC alternatives.
- Improved aesthetics: A well-chosen T-bar ties two rooms together visually, creating a deliberate, designed look rather than an awkward gap.
- Precise fit for varying heights: T-bars accommodate floor thicknesses ranging from 14mm to 26mm and beyond, giving you flexibility across different flooring types.
Statistic to note: Door threshold strips can reduce trip-related incidents in the home significantly when fitted correctly, particularly for households with elderly residents or young children.
Pro Tip: If you are fitting T-bars in a hallway or kitchen, choose a finish that matches your door bars for a cohesive, considered look throughout. Mixing finishes in a single space is one of the most common mistakes DIY renovators make, and it is entirely avoidable.
One thing that surprises many homeowners is how much a quality T-bar improves the perceived value of a room. Estate agents and interior designers consistently note that finishing details, including trims and thresholds, signal the difference between a careful renovation and a rushed one. If you have spent money on good flooring, it makes sense to finish it properly. Consulting a laminate finishes guide can also help you match trim finishes to your specific flooring type before you buy.
How T-bars compare to reducers and other flooring trims
To choose the right solution, it is worth understanding the differences between T-bars and other trims. They are not interchangeable, and using the wrong one creates problems that are awkward and costly to fix.
T-bars differ from reducers and flat thresholds; they are used specifically for same-height hard floors, while reducers handle height differences of up to around 12mm. Here is how the main types compare:
| Trim type | Best for | Height difference | Suitable for carpet? |
|---|---|---|---|
| T-bar | Same-height hard floors | None (equal height) | No |
| Reducer | Uneven floor joins | Up to 12mm | Sometimes |
| Flat threshold | Basic edge cover | Minimal | No |
| Carpet edge trim | Carpet to hard floor | Varies | Yes |
When should you use each type? Follow this simple decision process:
- Are both floors the same height and both hard surfaces? Use a T-bar.
- Is one floor higher than the other? Use a reducer. See our transition strips for uneven floors for the right profile.
- Are you joining carpet to a hard floor? Use a carpet edge trim, not a T-bar.
- Do you simply need to cover an exposed edge near a wall or step? A flat threshold or edge trim is more appropriate.
“Choosing the wrong trim type is the single most common flooring finishing mistake. A T-bar forced onto uneven floors will rock, creak, and eventually lift.”
It is also worth noting that T-bars are not suitable for floating vinyl or high-expansion floors. These surfaces move considerably with temperature changes, and a rigid T-bar stem can restrict that movement, causing the floor to buckle. If you are working with uneven floor transition strips, always check the expansion allowance before committing to a specific profile. Understanding threshold types in more detail will help you make the right call for each room.
Best practices for installing T-bars in UK homes
Knowing which trim to use is half the battle. Installing it properly is what ensures long-term results and a finish that looks genuinely professional.
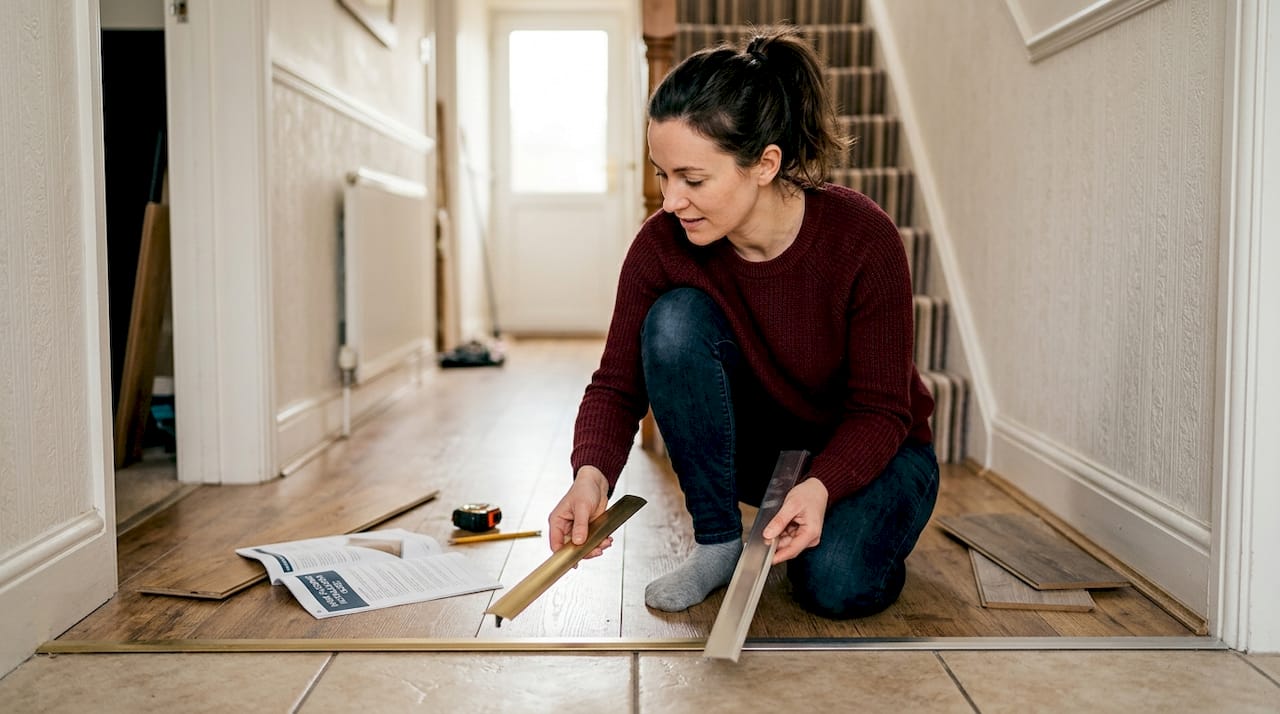
Installation involves cleaning surfaces, applying silicone adhesive to the channel, inserting the T-bar stem, and pressing firmly. Cut to length with a hacksaw for a neat finish.
Follow these steps for a reliable result:
- Prepare the gap: Ensure the expansion gap between your two floors is clean, dry, and free from debris. Any grit or old adhesive will prevent the stem from sitting flush.
- Measure carefully: Measure the gap width and the floor thickness on both sides. Your T-bar stem must fit snugly without forcing.
- Cut to length: Use a fine-toothed hacksaw to cut the T-bar to the exact doorway width. Cut from the underside to avoid scratching the visible face.
- Apply adhesive: Run a thin bead of silicone adhesive along the inside of the channel or gap. Do not overfill, as excess silicone will squeeze out and look untidy.
- Insert and press: Slot the stem into the gap and press the flange down firmly onto both floor surfaces. Hold for 30 to 60 seconds.
- Allow to cure: Leave the adhesive to cure fully before walking on the trim, typically 24 hours.
Pro Tip: Always leave a proper expansion gap of 25mm to 38mm for floating floors before fitting any trim. Fitting a T-bar too tightly against a floating floor is one of the most common installation errors, and it causes buckling within months. Our laminate trim guide covers this in detail for laminate-specific projects.
For more complex installations involving clip-down systems, reviewing guidance on installing multipurpose thresholds can help you understand the mechanics before you start.
Why most UK homeowners overlook T-bars—and what you should actually do
Here is the uncomfortable truth: most people buy flooring, spend hours choosing the right shade and texture, and then grab the cheapest trim they can find as an afterthought. It is a false economy. A low-quality T-bar fitted in a busy doorway will show wear within a year, and replacing it means lifting the trim, cleaning the adhesive, and starting again.
The contrarian advice that experienced renovators have learned is this: invest more in the trim than you think you need to. Solid brass T-bars suit high-traffic areas best, with unlacquered finishes that age naturally and never look tired. Wood looks beautiful initially but swells, cracks, and discolours over time, particularly near external doors or in kitchens.
Matching your T-bar finish to your flooring species and interior palette is also far more important than most guides admit. A polished brass trim on pale oak flooring looks intentional. A mismatched chrome trim on warm walnut looks like an error. Our premier solid thresholds are available in ten hand-finished options precisely because matching matters.
Quality T-bars and trims: Shop the UK’s trusted range
Ready to finish your flooring project properly? At Quality Carpet Trims, we supply solid metal T-bars and thresholds hand-finished in ten beautiful options, made to last in real UK homes.

Whether you are connecting two hard floor surfaces in a hallway, kitchen, or living room, our range covers every scenario. We do not sell aluminium, wood, or PVC trims because we believe you deserve better. Explore our full selection of flooring trim types to find the right profile for your project, or go straight to our buy door bars section to see what is available. Visit Quality Carpet Trims today for expert advice, fast UK delivery, and trims that genuinely complete the job.
Frequently asked questions
Can T-bars be used between carpet and hard flooring?
T-bars are not suitable for carpet-to-hardfloor transitions because the two surfaces sit at different heights. Use a carpet edge trim instead, which is designed specifically for that join.
What material is best for T-bars in high-traffic areas?
Solid brass T-bars resist denting and warping far better than wood, PVC, or aluminium alternatives, making them the most durable choice for busy doorways.
How do you install a T-bar threshold properly?
Clean the gap, apply silicone adhesive, insert the stem, press the flange firmly onto both floor surfaces, and allow 24 hours to cure. Cut to length with a fine-toothed hacksaw before fitting.
Should I use a T-bar or a reducer for neighbouring rooms?
Use a T-bar only when both floors are the same height and both are hard surfaces. If there is any height difference between floors, a reducer is the correct choice.
Recommended
- What is a flooring transition: guide for UK homeowners 2026
- Floor level transition guide for UK homeowners 2026
- How to Choose Flooring Transitions: Cut Trip Hazards 30%
- What Is a Carpet Bar? How It Elevates Flooring Transitions