
Blog
Workflow for matching floor trims: a step-by-step guide

Jul
TL;DR:
- Proper workflow for matching floor trims ensures rooms look cohesive and professional, preventing cheap appearances.
- Choosing trims that coordinate with door casings and finishes, not the floor color, creates a seamless design.
A well-planned workflow for matching floor trims is defined as the structured sequence of selecting, measuring, and fitting transition pieces and baseboards so they coordinate with your flooring and existing interior elements. Get this right and every room feels finished, cohesive, and professional. Get it wrong and even expensive flooring looks cheap. The industry standard approach prioritises coordinating trims with door casings and window surrounds first, then with flooring tone. Qualitycarpettrims solid brass trims, hand-finished in 10 luxury finishes, give you a material that will not split, bend, or dent the way cheaper alternatives do.
What do you need before starting the floor trim matching process?
Preparation is the single biggest factor separating a professional result from a frustrating one. Arriving at the job without the right tools or materials means cutting corners, literally and figuratively.
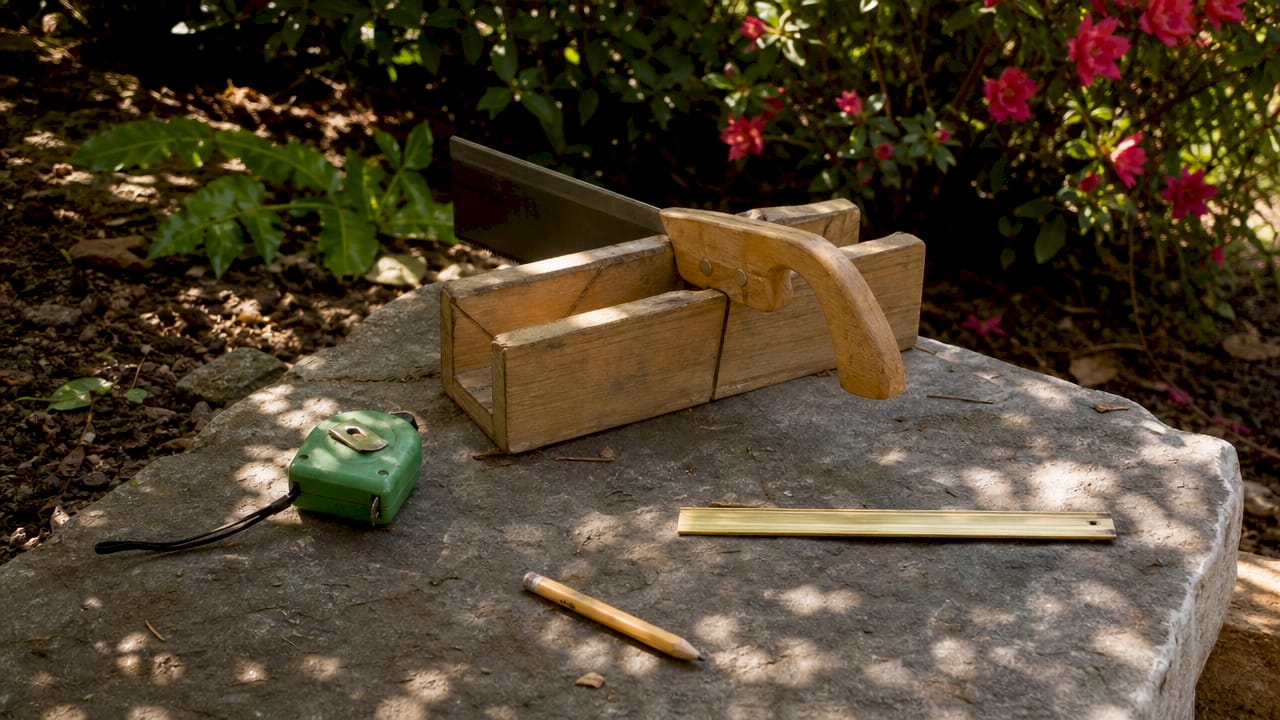
Tools and materials checklist
Before you touch a single trim piece, gather the following:
- Measuring tape for floor height and room perimeter
- Mitre saw for accurate angle cuts on baseboards and casings
- Coping saw for internal corners where a mitre would open up over time
- Pencil and combination square for marking cut lines
- Nail gun or hammer and finishing nails for securing baseboards to the wall
- Adhesive or track fixings for door bar thresholds
| Tool or material | Purpose |
|---|---|
| Measuring tape | Measure finished floor height and room perimeter |
| Mitre saw | Cut baseboards and casings at precise angles |
| Coping saw | Create coped joints at internal corners |
| Combination square | Mark accurate cut lines |
| Nail gun | Secure baseboards to wall studs or noggins |
| Adhesive or track fixings | Fix door threshold bars without penetrating floating floors |
| Solid brass trims | Provide durable, luxury transition pieces at doorways |
Measuring finished floor height is a step most homeowners skip too early. You must measure after the flooring is laid, not before, because the actual height determines how your baseboard sits and whether it covers the expansion gap correctly.
Pro Tip: Order your trims at the same time as your flooring. Transition strips ordered together with your planks are far more likely to match in grain, sheen, and tone than anything bought separately later.
Qualitycarpettrims trims are solid brass with a powder-coated finish. They will not warp, crack, or discolour the way wooden, plastic, or aluminium trims do over time. That durability matters when you are fitting trims in high-traffic doorways.
What is the step-by-step workflow for matching and installing floor trims?
The correct installation sequence is flooring first, then door and window casings, and baseboards last. This order exists for a practical reason: baseboards must sit on top of the finished floor height to cover the expansion gap without pinching the floor.
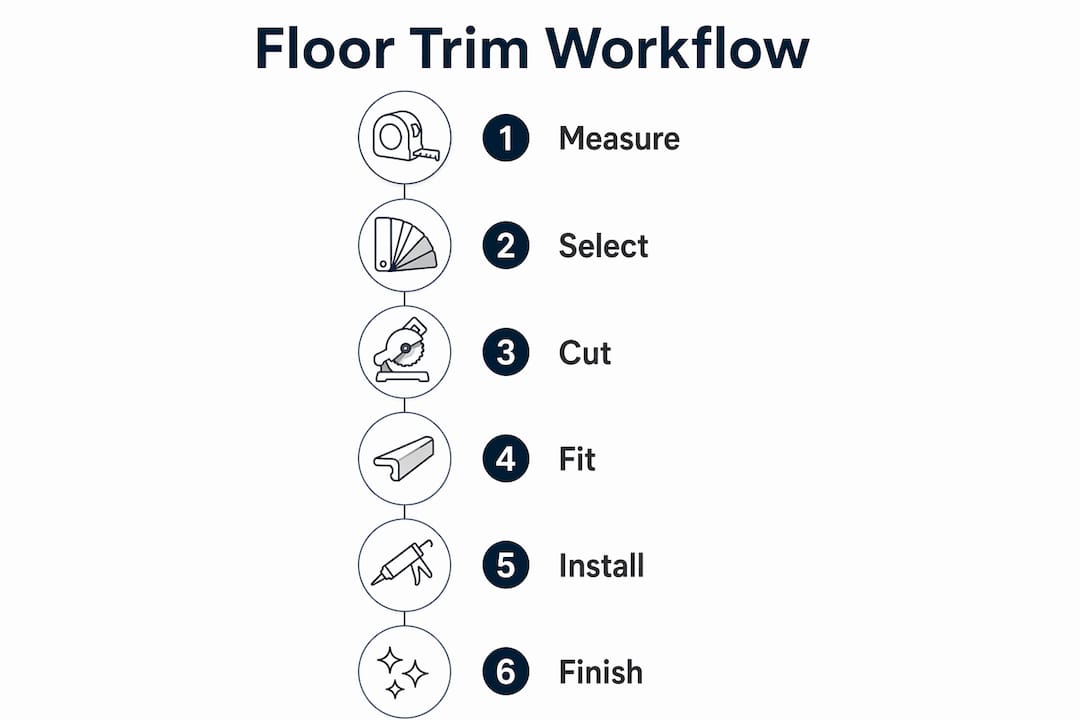
The full installation sequence
-
Lay your flooring completely. Never cut or fit trims until the floor is down and fully settled. Floating floors in particular need 24–48 hours to acclimatise before you measure.
-
Measure finished floor height at multiple points. Floors are rarely perfectly level. Measure at doorways, corners, and mid-wall to find the highest point. Use that measurement to set your baseboard height.
-
Fit door and window casings next. Casings sit against the wall and frame the opening. They are fitted before baseboards so the baseboard can butt cleanly against the casing rather than overlapping awkwardly.
-
Select and cut your threshold bars for doorways. Door threshold bars bridge the gap between two floor surfaces or cover the expansion gap at a doorway. Transition strips for uneven floors are available where floor heights differ between rooms.
-
Cut baseboards to length. For external corners, cut a 45-degree mitre on each piece so they meet cleanly. For internal corners, use a coped joint rather than a mitre.
-
Cope your internal corners. A coped joint means cutting the profile of one baseboard piece onto the end of the adjoining piece so it overlaps. Coped joints create permanent seams that stay tight as the house moves, whereas simple mitres open up within months.
-
Secure baseboards to the wall, not the floor. Nail or screw into wall studs or noggins. Fixing trims to floating floors causes buckling because the floor cannot expand freely beneath the trim.
-
Fit threshold bars at doorways. Use the manufacturer’s track system or adhesive to fix the bar to the subfloor. Never nail through a floating floor.
-
Caulk and finish. Apply a thin bead of decorator’s caulk along the top edge of the baseboard where it meets the wall. Paint or touch up after caulking, not before.
Pro Tip: Back-bevel your baseboard cuts by one or two degrees. This means the back face of the cut is slightly shorter than the front face, so the visible edge presses tightly against the wall even if the wall is not perfectly plumb.
The step-by-step flooring transitions guide from Qualitycarpettrims covers additional techniques for handling height differences and awkward doorway profiles in more detail.
How do you select trims and finishes that coordinate with your flooring?
The most common aesthetic error is trying to match baseboards to the floor colour. Design professionals recommend coordinating trims with existing door casings and window surrounds instead. Matching the floor creates a choppy, disconnected look because the baseboard visually separates the floor from the wall rather than framing the room.
Key design principles for trim selection
- Match casings, not flooring. White-painted baseboards work with virtually any floor colour because they tie the room together through the door frames and window surrounds, not through the floor.
- Use consistent profiles across rooms. The profile shape of your baseboard (ogee, torus, pencil round) should remain the same throughout the house. Consistent design language across rooms creates visual cohesion even when floor colours change.
- For stained wood floors, coordinate tone rather than match exactly. A trim slightly darker than the floor reads as intentional. An imperfect match reads as a mistake.
- Treat trims as neutral or intentional contrast. A brass threshold bar in a satin or antique finish acts as a deliberate design detail, not a forced match to the floor.
- Order transition pieces with your flooring. Generic store-bought trims rarely match premium plank finishes in sheen or grain. Ordering together removes that risk.
For door threshold bars, the finish you choose matters as much as the profile. Qualitycarpettrims offers 10 hand-finished options in solid brass, from polished gold to dark bronze, so you can coordinate with door furniture, light fittings, and cabinet handles for a considered, high-end result. You can review current floor trim trends for 2026 to understand which finishes are working well in contemporary UK interiors.
The BRCKS construction blog makes a useful point about design consistency: maintaining the same trim profile across different rooms does not require exact matches, only a shared visual language. That principle applies directly to flooring trims.
What are the most common mistakes in floor trim installation?
Most trim installation problems come down to rushing the sequence or skimping on technique. The mistakes below are the ones that cause the most rework.
- Cutting trims before measuring finished floor height. Homeowners are advised against cutting trims early because the actual floor height after laying is almost always different from the estimate. Cut after laying, always.
- Relying on caulk to fix poor joints. Caulk is a finish, not a structural fix. If a joint is poorly cut, caulk will crack within a season as the house moves.
- Nailing trims to the floor. Fixing a threshold bar or baseboard to a floating floor restricts expansion. The floor buckles or peaks under the trim within months.
- Ignoring wall irregularities. Walls bow, lean, and undulate. Scribing trims to uneven walls means running a compass along the wall surface to transfer its profile onto the trim, then cutting to that line. The result fits tightly without filler.
- Mixing trim quality with premium flooring. Wooden trims split at the ends. Plastic trims discolour and crack. Aluminium trims dent and scratch. None of these hold up alongside quality flooring. Solid brass trims maintain their finish and shape for the life of the floor.
“Professional trim carpentry is not about hiding mistakes with filler. It is about cutting and fitting so accurately that no filler is needed. Scribing, coping, and back-bevelling are the techniques that separate a lasting installation from one that looks tired within a year.”
Key takeaways
A successful floor trim matching process depends on following the correct installation sequence, selecting finishes that coordinate with casings rather than flooring, and using professional cutting techniques that eliminate the need for filler.
| Point | Details |
|---|---|
| Follow the correct sequence | Lay flooring first, then casings, then baseboards to cover expansion gaps accurately. |
| Measure after laying | Always measure finished floor height after the floor is down, not before cutting trims. |
| Coordinate with casings | Match baseboards to door casings and window surrounds, not to the floor colour. |
| Cope internal corners | Use coped joints at internal corners rather than mitres to prevent gaps opening over time. |
| Fix to wall, not floor | Secure all trims to the wall or subfloor to maintain expansion gaps and prevent buckling. |
Why planning trim selection early is the decision I wish more homeowners made
Most renovation projects I see go wrong at the same point: the flooring is down, the room looks great, and then someone orders a door bar from a hardware shop because it is quick and cheap. Three months later the finish is flaking, the bar has dented, and the whole doorway looks like an afterthought.
The workflow for matching floor trims only works if trim selection happens at the same time as flooring selection, not after. When you choose your floor, you should already know the finish of your door furniture, the colour of your casings, and the profile of your baseboards. Those three decisions together determine which trim finish will tie the room together.
I have seen homeowners spend thousands on engineered oak flooring and then fit a plastic reducer strip at the doorway. The plastic trim does not just look wrong. It undermines the entire investment. Solid brass trims with a hand-applied finish hold their appearance for years. They do not split at the edges, they do not bow in humidity, and they do not scratch the way softer metals do.
The techniques matter too. Learning to cope an internal corner takes one afternoon of practice. Once you can do it, every baseboard joint in your home will stay tight for decades. That is a better return on your time than any amount of caulk.
— Matt
Qualitycarpettrims solid brass trims for your flooring project
Choosing the right trim is the final detail that makes a flooring project look considered rather than rushed.

Qualitycarpettrims supplies solid brass door bars and threshold strips, hand-finished in 10 luxury finishes including polished brass, dark bronze, and satin nickel. These trims will not split, bend, or dent like wooden, plastic, or aluminium alternatives. Every bar is made in the UK and finished by hand, so the colour and texture hold up in high-traffic doorways for years. Browse the full range on the Matwell flooring trim page, or explore the complete door threshold bar collection to find the right profile and finish for your project.
FAQ
What is the correct order for installing floor trims?
The correct installation order is flooring first, then door and window casings, and baseboards last. This sequence ensures baseboards cover the expansion gap at the correct finished floor height.
Should baseboards match the floor or the door casings?
Baseboards should coordinate with door casings and window surrounds, not the floor colour. Matching casings creates visual cohesion across the room; matching the floor creates a disjointed appearance.
How do I stop threshold bars from damaging a floating floor?
Fix threshold bars to the subfloor or wall using a track system or adhesive, never directly to the floating floor. Securing trims to the floor restricts expansion and causes buckling.
What is a coped joint and why does it matter?
A coped joint is cut by profiling one baseboard piece to overlap the face of the adjoining piece at an internal corner. It stays tight as the house moves, unlike a simple mitre which opens up over time.
Why are solid brass trims better than wooden or plastic alternatives?
Solid brass trims resist splits, bends, and dents that affect wooden, plastic, and aluminium trims. They maintain their finish and shape for the life of the floor, making them the durable choice for high-traffic doorways.
Recommended
- Floor trim installation workflow: a DIY guide
- Achieve seamless floor transitions: step-by-step UK workflow
- Floor trim fitting guide for a professional finish
- Step by step flooring trim installation guide