
Blog
Why match finishes in flooring: the homeowner’s guide

Jul
TL;DR:
- Matching flooring finishes involves aligning coating chemistry, sheen, and undertone to ensure a cohesive and durable look. Proper testing, preparation, and choosing compatible products prevent peeling, mismatches, and costly repairs. Using trims that complement the finish enhances transitions and completes a polished, intentional interior.
Matching finishes in flooring means ensuring the surface coatings of your floor materials align visually and chemically to deliver a consistent, professional, and durable result. This is the single most overlooked decision in renovation projects, and it affects everything from how a room feels to how long your floor lasts. The importance of matching finishes extends beyond aesthetics. Get it wrong and you face peeling coatings, jarring visual breaks, and costly remedial work. Get it right and your floors look intentional, cohesive, and built to last.
Why match finishes in flooring at all?
Flooring finish compatibility is defined by two factors: chemical compatibility between coating types, and visual alignment of sheen and undertone. Both must be correct. A floor that passes one test but fails the other will still look or perform poorly.
The industry term for this discipline is finish matching, and it covers the coating product applied to the floor surface, the sheen level of that coating, and the colour temperature of the result. Homeowners often focus on wood species or tile colour and forget that the finish sitting on top of those materials is what the eye actually reads first.
2026 industry standards now mandate finish compatibility across flooring and trim elements in both new builds and refurbishment projects. This reflects a growing recognition that mismatched finishes are not just an aesthetic problem. They are a construction quality problem.
What does matching flooring finishes actually involve?
Finish matching covers three distinct layers: the chemistry of the coating, the sheen of the surface, and the undertone of the colour. Each layer must align independently.
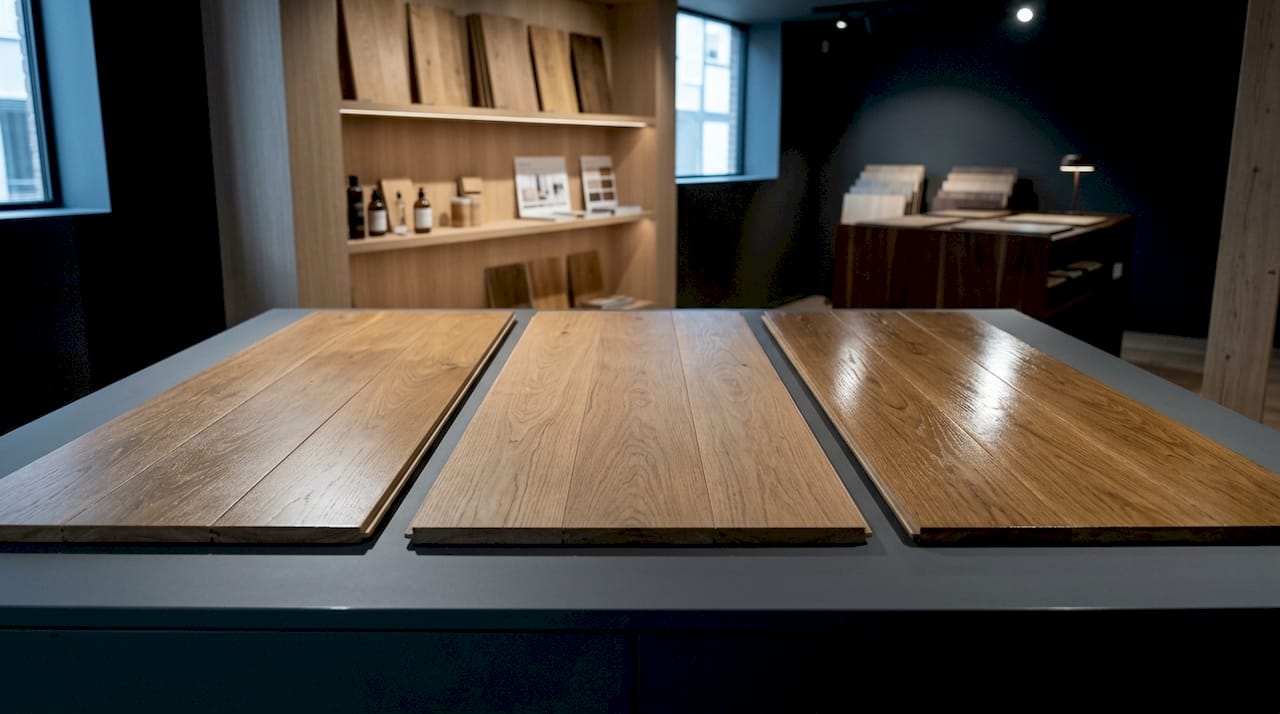
Coating chemistry and compatibility
The three most common floor finish types are polyurethane, hardwax oil, and penetrating oil. These are not interchangeable. Switching between polyurethane and hardwax oil requires a full sand down because they are chemically incompatible. Applying a water-based finish over an oil-based one causes adhesion failure and peeling within days. This is not a minor cosmetic issue. It ruins the floor surface entirely and requires complete stripping.
Pro Tip: Before any re-coat, identify the existing finish type by checking the original product documentation or asking a professional finisher to perform a compatibility test. Never assume.
Sheen level and visual perception
Sheen is measured on a scale from flat through satin to high gloss. Differences in sheen strongly influence perceived matching, even when the colour is identical. A new high-sheen floor placed next to an older dulled floor looks mismatched regardless of the stain colour used. UV exposure and foot traffic dull sheens over time, which means a floor laid five years ago will read differently from a freshly finished section even if both used the same product.
Undertone temperature
Undertones are the warm, cool, or neutral tones sitting beneath the primary colour of a finish. Undertone conflict is the primary reason for aesthetic failure in home designs where flooring, cabinetry, and countertops were not selected together. A warm honey oak floor will clash with a cool grey-toned finish on an adjacent section, even if both are described as “natural.” Samples must always be viewed under the same lighting conditions to avoid undertone clashes.
| Finish type | Sheen options | Compatible with | Incompatible with |
|---|---|---|---|
| Polyurethane | Flat, satin, gloss | Other polyurethane | Hardwax oil, penetrating oil |
| Hardwax oil | Satin, natural | Other hardwax oil | Polyurethane |
| Penetrating oil | Flat, natural | Other penetrating oil | Polyurethane |
Why is matching flooring finishes critical for renovation projects?
Renovation projects present the hardest finish matching challenges because you are working with floors that have aged, oxidised, and absorbed years of UV light. Achieving an invisible match between old and new hardwood is rare. Natural wood oxidises over time, altering both the colour and the sheen of the existing finish. Factory formulas are rarely sufficient. Custom, on-site stain blends are often necessary to get close.
Full refinish versus re-coat
The choice between a full refinish and a buff-and-re-coat is central to finish matching in renovations. A buff-and-re-coat takes one day and requires 24 hours of cure time. A full floor refinish takes approximately 5 days to complete, with a further 5–7 days needed for full cure before furniture and normal traffic can return. That is a significant commitment, but it is the only route to a consistent finish across old and new sections.
Re-coating is only appropriate when the existing finish is in good condition and chemically compatible with the new product. The following signs indicate a full refinish is required:
- Deep scratches or gouges that penetrate the finish layer
- Grey or black staining from moisture damage
- Visible finish peeling or flaking
- Sections where different finish types were applied at different times
- Significant sheen variation across the floor
Pro Tip: Full cure of floor finishes can take up to 30 days. Avoid placing heavy furniture or rugs during this period, even if the floor feels dry to the touch.
Undertone alignment is the most underestimated factor in renovation matching. A professional finisher will blend stains on-site, testing under the room’s actual lighting conditions before committing to the full floor. This is the step most DIY renovators skip, and it is the step that most often causes regret.
How to achieve cohesive flooring transitions with matched finishes
Cohesive flooring transitions do not always require an exact match. Tonal cohesion within the same colour family creates a sophisticated interior without the rigid, costume-like quality of over-matched spaces. The goal is harmony, not uniformity.
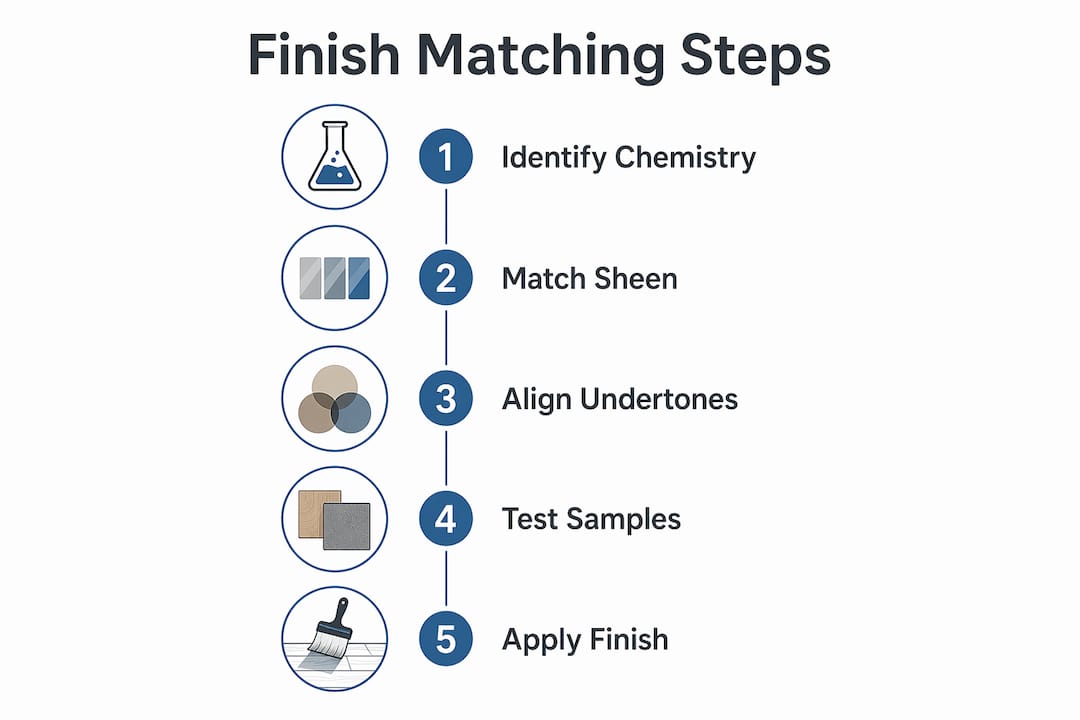
When exact matching is not possible
When a perfect match is genuinely unachievable, the best practice is to pivot to intentional contrast. Distinct board widths and complementary undertones create a deliberate design statement rather than an accidental mismatch. The critical rule is to avoid “almost matching.” A floor that is close but not quite right reads as a mistake. A floor that is clearly different reads as a choice.
Flooring transitions succeed when undertones align, even if the wood species or board widths differ. A warm-toned oak in one room can transition to a warm-toned engineered board in another without visual discord, provided the sheen levels are also consistent.
Using trims to frame transitions intentionally
Transition strips and flooring trims serve a dual purpose. They protect the edges of flooring materials and they frame the change between two surfaces so the eye reads it as intentional. A well-chosen trim in a finish that complements your flooring signals design intent. A poorly chosen trim in a clashing finish undermines the entire room.
Key design principles for cohesive transitions:
- Match the trim finish to the dominant undertone of the flooring, not the secondary colour
- Keep sheen levels consistent across the trim and the adjacent floor surfaces
- Use wider trims to bridge larger height differences between floor types
- Choose a trim finish that also relates to other metal elements in the room, such as door handles or light fittings
Pro Tip: View all finish samples together under the room’s natural daylight and artificial lighting before committing. Finishes that look identical in a showroom often read differently once installed.
Common mistakes that cause finish mismatches in flooring projects
The most damaging mistake is mixing incompatible finish chemistries without testing adhesion first. Applying a water-based product over an oil-based finish is the most common version of this error. Compatibility testing is mandatory; re-coats over incompatible finishes cause peeling within days. The repair cost far exceeds the cost of a simple test.
The second most common mistake is attempting a partial re-coat over a floor with mixed finish types. This happens when homeowners source materials from different suppliers at different times, or when a previous owner used a different product for repairs. The result is a floor with visible patches of different sheen and colour.
Other frequent errors include:
- Ignoring the ageing effect on existing floors before selecting a new finish
- Comparing samples under shop lighting rather than in the actual room
- Sourcing flooring and trims separately without checking finish compatibility
- Assuming factory colour names are consistent across different manufacturers
A pre-application checklist prevents most of these errors:
- Identify the existing finish type before purchasing any new product
- Test adhesion on a small, hidden area before full application
- View all samples under the room’s actual lighting conditions
- Check sheen levels match across all new and existing surfaces
- Confirm trim finishes align with the flooring finish before ordering
Pro Tip: Always order a sample of your chosen trim finish alongside your flooring sample. Hold both under the room’s lighting at the same time. If they clash, adjust before you commit.
Key takeaways
Matching flooring finishes requires aligning coating chemistry, sheen level, and undertone temperature across every surface in the room, including the trims.
| Point | Details |
|---|---|
| Chemistry must be compatible | Mixing polyurethane and hardwax oil requires a full sand down; incompatible finishes peel within days. |
| Sheen affects perceived match | A new high-sheen floor next to a dulled older floor looks mismatched even with identical colour. |
| Undertones drive visual harmony | Warm and cool undertones clash regardless of colour; always compare samples under room lighting. |
| Full refinish takes up to 12 days | Allow 5 days for the work and 5–7 days cure time before returning furniture and normal traffic. |
| Trims frame transitions intentionally | A trim finish matched to the flooring undertone signals design intent and protects floor edges. |
Why finish matching matters more than most homeowners realise
I have seen more renovation projects derailed by finish mismatches than by any other single decision. Homeowners spend months choosing the right wood species, the right tile, the right paint colour, and then rush the finish selection at the end. That is where the money gets lost.
The thing that surprises people most is how much sheen does the heavy lifting. I have stood in rooms where the colour match was near-perfect and the floor still looked wrong. The existing boards had dulled over five years of UV exposure. The new section was freshly finished and bright. The colour was the same. The sheen was not. The eye caught it immediately.
What the 2026 flooring standards have done is formalise what experienced installers already knew. Finish compatibility is a construction quality issue, not just a design preference. When a re-coat fails because of chemical incompatibility, you are not looking at a cosmetic touch-up. You are looking at a full strip and refinish.
My honest advice to any homeowner planning a renovation is to treat the finish decision with the same seriousness as the flooring material itself. Get samples. Test them in the room. Check the chemistry before you buy. And do not underestimate what a well-chosen trim does for the overall result. A trim that echoes the flooring finish pulls the whole room together in a way that is hard to articulate but immediately obvious when you see it done well.
— Matt
Qualitycarpettrims: flooring trims that hold their finish
Choosing the right flooring trim is the final step in a matched finish installation, and the trim material matters as much as the finish itself.

Qualitycarpettrims supplies solid brass door threshold bars and flooring trims, hand-finished in 10 luxury colours to complement your flooring. Solid brass does not split, bend, or dent over time, unlike cheaper alternatives made from plastic, rubber, or aluminium, which degrade and lose their finish within years. Every trim is finished by hand in the UK, so the colour and sheen remain consistent across your order. Browse the full range of premium flooring trims to find the finish that completes your project.
FAQ
What does matching finishes in flooring mean?
Matching finishes in flooring means aligning the coating type, sheen level, and undertone colour of all floor surfaces in a space so they read as visually and chemically consistent.
Can you apply a new finish over an existing one?
Only if the finish types are chemically compatible. Applying a water-based finish over an oil-based one causes adhesion failure and peeling within days; a full sand down is required when switching between incompatible types.
How long does a full floor refinish take?
A full refinish takes approximately 5 days to complete, followed by 5–7 days of cure time before furniture and normal traffic can return. Full chemical cure can take up to 30 days.
What if I cannot get an exact finish match?
When an exact match is not achievable, pivot to intentional contrast using distinct board widths and complementary undertones. Avoid “almost matching,” which reads as a mistake rather than a design decision.
Why do my floors look different even with the same colour?
Sheen differences are the most common cause. An older floor dulled by UV exposure and foot traffic will look different from a freshly finished section even when the stain colour is identical. Sheen must be matched alongside colour.
Recommended
- What is flooring compatibility: a homeowner’s guide
- Workflow for matching floor trims: a step-by-step guide
- Defining flooring compatibility: the UK DIY and contractor guide
- What is edge finishing? A homeowner’s guide